Dlib による顔検出,顔ランドマークの検出を行う Python プログラム(Dlib, Python を使用)(Windows 上)
【目次】
【サイト内の関連ページ】
- 説明資料: Dlib の機能概要 [PDF], [パワーポイント]
- 顔情報処理の Python プログラム(Dlib,face_recognition を使用) について: 別ページ »にまとめ
- Windows で動く人工知能関係 Pythonアプリケーション,オープンソースソフトウエア): 別ページ »にまとめている.
【用語説明】
- Dlib
Dlibは,数多くの機能を持つ C++ ライブラリ.機能には,機械学習,数値計算,グラフィカルモデル推論,画像処理,スレッド,通信,GUI,データ圧縮・一貫性,テスト,さまざまなユーティリティなどがある.Python API もある.
- 顔検出 (face detection):
Dlib には,Convolutional Neural Network (CNN) による顔検出の機能がある.
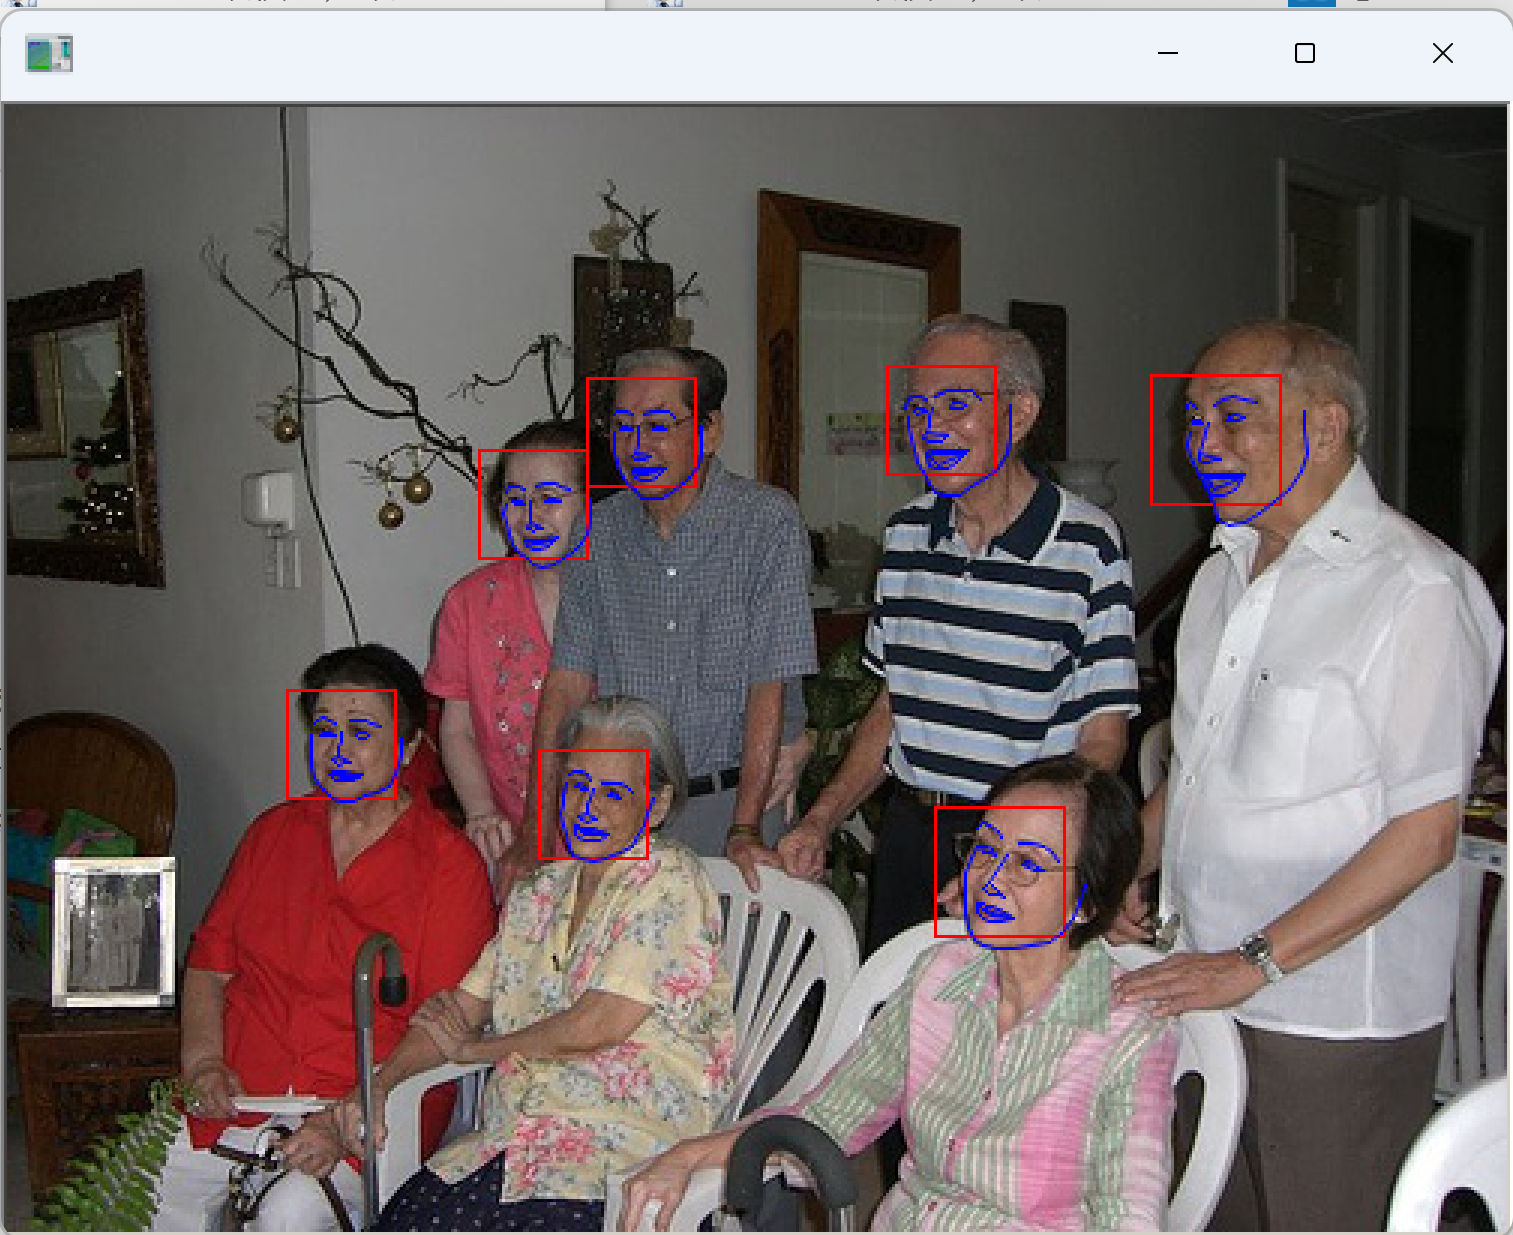
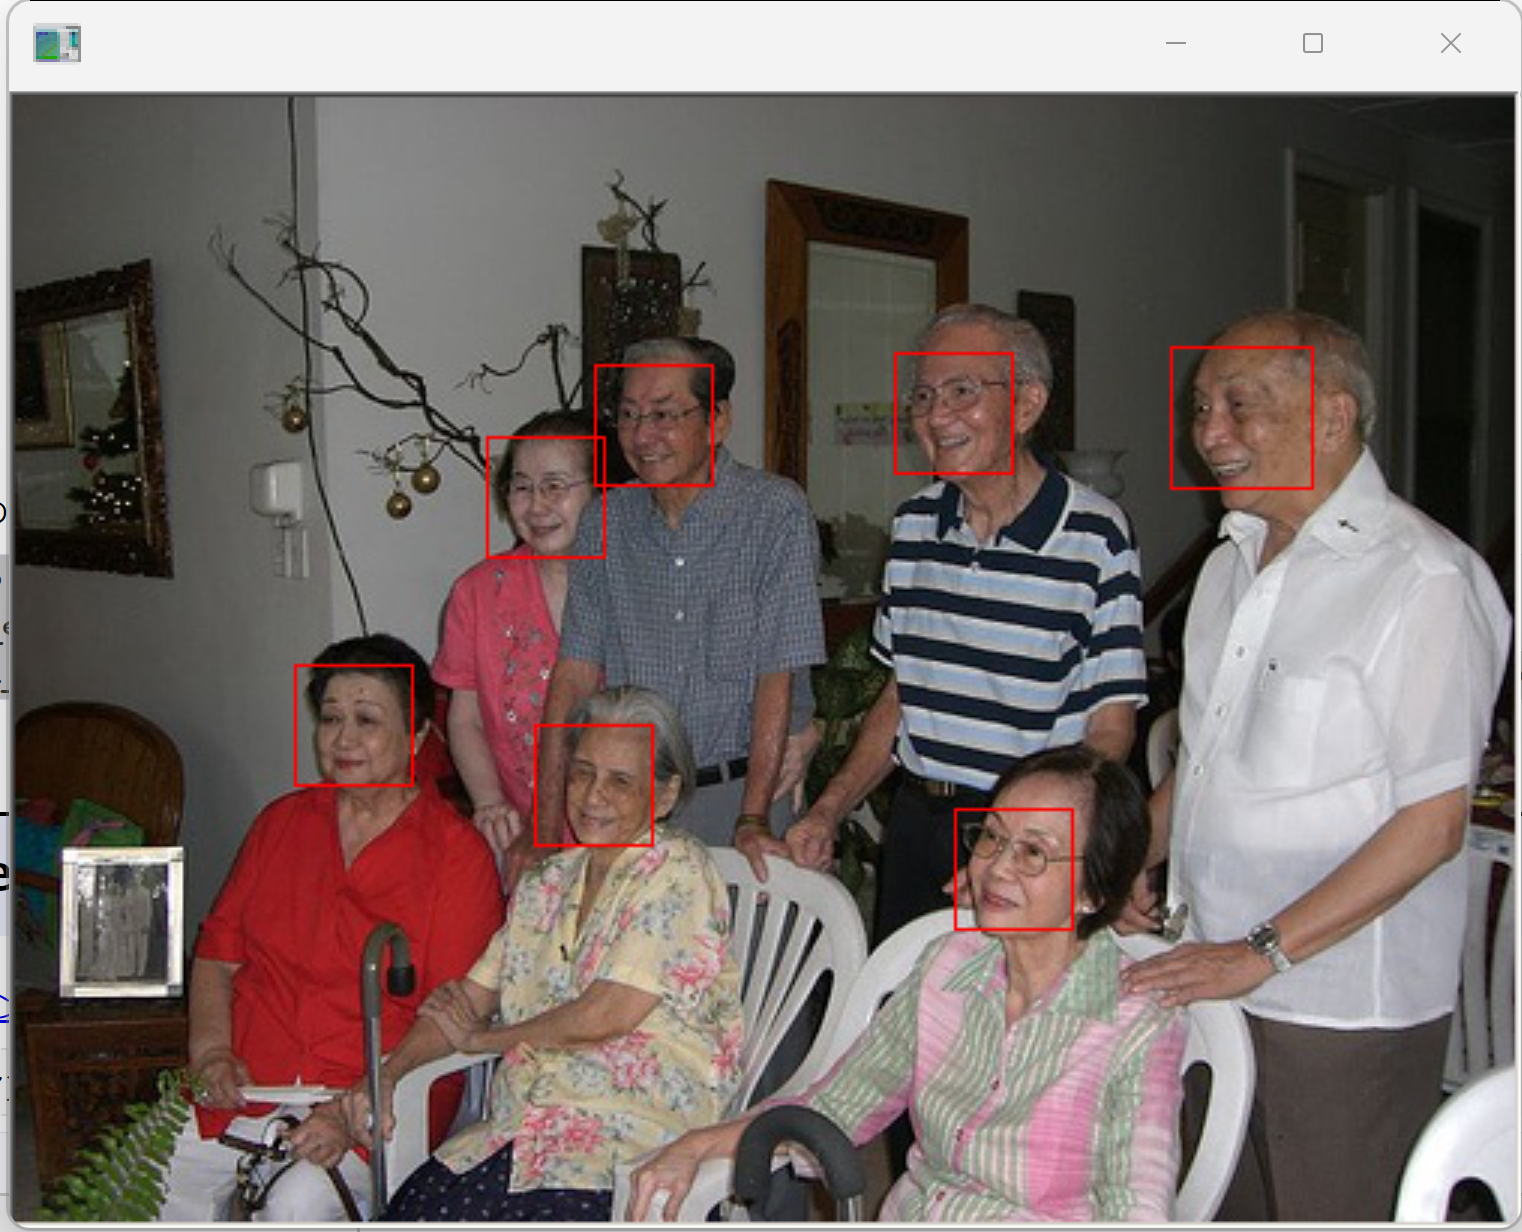
Dlib による顔検出の例
顔検出が行われ,顔を囲むようなバウンディングボックス (bounding box) が表示される.
バウンディングボックスの座標値が数値データとして得られる
顔のランドマーク検知が行われ,顔を囲むようなバウンディングボックス (bounding box) と,顔のランドマークが表示される.
1. 前準備
Python のインストール(Windows上)
注:既にPython(バージョン3.12を推奨)がインストール済みの場合は,この手順は不要である.
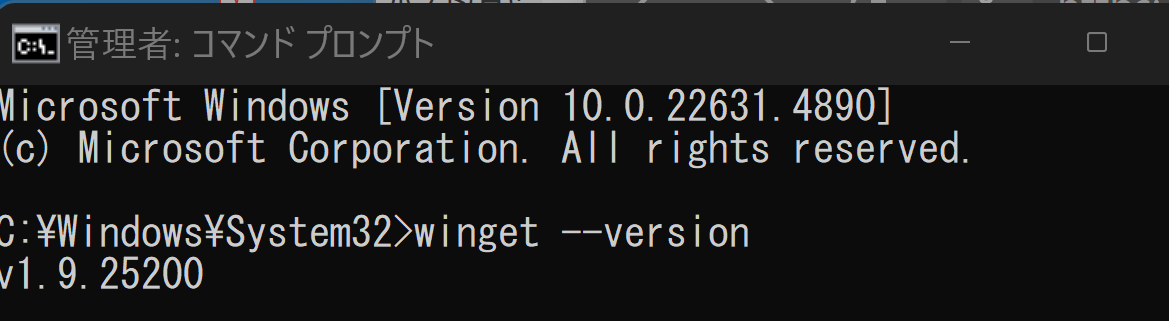
winget(Windowsパッケージマネージャー)を使用してインストールを行う
- Windowsで,管理者権限でコマンドプロンプトを起動(手順:Windowsキーまたはスタートメニュー >
cmdと入力 > 右クリック > 「管理者として実行」)。 - winget(Windowsパッケージマネージャー)が利用可能か確認する:
winget --version
- Pythonのインストール(下のコマンドにより Python 3.12 がインストールされる).
reg add "HKLM\SYSTEM\CurrentControlSet\Control\FileSystem" /v LongPathsEnabled /t REG_DWORD /d 1 /f
REM Python をシステム領域にインストール
winget install --scope machine --id Python.Python.3.12 -e --silent
REM Python のパス
set "INSTALL_PATH=C:\Program Files\Python312"
echo "%PATH%" | find /i "%INSTALL_PATH%" >nul
if errorlevel 1 setx PATH "%PATH%;%INSTALL_PATH%" /M >nul
echo "%PATH%" | find /i "%INSTALL_PATH%\Scripts" >nul
if errorlevel 1 setx PATH "%PATH%;%INSTALL_PATH%\Scripts" /M >nul
- Python詳細ガイド:Pythonまとめ »
【関連する外部サイト】
【サイト内の関連ページ】
Visual Studio 2022 Build Toolsとランタイムのインストール
管理者権限でコマンドプロンプトを起動(手順:Windowsキーまたはスタートメニュー > cmd と入力 > 右クリック > 「管理者として実行」)し、以下を実行する。管理者権限は、wingetの--scope machineオプションでシステム全体にソフトウェアをインストールするために必要である。
REM Visual Studio 2022 Build Toolsとランタイムのインストール
winget install --scope machine --wait --accept-source-agreements --accept-package-agreements Microsoft.VisualStudio.2022.BuildTools Microsoft.VCRedist.2015+.x64

REM インストーラーとインストールパスの設定
set VS_INSTALLER="C:\Program Files (x86)\Microsoft Visual Studio\Installer\vs_installer.exe"
set VS_PATH="C:\Program Files (x86)\Microsoft Visual Studio\2022\BuildTools"

REM C++開発ワークロードのインストール(次のコマンドは全体で1行である)
%VS_INSTALLER% modify --installPath %VS_PATH% --add Microsoft.VisualStudio.Workload.VCTools --add Microsoft.VisualStudio.Component.VC.Tools.x86.x64 --add Microsoft.VisualStudio.Component.Windows11SDK.22621 --includeRecommended --quiet --norestart
Git のインストール(Windows 上)
Gitは,バージョン管理システム.ソースコードの管理や複数人での共同に役立つ.
【サイト内の関連ページ】 Windows での Git のインストール: 別ページ »で説明
【関連する外部ページ】 Git の公式ページ: https://git-scm.com/
Gitのインストール
管理者権限でコマンドプロンプトを起動(手順:Windowsキーまたはスタートメニュー > cmd と入力 > 右クリック > 「管理者として実行」)し、以下を実行する。管理者権限は、wingetの--scope machineオプションでシステム全体にソフトウェアをインストールするために必要となる。
REM Git をシステム領域にインストール
7-Zip のインストール
管理者権限でコマンドプロンプトを起動(手順:Windowsキーまたはスタートメニュー > cmd と入力 > 右クリック > 「管理者として実行」)し、以下を実行する。管理者権限は、wingetの--scope machineオプションでシステム全体にソフトウェアをインストールするために必要となる。
REM 7-Zip をシステム領域にインストール
winget install --scope machine --id 7zip.7zip -e --silent
REM 7-Zip のパス設定
set "SEVENZIP_PATH=C:\Program Files\7-Zip"
if exist "%SEVENZIP_PATH%" (
echo "%PATH%" | find /i "%SEVENZIP_PATH%" >nul
if errorlevel 1 setx PATH "%PATH%;%SEVENZIP_PATH%" /M >nul
)
imutils のインストール
- Windows で,管理者権限でコマンドプロンプトを起動(手順:Windowsキーまたはスタートメニュー >
cmd と入力 > 右クリック > 「管理者として実行」)。
- imutils のインストール
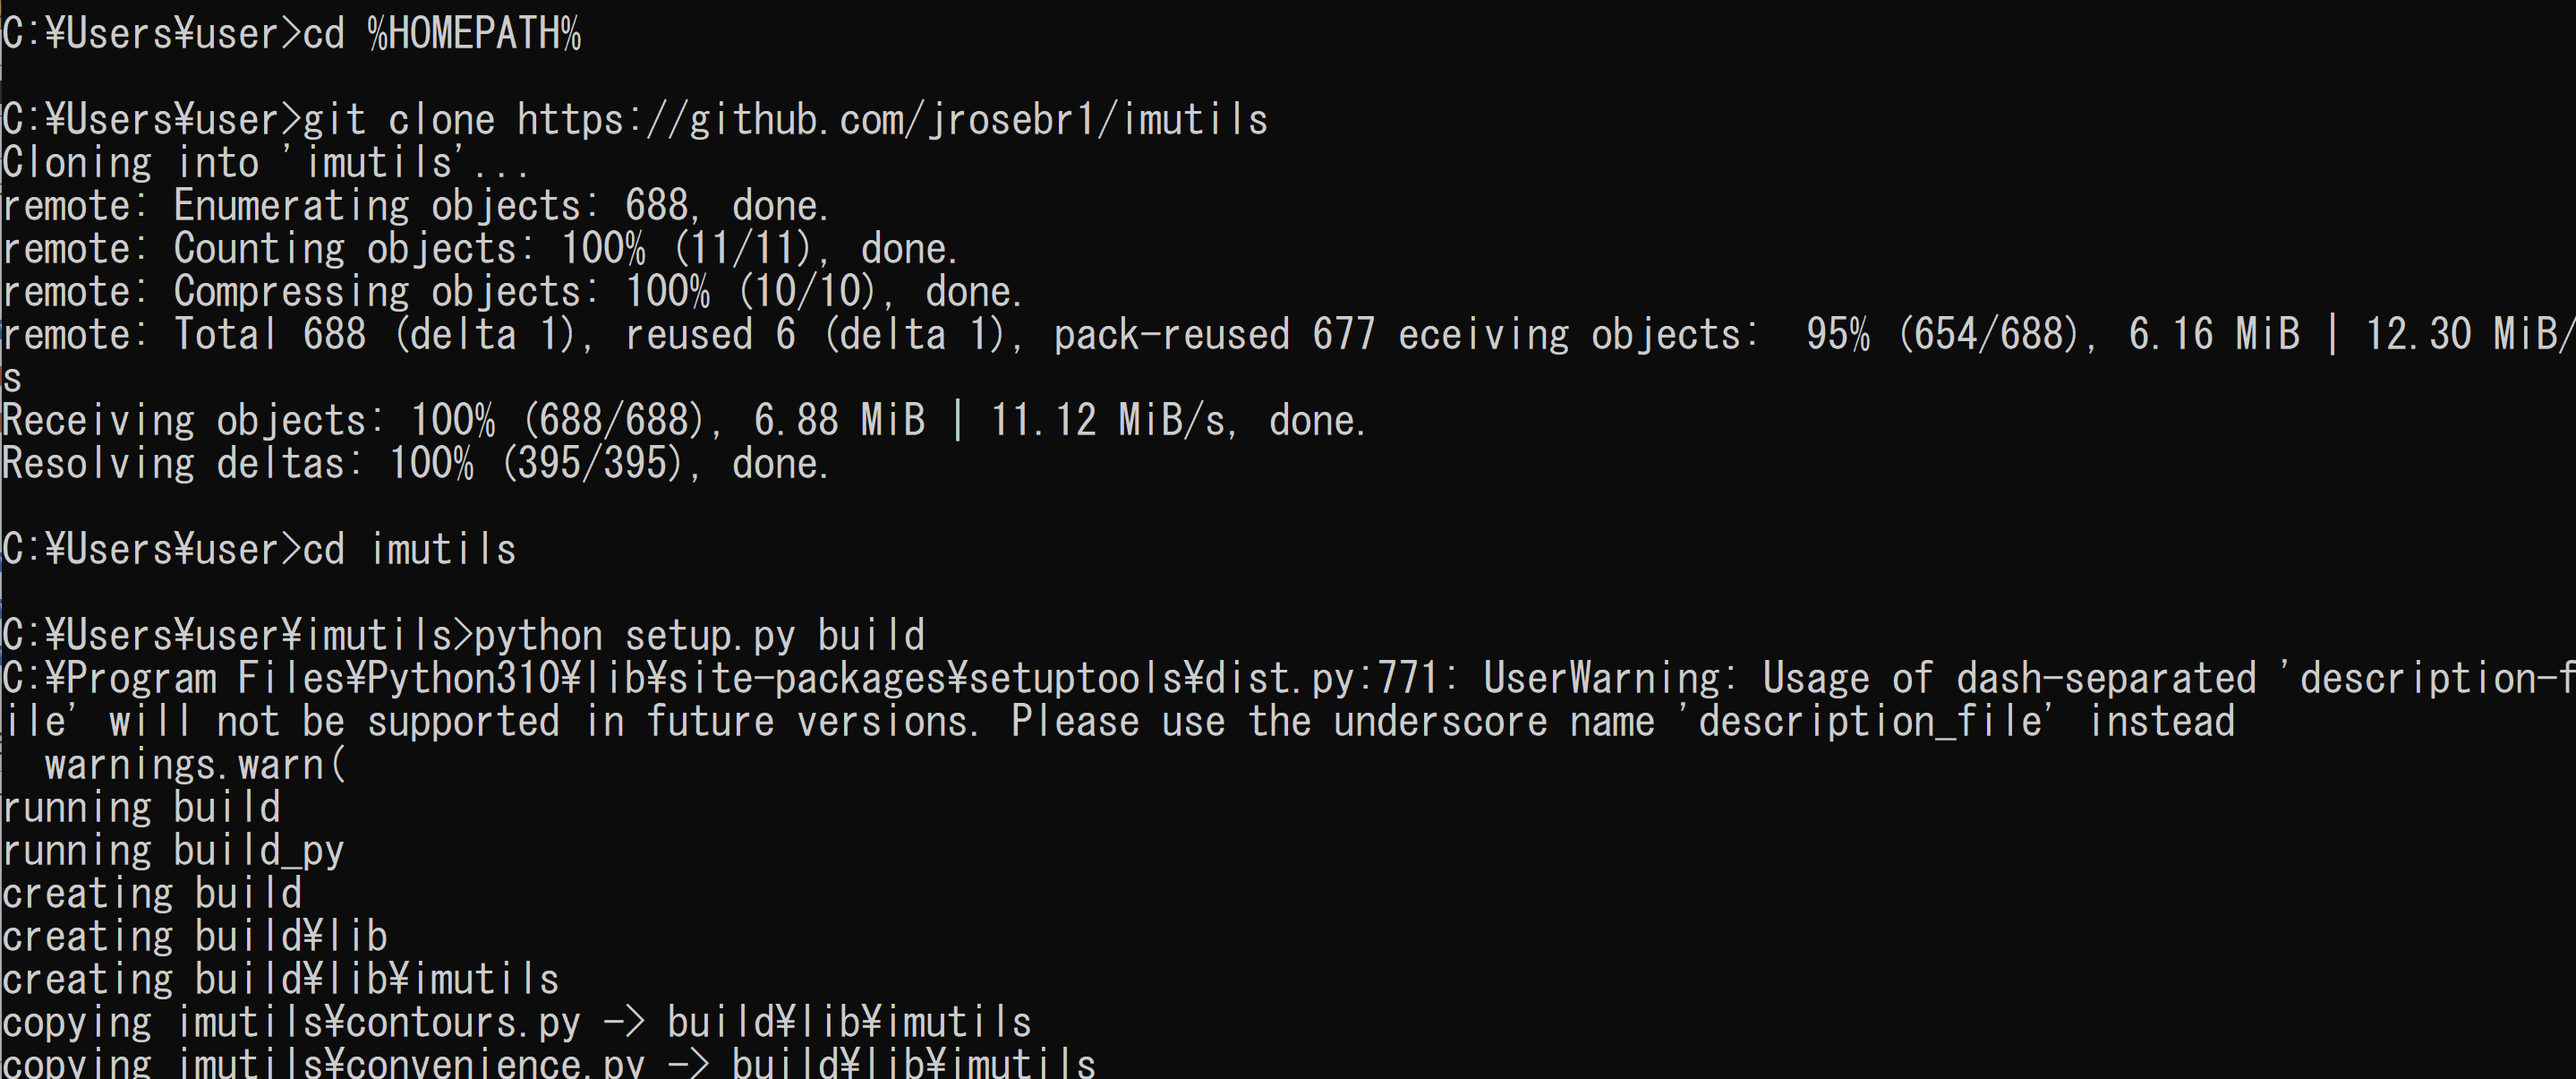
cd /d c:%HOMEPATH%
rmdir /s /q imutils
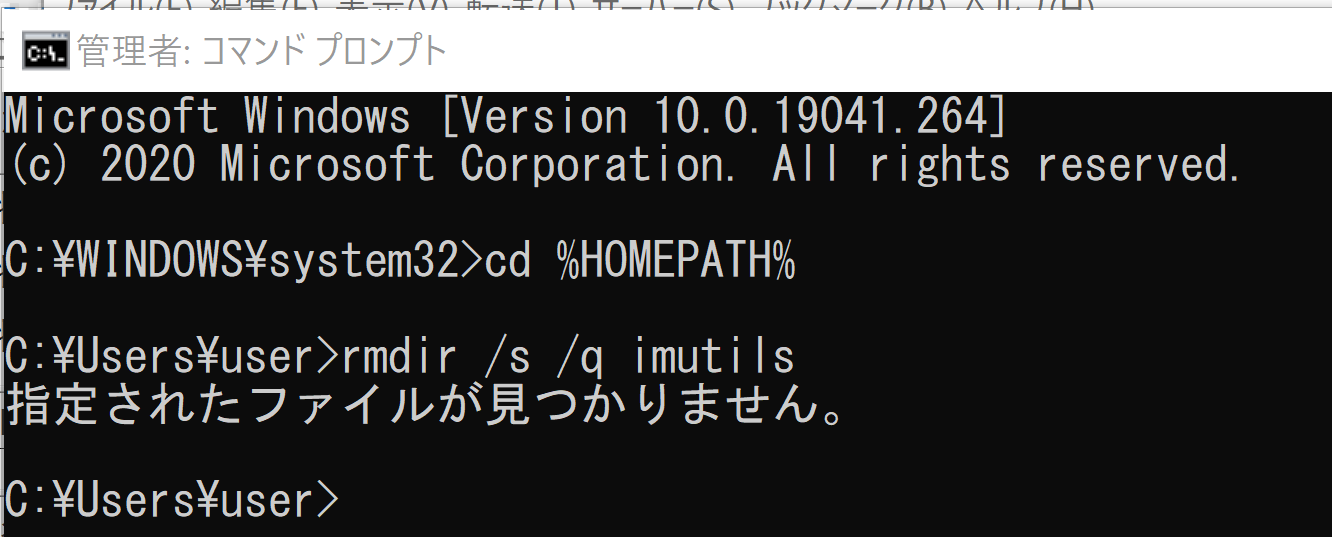
cd /d c:%HOMEPATH%
git clone https://github.com/jrosebr1/imutils
cd imutils
python setup.py build
python setup.py install
(以下省略)
- imutils のバージョン確認
Windows のコマンドプロンプトで、次のコマンドを実行
python -c "import imutils; print( imutils.__version__ )"

2. Dlib Python のインストール,Dlib のソースコード等と,Dlib の学習済みモデルのダウンロード
- Windows で,管理者権限でコマンドプロンプトを起動(手順:Windowsキーまたはスタートメニュー >
cmd と入力 > 右クリック > 「管理者として実行」)。
- Dlib のパッケージのインストール
次のコマンドを実行.
python -m pip uninstall -y dlib
cd C:\
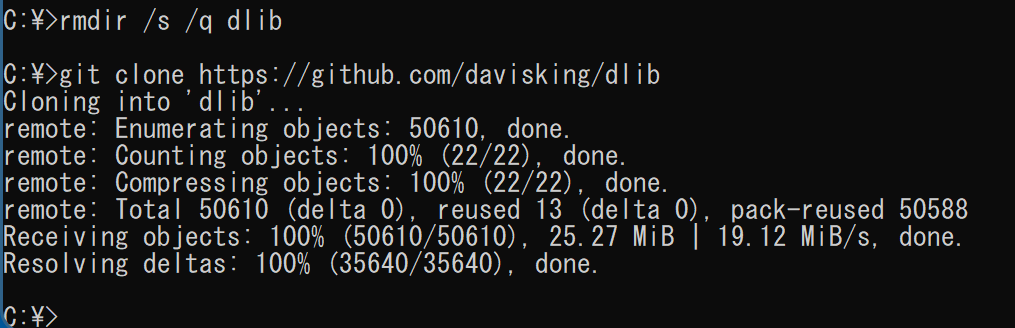
rmdir /s /q dlib
git clone https://github.com/davisking/dlib
cd C:\dlib
python setup.py build --no DLIB_GIF_SUPPORT
python setup.py install --no DLIB_GIF_SUPPORT

- Python の dlib パッケージがインストールできたことの確認
バージョン番号が表示されれば OK.下の図とは違うバージョンが表示されることがある.
python -c "import dlib; print( dlib.__version__ )"

- Dlib のソースコード等のダウンロード
次のコマンドを実行.
cd C:\
rmdir /s /q dlib
git clone https://github.com/davisking/dlib
- Dlib の学習済みモデルのダウンロード
次のコマンドを実行.
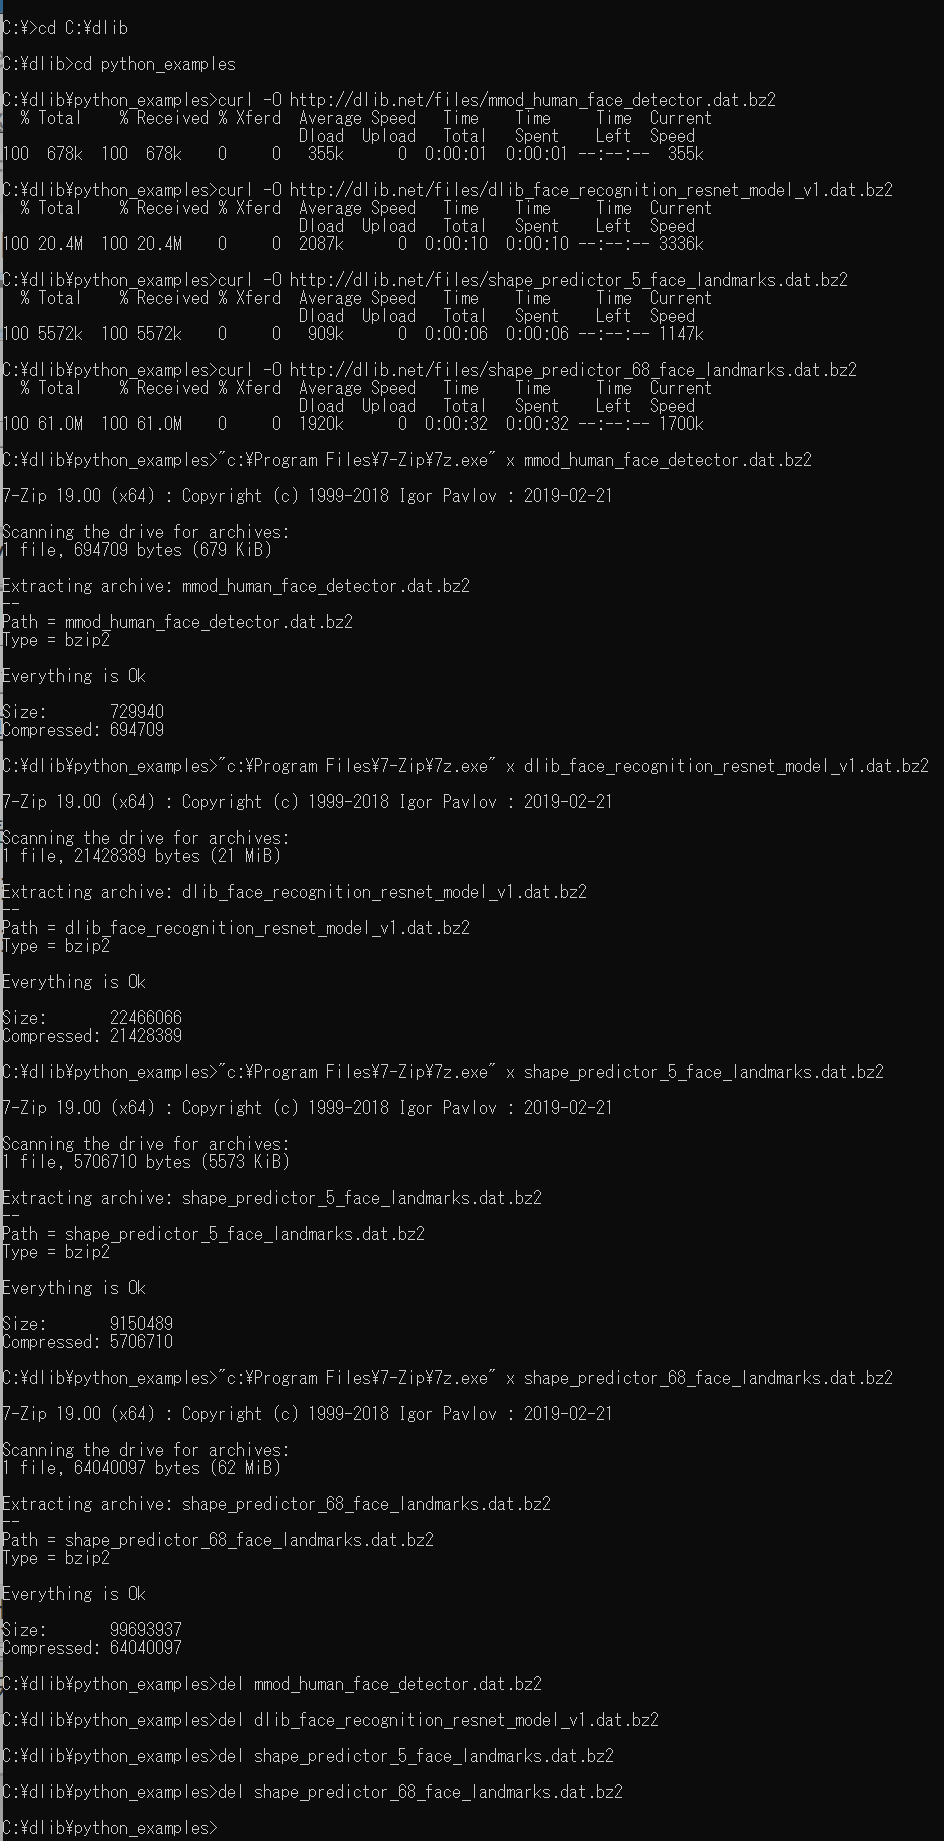
cd C:\dlib
cd python_examples
curl -O http://dlib.net/files/mmod_human_face_detector.dat.bz2
curl -O http://dlib.net/files/dlib_face_recognition_resnet_model_v1.dat.bz2
curl -O http://dlib.net/files/shape_predictor_5_face_landmarks.dat.bz2
curl -O http://dlib.net/files/shape_predictor_68_face_landmarks.dat.bz2
"c:\Program Files\7-Zip\7z.exe" x mmod_human_face_detector.dat.bz2
"c:\Program Files\7-Zip\7z.exe" x dlib_face_recognition_resnet_model_v1.dat.bz2
"c:\Program Files\7-Zip\7z.exe" x shape_predictor_5_face_landmarks.dat.bz2
"c:\Program Files\7-Zip\7z.exe" x shape_predictor_68_face_landmarks.dat.bz2
del mmod_human_face_detector.dat.bz2
del dlib_face_recognition_resnet_model_v1.dat.bz2
del shape_predictor_5_face_landmarks.dat.bz2
del shape_predictor_68_face_landmarks.dat.bz2
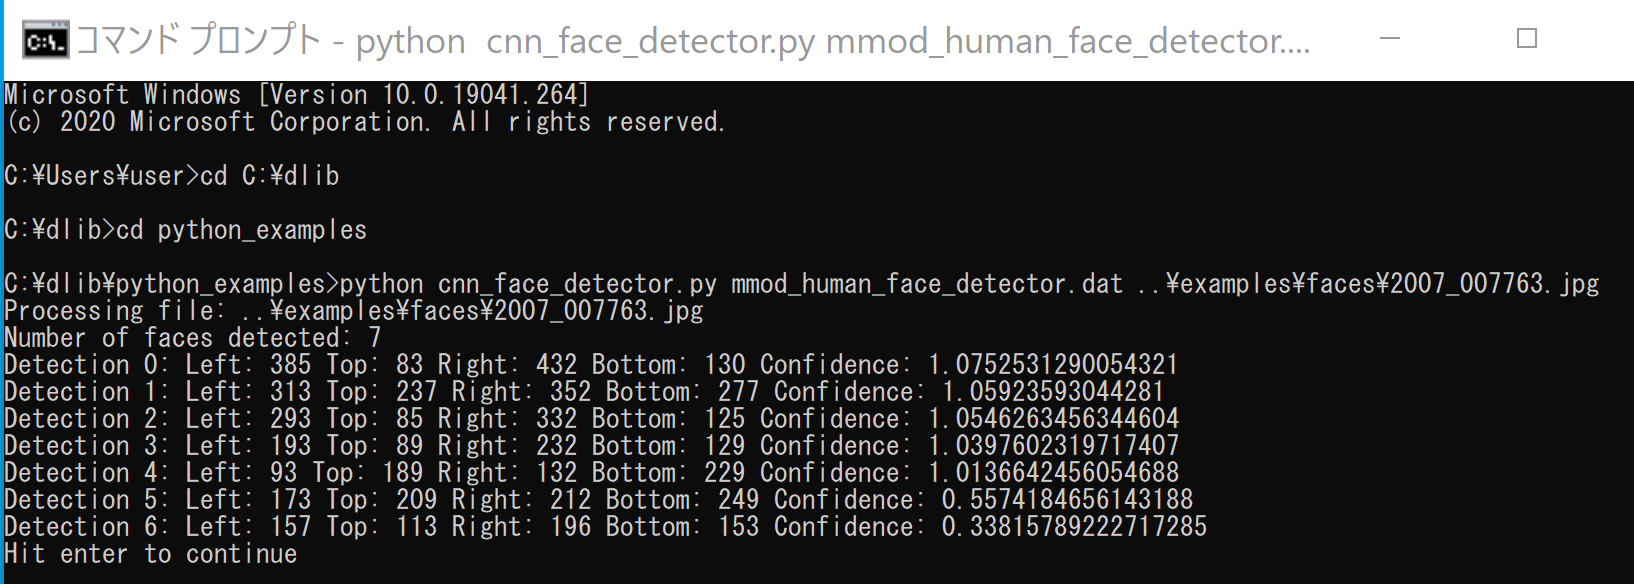
- Dlib の動作確認のため,次を実行.エラーメッセージが出ずに,顔検出の結果が表示されれば OK とする.
cd C:\dlib
cd python_examples
python cnn_face_detector.py mmod_human_face_detector.dat ..\examples\faces\2007_007763.jpg

顔写真とビデオの準備
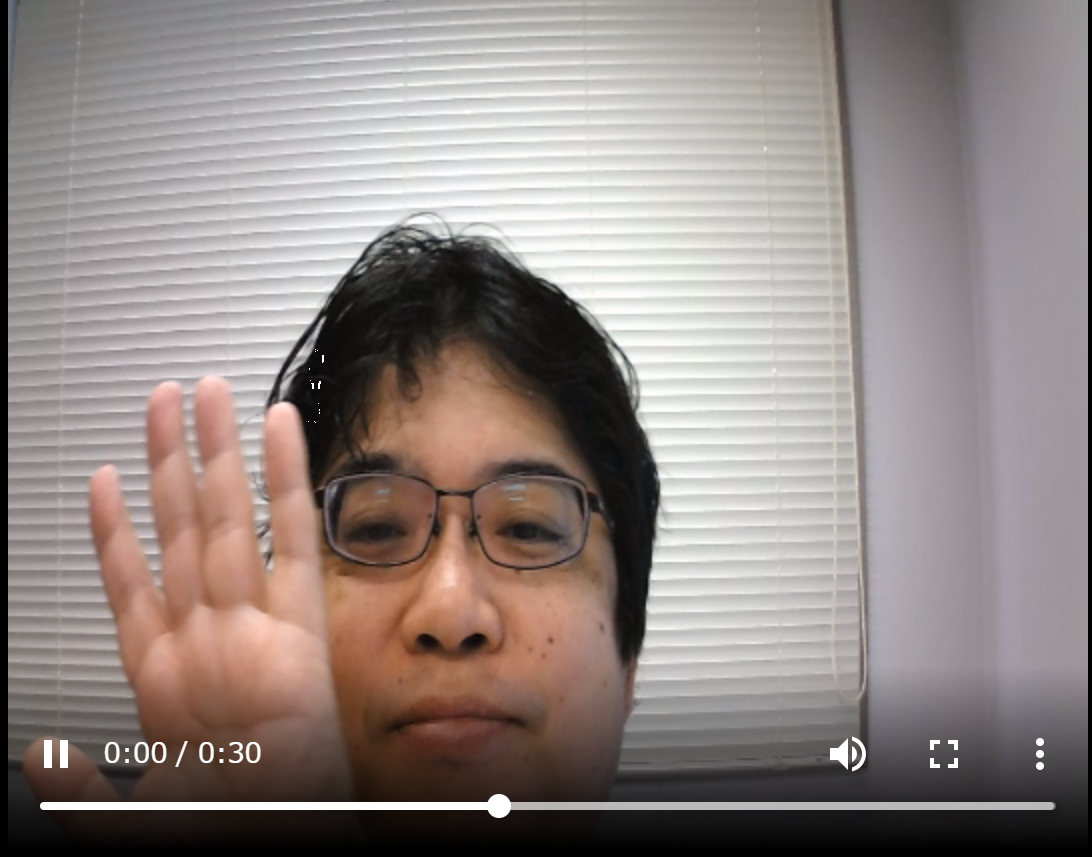
ここで使用するビデオ
mp4 形式動画ファイル: sample1.mp4
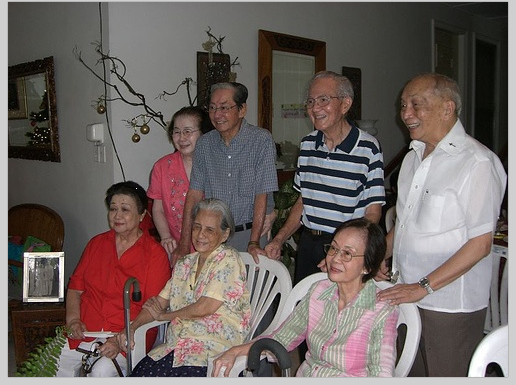
ここで使用する顔写真


作業手順
- Windows のコマンドプロンプトを開く
- ダウンロード
次のコマンドを実行.
cd C:\dlib
cd python_examples
curl -O https://www.kkaneko.jp/sample/face/126.png
curl -O https://www.kkaneko.jp/sample/face/127.png
curl -O https://www.kkaneko.jp/sample/face/sample1.mp4
Python プログラム
濃淡画像に変換して表示する Python プログラム
顔画像ファイル 126.png を読み込んで、濃淡画像に変換してみる
Python プログラムの実行
Python プログラムの実行
- Windows では python (Python ランチャーは py)
- Ubuntu では python3
Python 開発環境(Jupyter Qt Console,
Jupyter ノートブック (Jupyter Notebook),
Jupyter Lab,
Nteract,
Spyder,
PyCharm,
PyScripterなど)も便利である.
Python のまとめ: 別ページ »にまとめ
python
コマンドプロンプトで次を実行
cd C:\dlib
python
次の Python プログラムを実行
import numpy as np
import dlib
import cv2
import imutils
from imutils import face_utils
img = cv2.imread("./python_examples/126.png")
mono = cv2.cvtColor(img, cv2.COLOR_BGR2GRAY)
cv2.imshow("", mono)
cv2.waitKey(0)
cv2.destroyAllWindows()
exit()
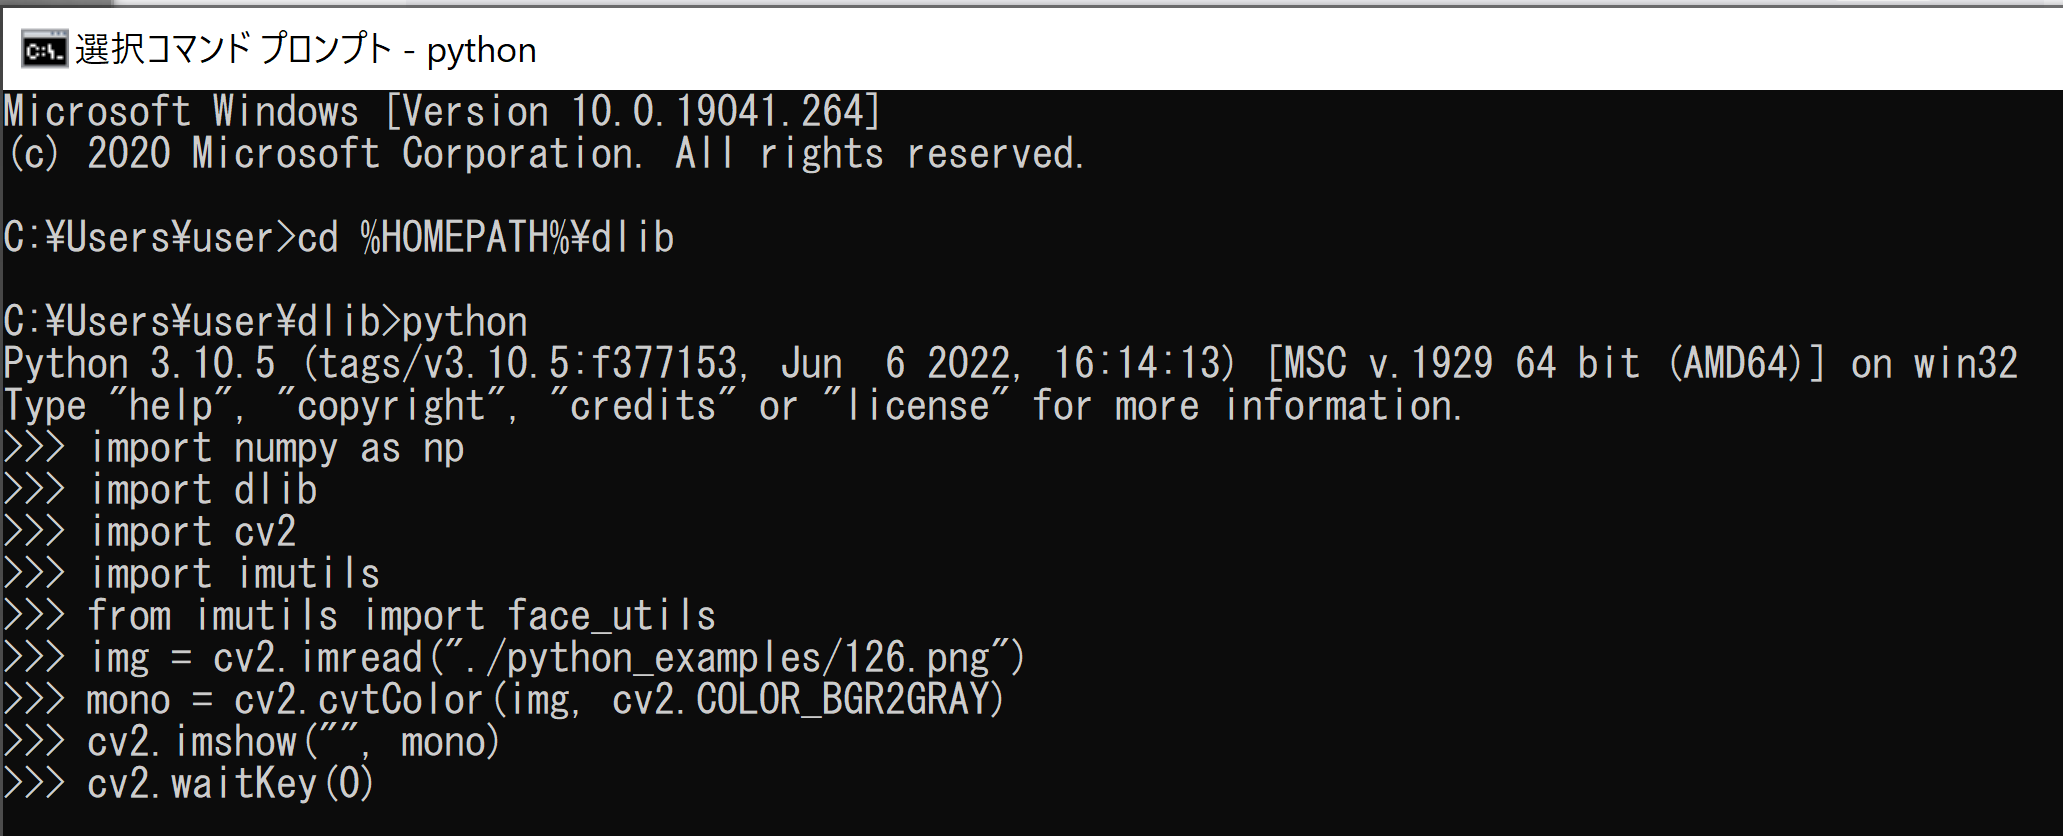

画像が表示されるので確認.
このあと,ウインドウの右上の「x」をクリックしない.画面の中をクリックしてから,何かのキーを押して閉じる
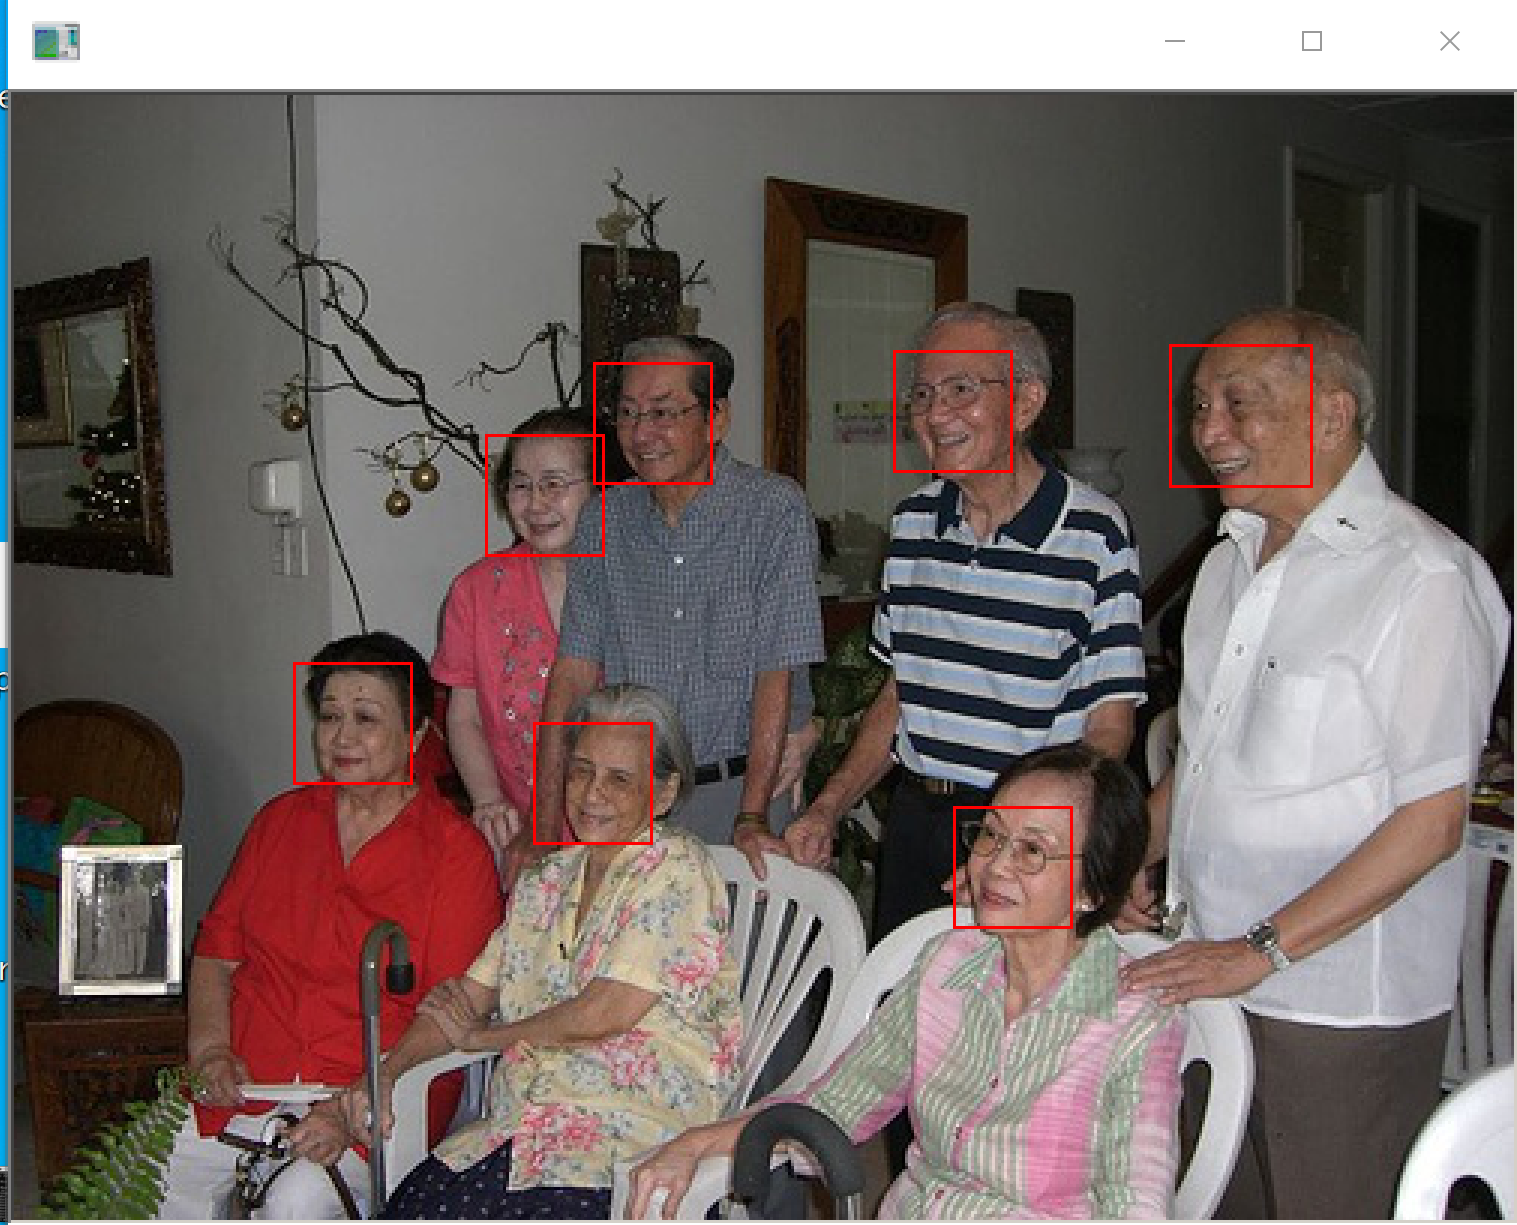
顔検出の Python プログラム
Python プログラムの実行
Python プログラムの実行
- Windows では python (Python ランチャーは py)
- Ubuntu では python3
Python 開発環境(Jupyter Qt Console,
Jupyter ノートブック (Jupyter Notebook),
Jupyter Lab,
Nteract,
Spyder,
PyCharm,
PyScripterなど)も便利である.
Python のまとめ: 別ページ »にまとめ
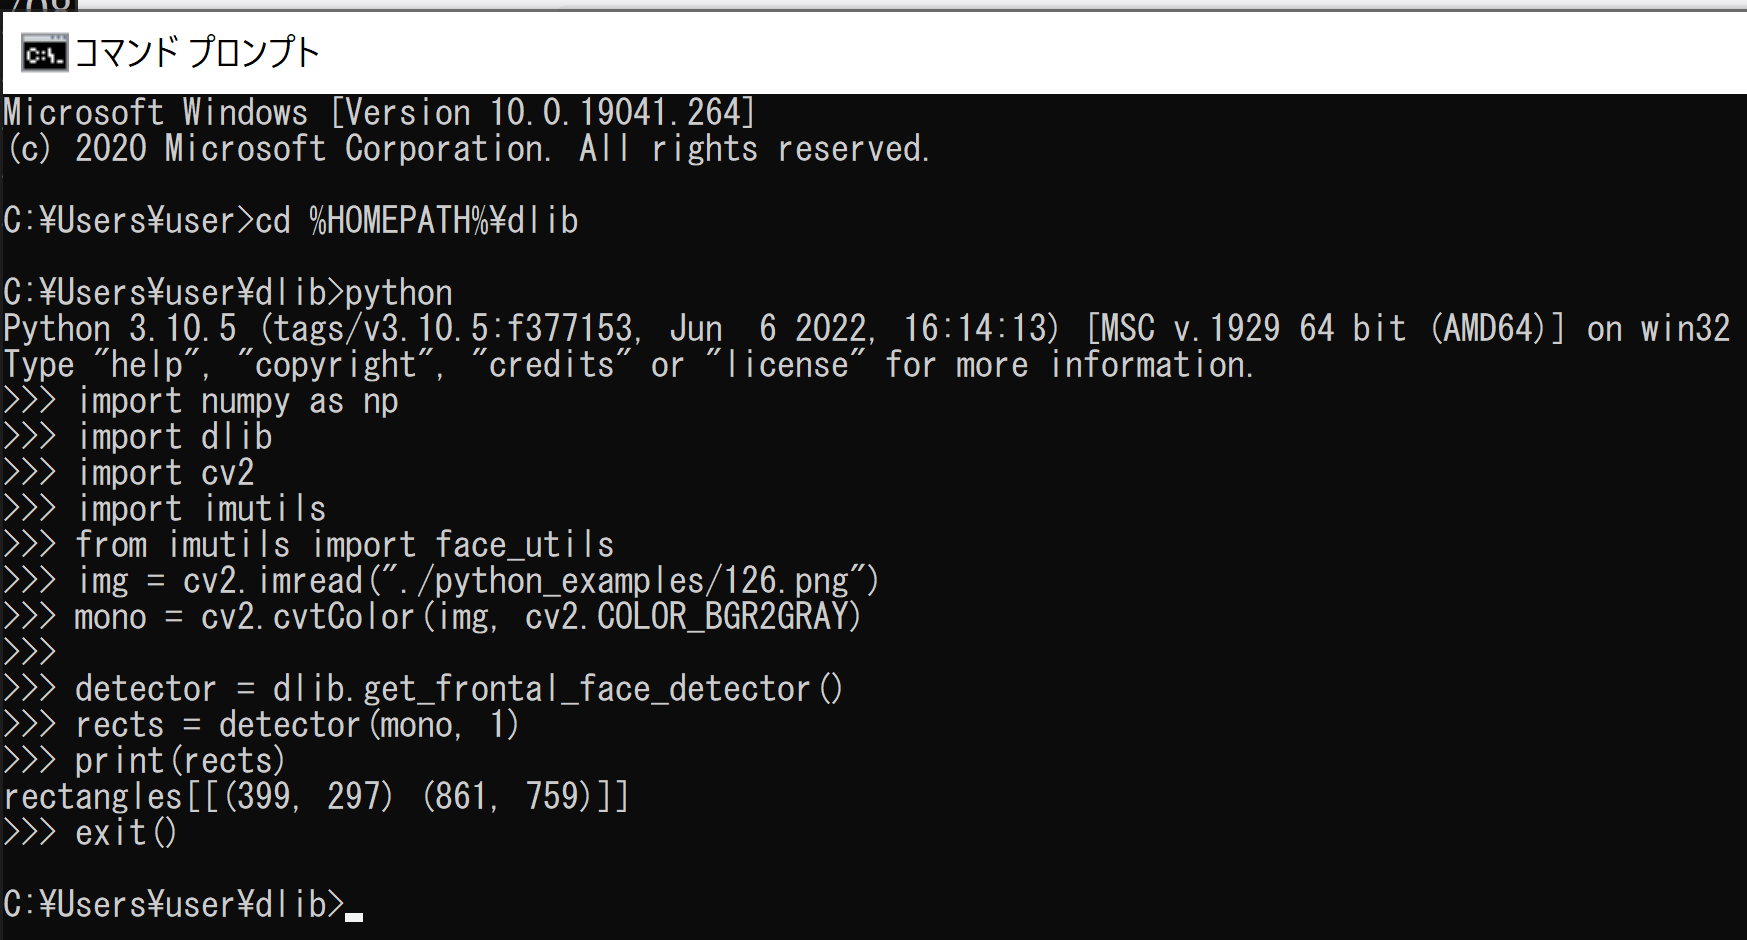
python
コマンドプロンプトで次を実行
cd C:\dlib
python
次の Python プログラムを実行
import numpy as np
import dlib
import cv2
import imutils
from imutils import face_utils
img = cv2.imread("./python_examples/126.png")
mono = cv2.cvtColor(img, cv2.COLOR_BGR2GRAY)
detector = dlib.get_frontal_face_detector()
rects = detector(mono, 1)
print(rects)
exit()
結果が数値で表示される
顔検出の68 ランドマークの Python プログラム
Python プログラムの実行
Python プログラムの実行
- Windows では python (Python ランチャーは py)
- Ubuntu では python3
Python 開発環境(Jupyter Qt Console,
Jupyter ノートブック (Jupyter Notebook),
Jupyter Lab,
Nteract,
Spyder,
PyCharm,
PyScripterなど)も便利である.
Python のまとめ: 別ページ »にまとめ
python
コマンドプロンプトで次を実行
cd C:\dlib
python
次の Python プログラムを実行
import numpy as np
import dlib
import cv2
import imutils
from imutils import face_utils
img = cv2.imread("./python_examples/126.png")
mono = cv2.cvtColor(img, cv2.COLOR_BGR2GRAY)
detector = dlib.get_frontal_face_detector()
rects = detector(mono, 1)
print(rects)
from imutils import face_utils
def box_label(bgr, x1, y1, x2, y2, label):
cv2.rectangle(bgr, (x1, y1), (x2, y2), (255, 0, 0), 1, 1)
cv2.rectangle(bgr, (int(x1), int(y1-25)), (x2, y1), (255,255,255), -1)
cv2.putText(bgr, label, (x1, int(y1-5)), cv2.FONT_HERSHEY_COMPLEX, 0.7, (0,0,0), 1)
disp = img.copy()
predictor = dlib.shape_predictor('python_examples/shape_predictor_68_face_landmarks.dat')
for (i, rect) in enumerate(rects):
shape = predictor(mono, rect)
shape = face_utils.shape_to_np(shape)
(x, y, w, h) = face_utils.rect_to_bb(rect)
box_label(disp, x, y, x + w, y + h, str(i))
j = 0
for (x, y) in shape:
j = j + 1
cv2.putText(disp, str(j), (x, y - 6), cv2.FONT_HERSHEY_SIMPLEX, 0.5, (0, 255, 0), 1)
cv2.circle(disp, (x, y), 2, (0, 255, 0), -1)
cv2.imshow("", disp)
cv2.waitKey(0)
cv2.destroyAllWindows()
exit()
68 ランドマークの結果を表示
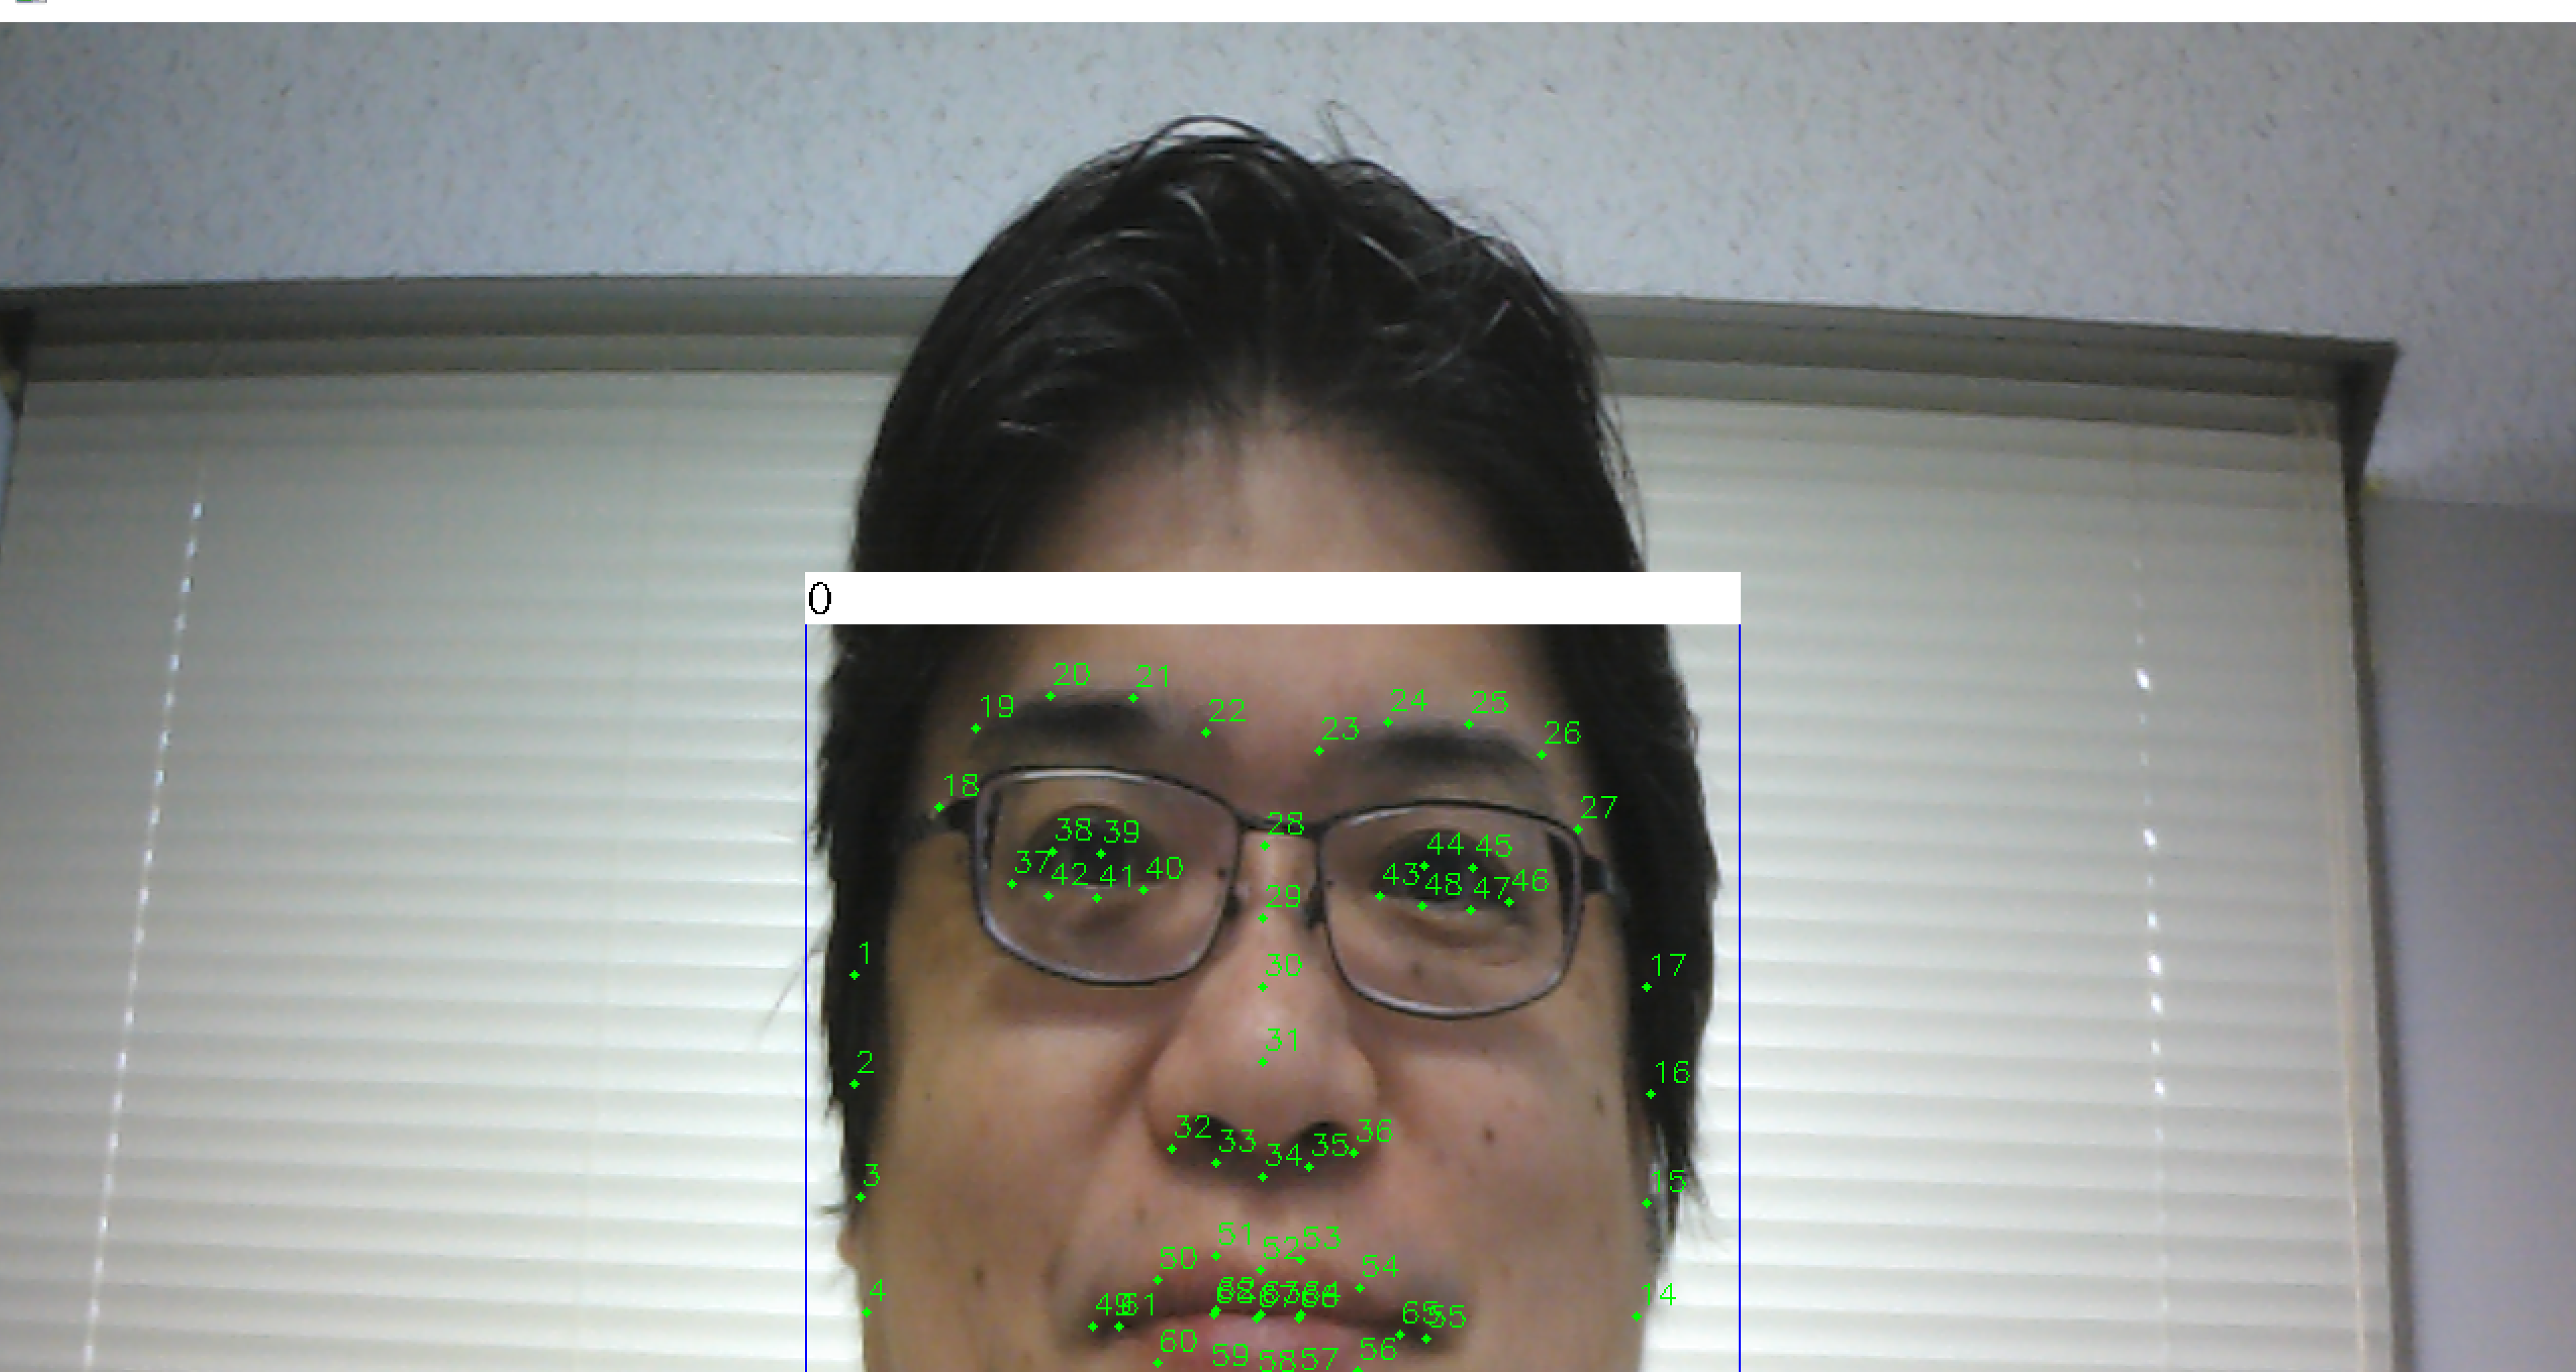
画像が表示されるので確認.
このあと,ウインドウの右上の「x」をクリックしない.画面の中をクリックしてから,何かのキーを押して閉じる
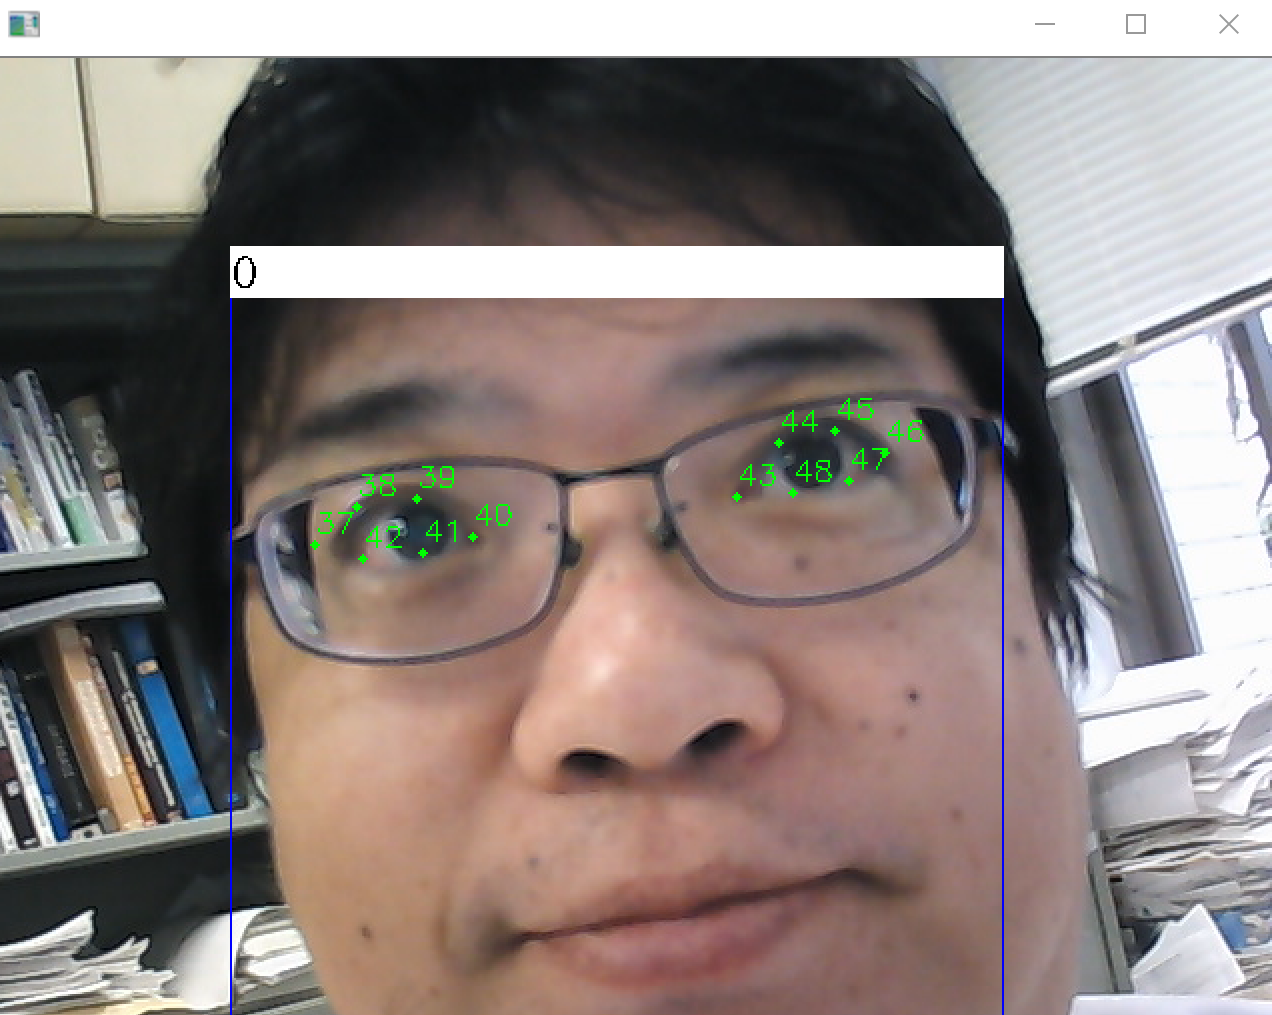
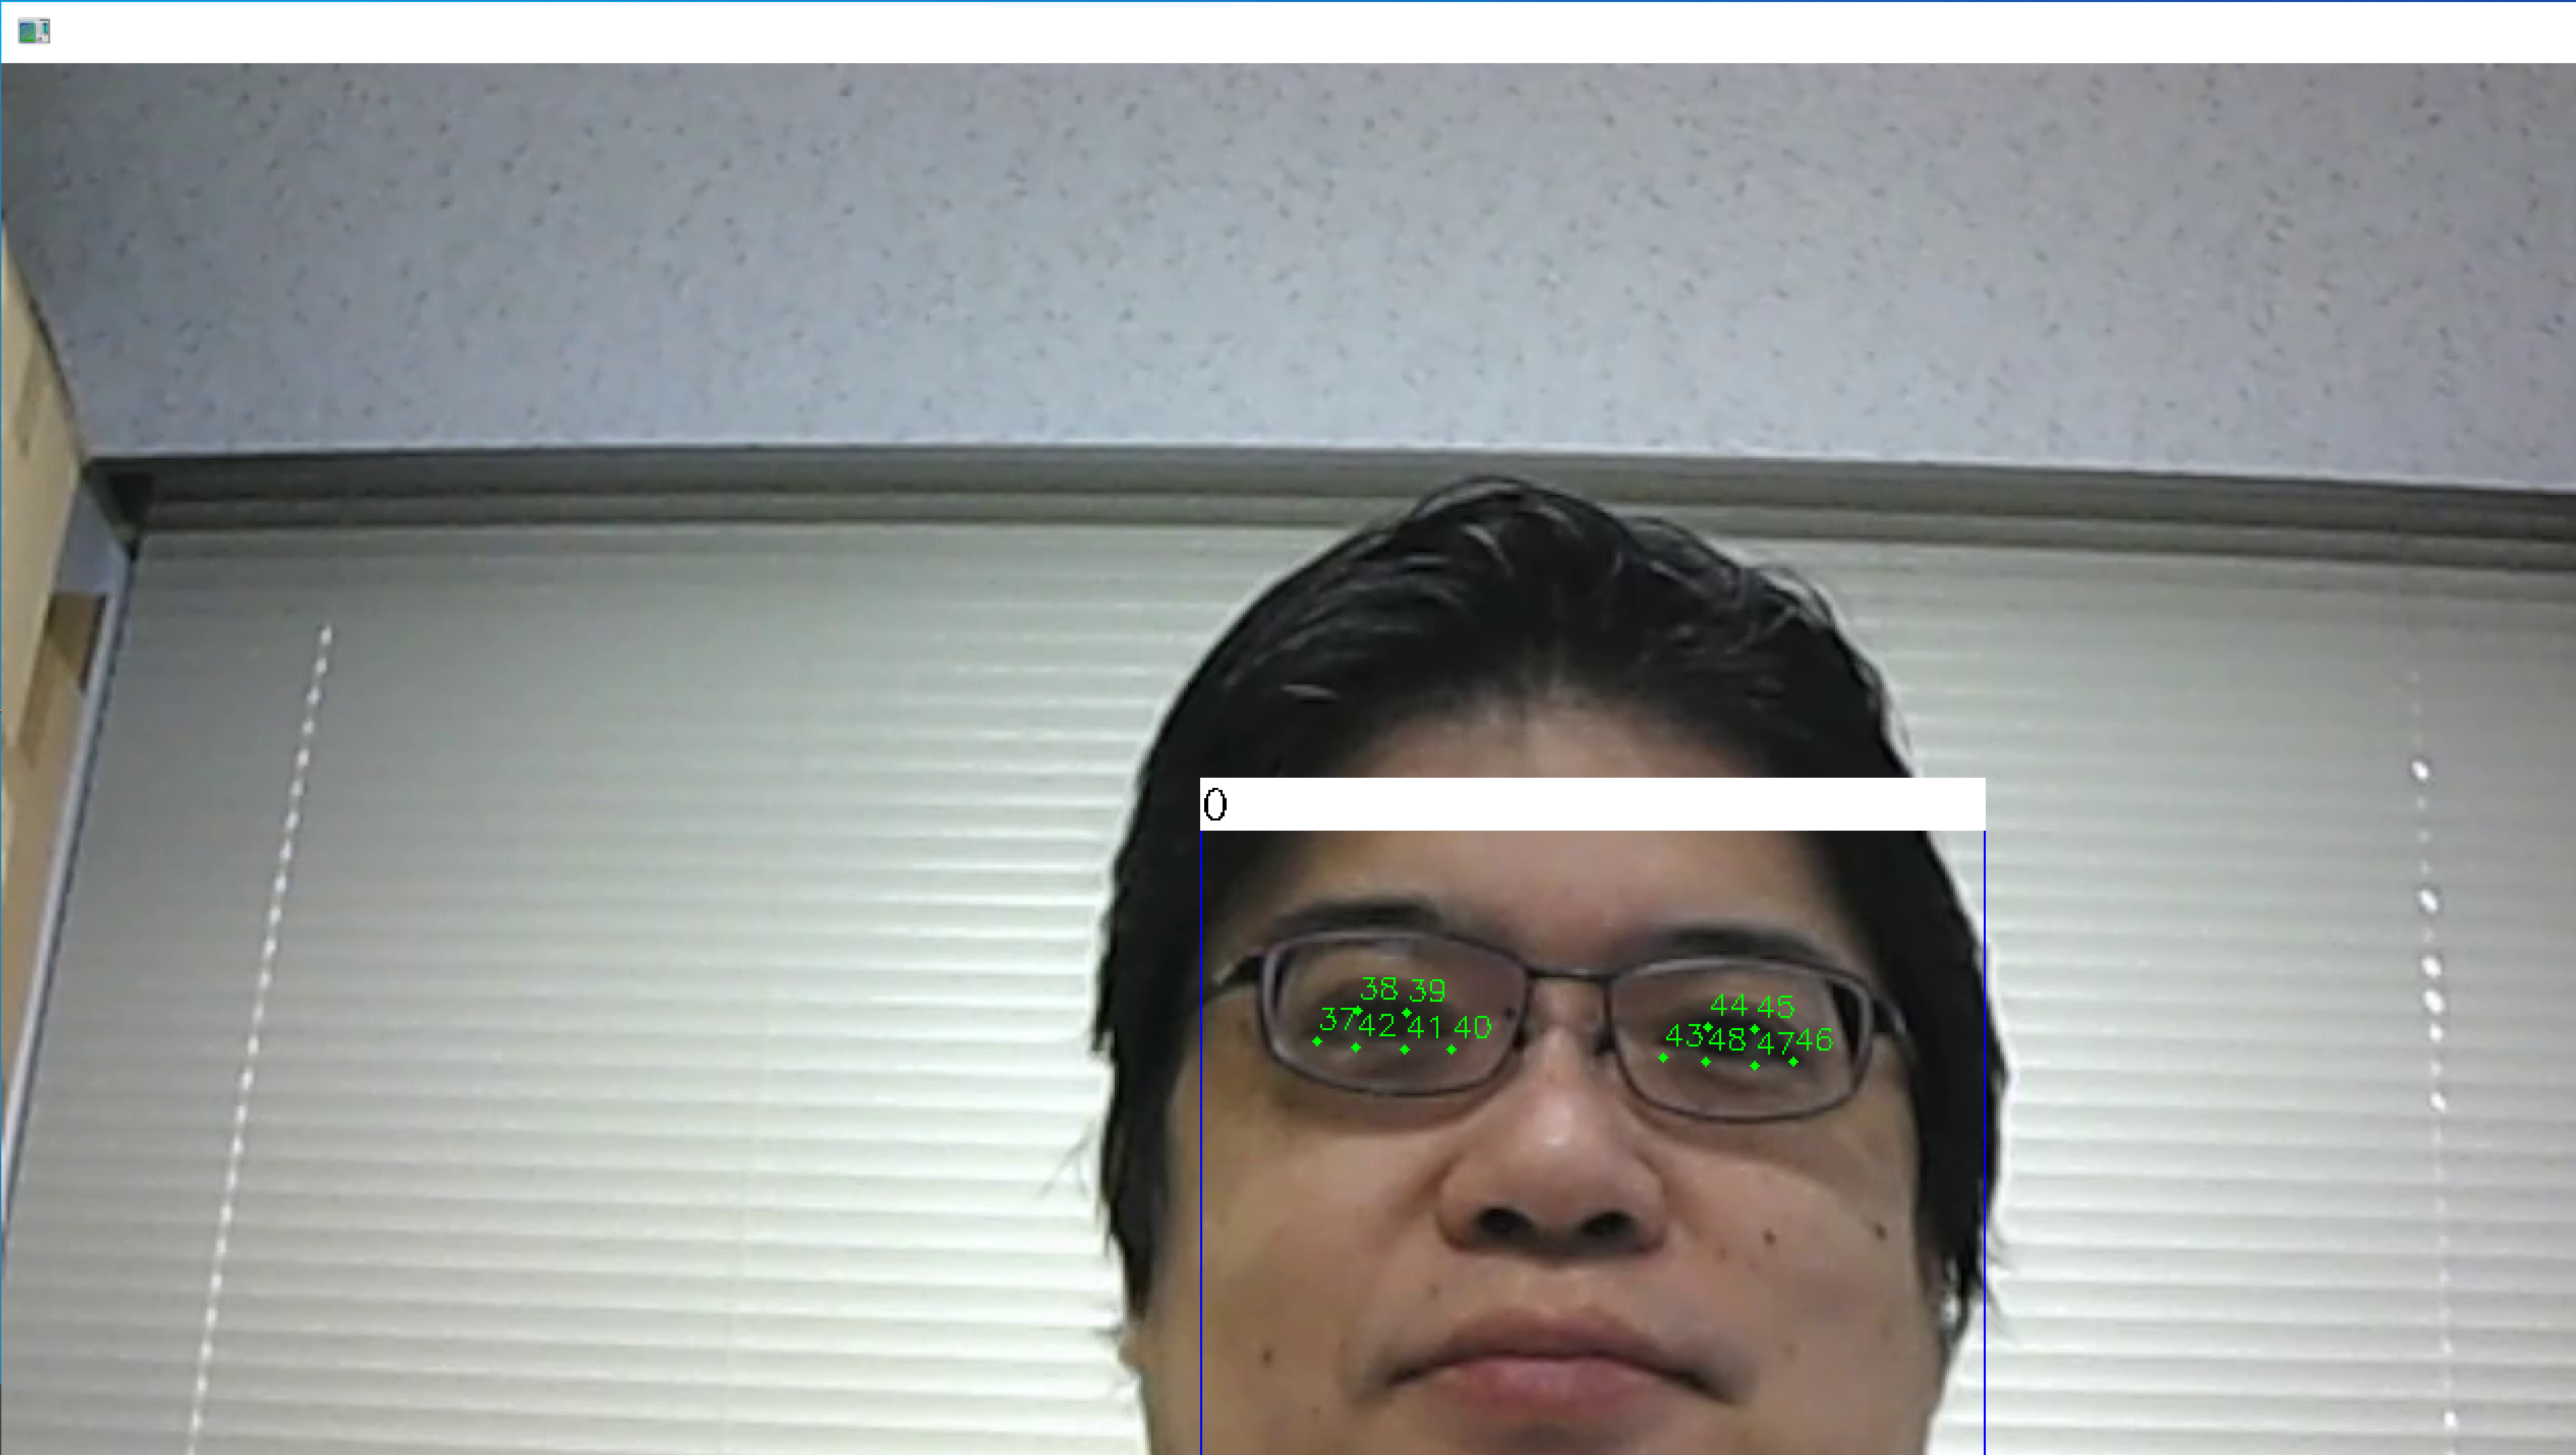
右目と左目の情報のみを表示
Python プログラムの実行
Python プログラムの実行
- Windows では python (Python ランチャーは py)
- Ubuntu では python3
Python 開発環境(Jupyter Qt Console,
Jupyter ノートブック (Jupyter Notebook),
Jupyter Lab,
Nteract,
Spyder,
PyCharm,
PyScripterなど)も便利である.
Python のまとめ: 別ページ »にまとめ
python
コマンドプロンプトで次を実行
python
コマンドプロンプトで次を実行
cd C:\dlib
python
次の Python プログラムを実行
「if ( j > 36 and j < 49): 」を追加
import numpy as np
import dlib
import cv2
import imutils
from imutils import face_utils
img = cv2.imread("./python_examples/126.png")
mono = cv2.cvtColor(img, cv2.COLOR_BGR2GRAY)
detector = dlib.get_frontal_face_detector()
rects = detector(mono, 1)
print(rects)
from imutils import face_utils
def box_label(bgr, x1, y1, x2, y2, label):
cv2.rectangle(bgr, (x1, y1), (x2, y2), (255, 0, 0), 1, 1)
cv2.rectangle(bgr, (int(x1), int(y1-25)), (x2, y1), (255,255,255), -1)
cv2.putText(bgr, label, (x1, int(y1-5)), cv2.FONT_HERSHEY_COMPLEX, 0.7, (0,0,0), 1)
disp = img.copy()
predictor = dlib.shape_predictor('python_examples/shape_predictor_68_face_landmarks.dat')
for (i, rect) in enumerate(rects):
shape = predictor(mono, rect)
shape = face_utils.shape_to_np(shape)
(x, y, w, h) = face_utils.rect_to_bb(rect)
box_label(disp, x, y, x + w, y + h, str(i))
j = 0
for (x, y) in shape:
j = j + 1
if ( j > 36 and j < 49):
cv2.putText(disp, str(j), (x, y - 6), cv2.FONT_HERSHEY_SIMPLEX, 0.5, (0, 255, 0), 1)
cv2.circle(disp, (x, y), 2, (0, 255, 0), -1)
cv2.imshow("", disp)
cv2.waitKey(0)
cv2.destroyAllWindows()
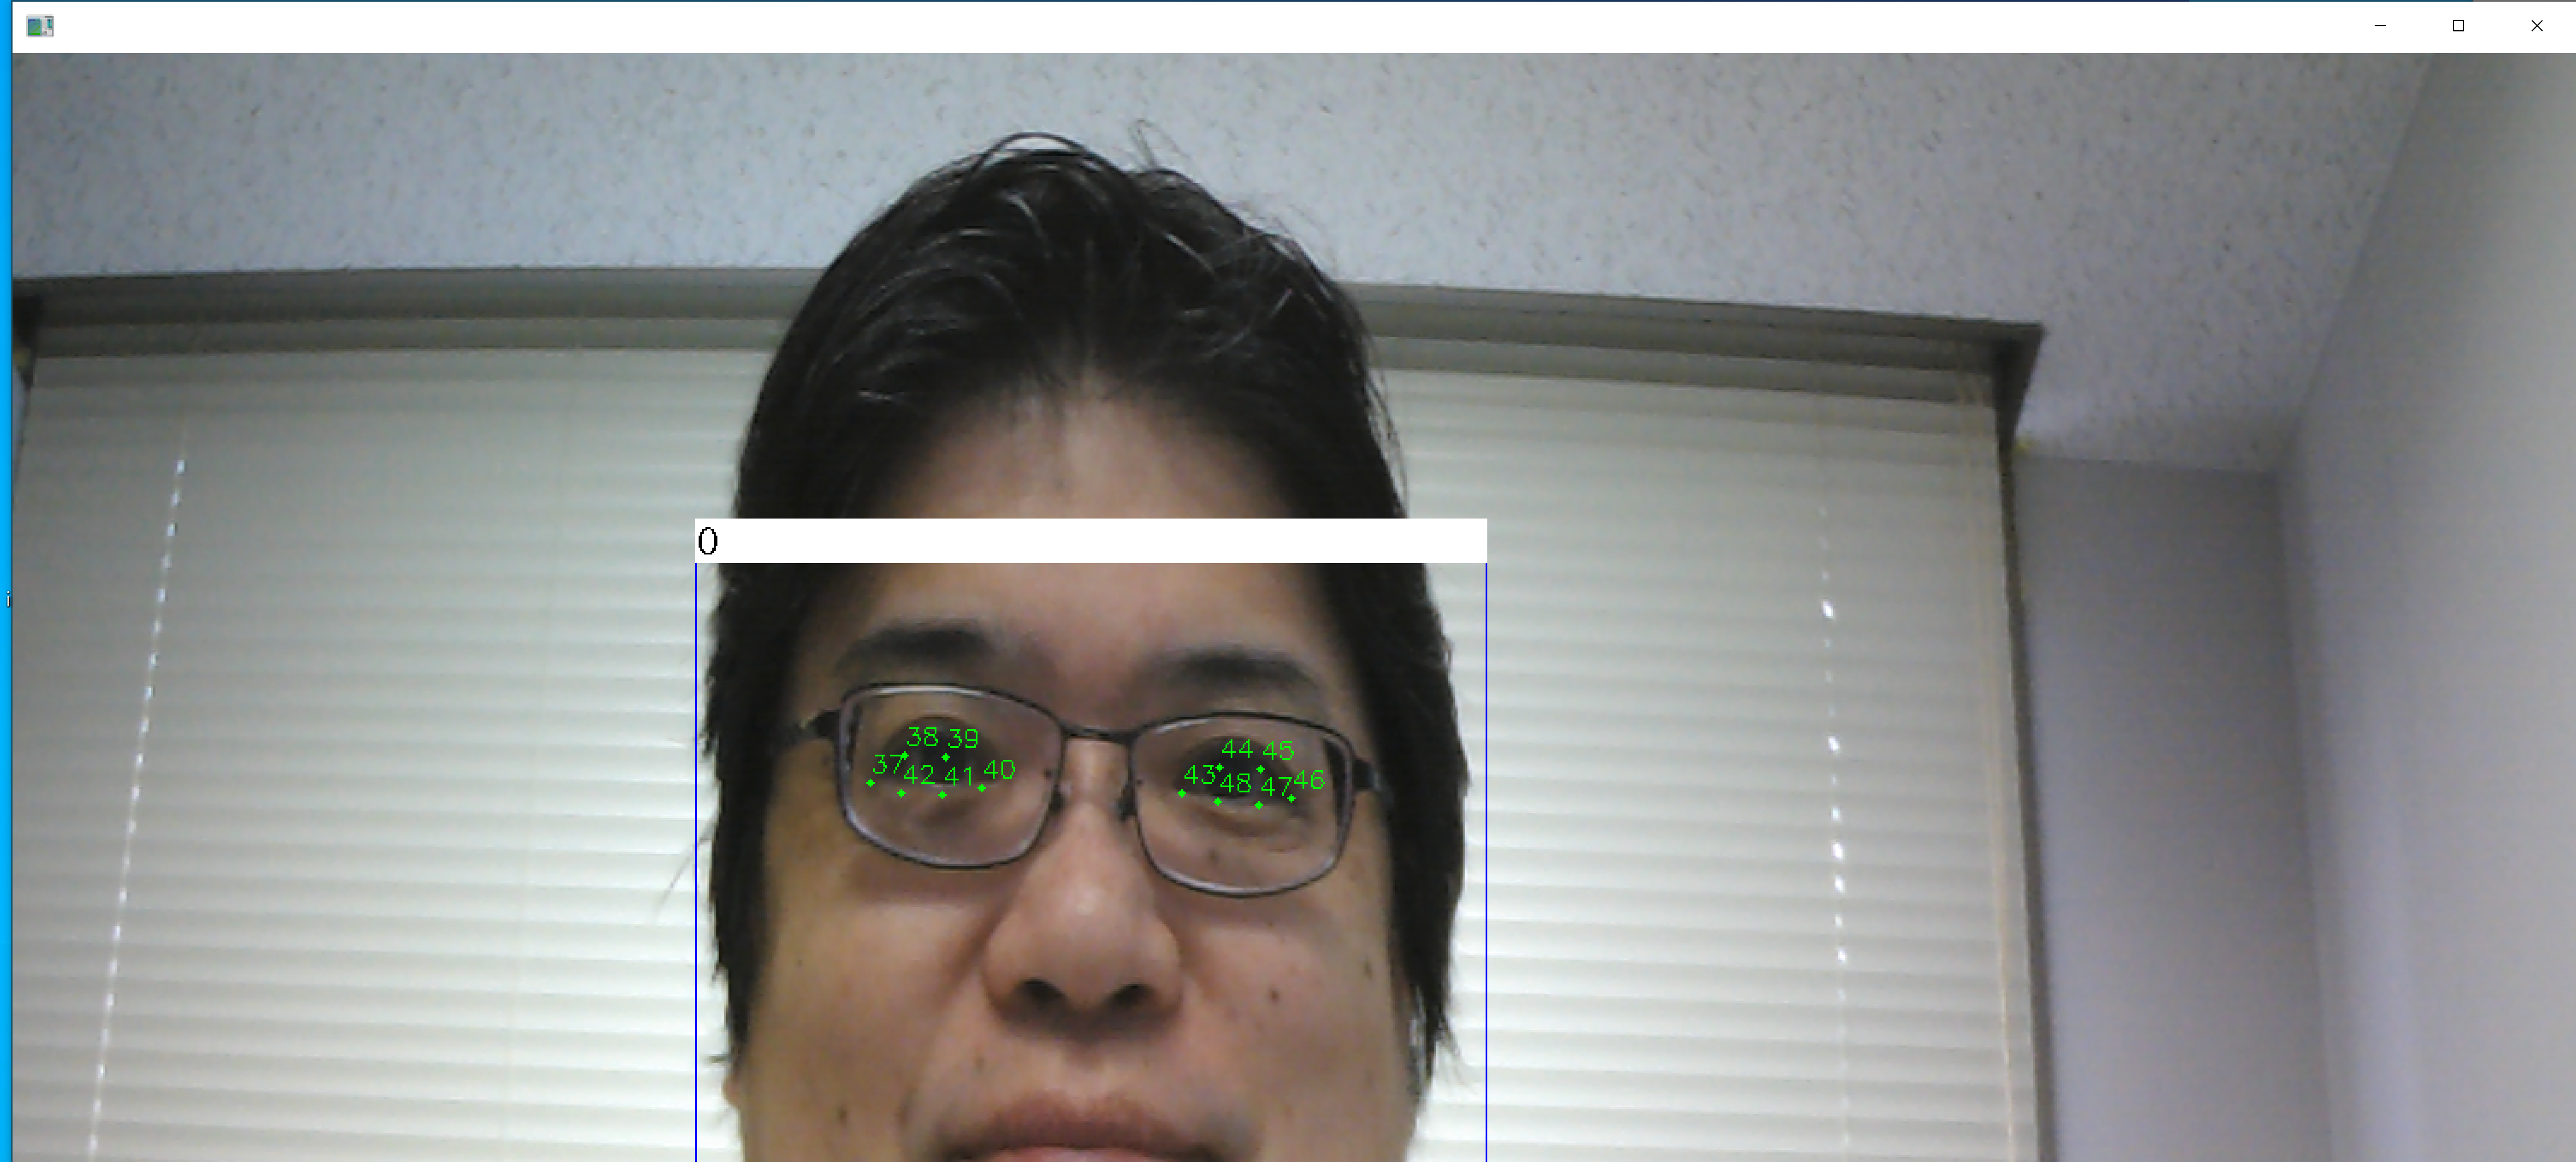
画像が表示されるので確認.
このあと,ウインドウの右上の「x」をクリックしない.画面の中をクリックしてから,何かのキーを押して閉じる
ビデオで行ってみる
Python プログラムの実行
Python プログラムの実行
- Windows では python (Python ランチャーは py)
- Ubuntu では python3
Python 開発環境(Jupyter Qt Console,
Jupyter ノートブック (Jupyter Notebook),
Jupyter Lab,
Nteract,
Spyder,
PyCharm,
PyScripterなど)も便利である.
Python のまとめ: 別ページ »にまとめ
python
コマンドプロンプトで次を実行
cd C:\dlib
python
次の Python プログラムを実行
OpenCV による動画表示を行う.
import numpy as np
import dlib
import cv2
import imutils
from imutils import face_utils
def box_label(bgr, x1, y1, x2, y2, label):
cv2.rectangle(bgr, (x1, y1), (x2, y2), (255, 0, 0), 1, 1)
cv2.rectangle(bgr, (int(x1), int(y1-25)), (x2, y1), (255,255,255), -1)
cv2.putText(bgr, label, (x1, int(y1-5)), cv2.FONT_HERSHEY_COMPLEX, 0.7, (0,0,0), 1)
detector = dlib.get_frontal_face_detector()
predictor = dlib.shape_predictor('python_examples/shape_predictor_68_face_landmarks.dat')
v = cv2.VideoCapture("./python_examples/sample1.mp4")
while(v.isOpened()):
r, f = v.read()
if ( r == False ):
break
mono = cv2.cvtColor(f, cv2.COLOR_BGR2GRAY)
rects = detector(mono, 1)
for (i, rect) in enumerate(rects):
shape = predictor(mono, rect)
shape = face_utils.shape_to_np(shape)
(x, y, w, h) = face_utils.rect_to_bb(rect)
box_label(f, x, y, x + w, y + h, str(i))
j = 0
for (x, y) in shape:
j = j + 1
if ( j > 36 and j < 49):
cv2.putText(f, str(j), (x, y - 6), cv2.FONT_HERSHEY_SIMPLEX, 0.5, (0, 255, 0), 1)
cv2.circle(f, (x, y), 2, (0, 255, 0), -1)
cv2.imshow("", f)
# Press Q to exit
if cv2.waitKey(1) & 0xFF == ord('q'):
break
v.release()
cv2.destroyAllWindows()
* 止めたいとき,右上の「x」をクリックしない.画面の中をクリックしてから,「q」のキーを押して閉じる
ビデオカメラで行ってみる
今度は、USB接続できるビデオカメラを準備し,パソコンに接続しておく.
「v = cv2.VideoCapture(0)」のように設定している.他は前のプログラムと同じ
import numpy as np
import dlib
import cv2
import imutils
from imutils import face_utils
def box_label(bgr, x1, y1, x2, y2, label):
cv2.rectangle(bgr, (x1, y1), (x2, y2), (255, 0, 0), 1, 1)
cv2.rectangle(bgr, (int(x1), int(y1-25)), (x2, y1), (255,255,255), -1)
cv2.putText(bgr, label, (x1, int(y1-5)), cv2.FONT_HERSHEY_COMPLEX, 0.7, (0,0,0), 1)
detector = dlib.get_frontal_face_detector()
predictor = dlib.shape_predictor('python_examples/shape_predictor_68_face_landmarks.dat')
v = cv2.VideoCapture(0)
while(v.isOpened()):
r, f = v.read()
if ( r == False ):
break
mono = cv2.cvtColor(f, cv2.COLOR_BGR2GRAY)
rects = detector(mono, 1)
for (i, rect) in enumerate(rects):
shape = predictor(mono, rect)
shape = face_utils.shape_to_np(shape)
(x, y, w, h) = face_utils.rect_to_bb(rect)
box_label(f, x, y, x + w, y + h, str(i))
j = 0
for (x, y) in shape:
j = j + 1
if ( j > 36 and j < 49):
cv2.putText(f, str(j), (x, y - 6), cv2.FONT_HERSHEY_SIMPLEX, 0.5, (0, 255, 0), 1)
cv2.circle(f, (x, y), 2, (0, 255, 0), -1)
cv2.imshow("", f)
# Press Q to exit
if cv2.waitKey(1) & 0xFF == ord('q'):
break
v.release()
cv2.destroyAllWindows()
* 止めたいとき,右上の「x」をクリックしない.画面の中をクリックしてから,「q」のキーを押して閉じる