YOLO11によるOBB(回転物体検出)(ソースコードと説明と利用ガイド)
【概要】YOLO11-OBBは、物体の向きに合わせて回転可能な境界ボックスを用いた物体検出技術である。従来の軸平行な矩形と異なり、任意の角度で回転した物体を正確に検出できる。DOTAv1データセットで学習され、航空・衛星画像における飛行機、船舶、車両など15種類の物体を検出する。C3k2ブロックやSPPFモジュールにより特徴抽出能力が向上。CLAHE前処理により低照度環境でも高精度な検出が可能である。日本語表示対応、検出結果の自動保存機能を備える。
ツール利用ガイド
1. このプログラムの利用シーン
航空・衛星画像における物体検出作業に使用される。建物、車両、船舶、港湾施設、飛行機、橋梁などの15種類の物体を自動検出し、回転した状態の物体も正確に検出できる。ドローン映像の解析、都市計画、交通監視、災害対応などの分野で活用される。
2. 主な機能
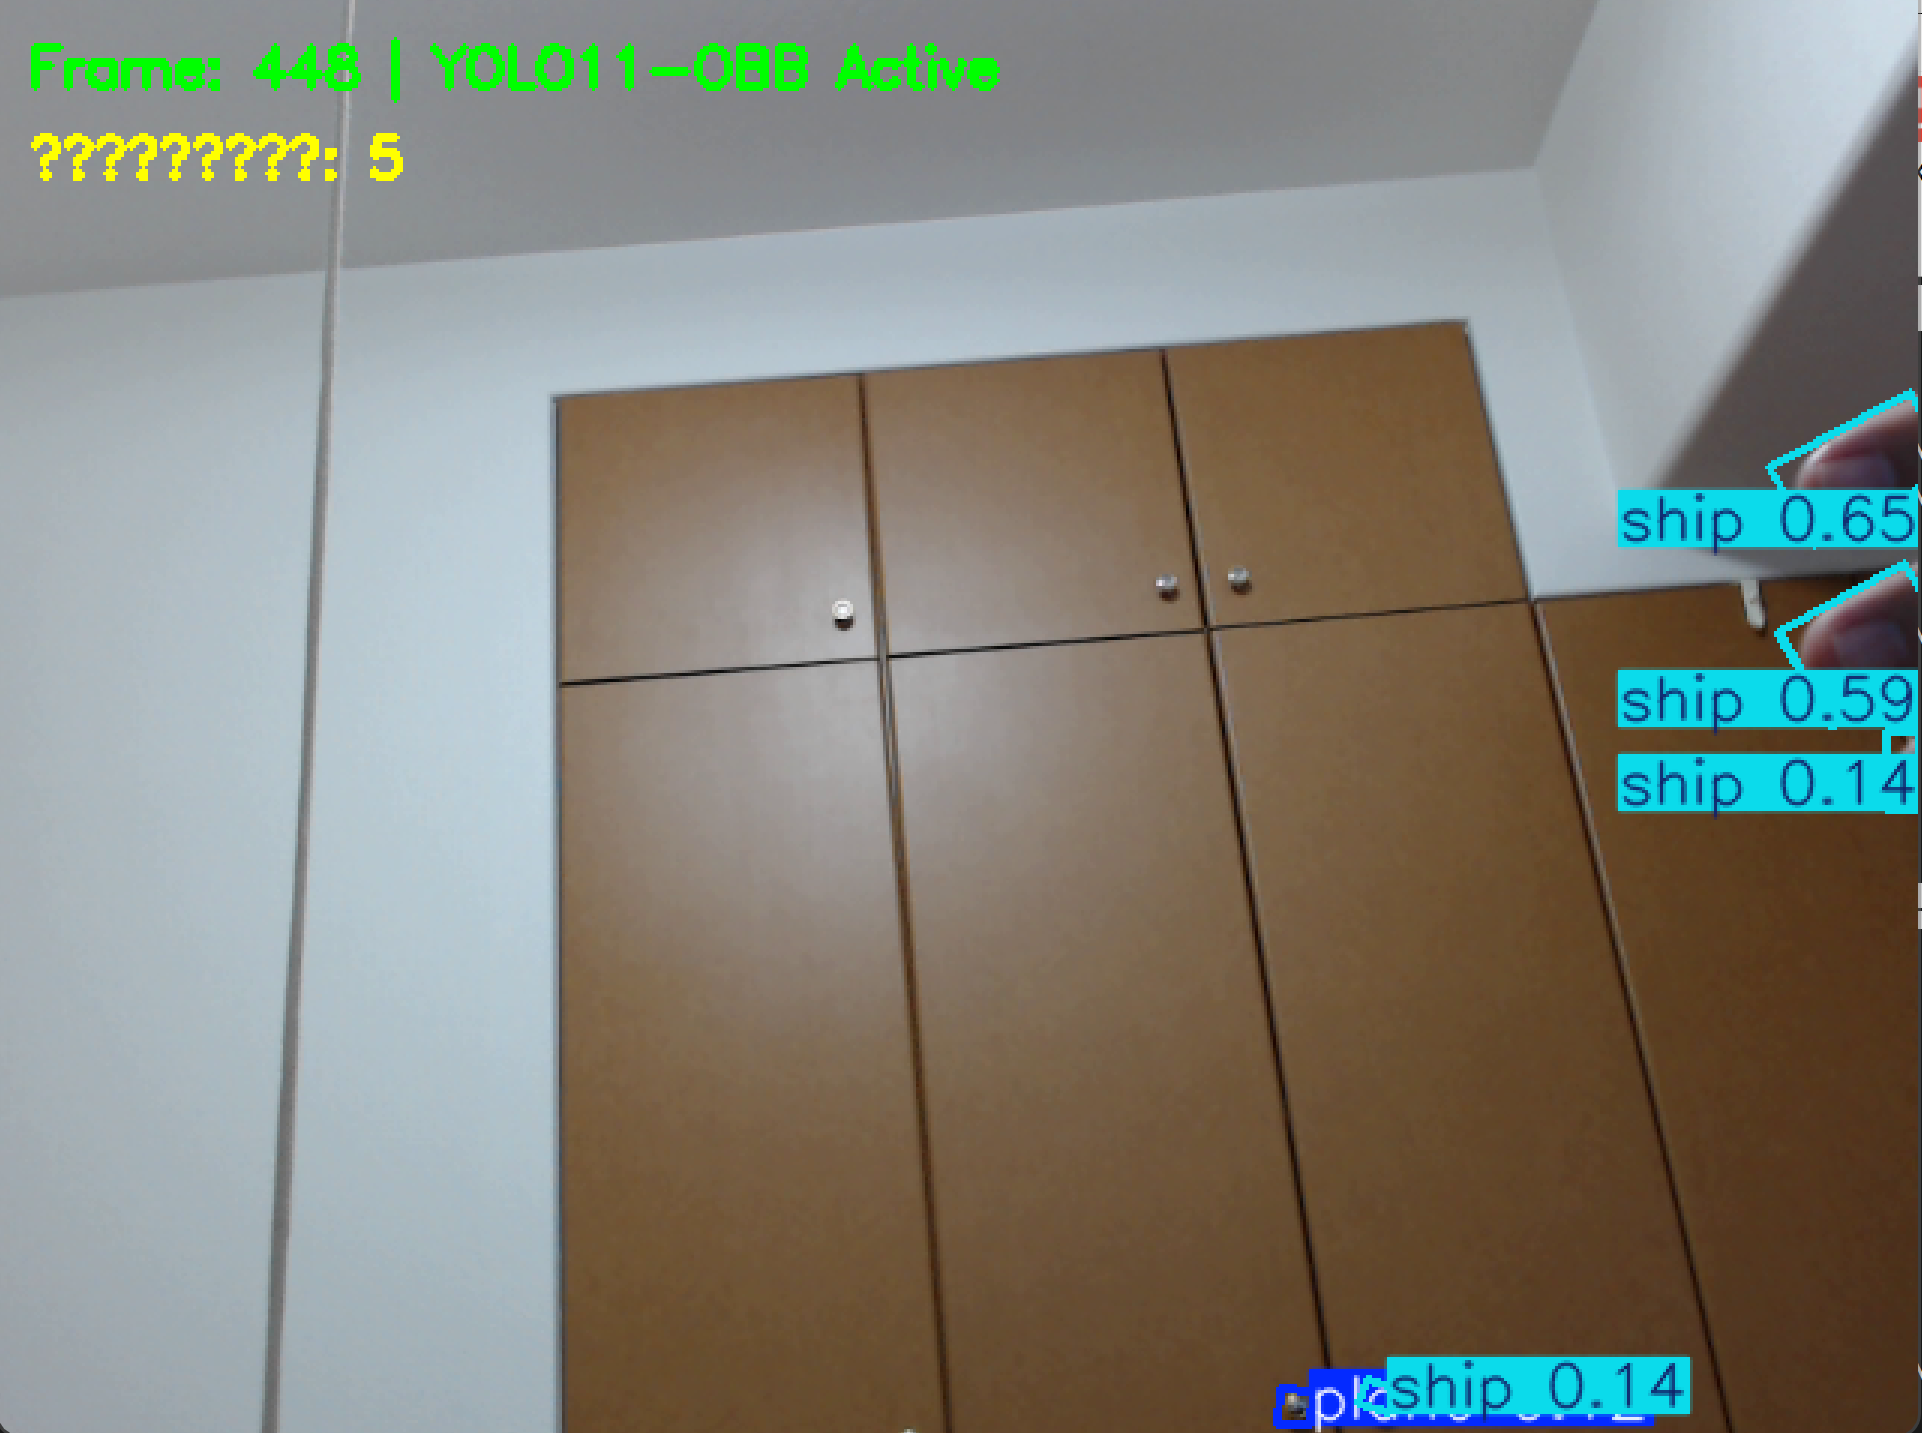
- リアルタイム物体検出: 動画ファイルやカメラ映像から物体を検出し、結果を画面に表示する。
- Oriented Bounding Box表示: 物体の向きに合わせて回転した境界ボックスで検出結果を表示する。
- モデル選択機能: 処理速度と精度のバランスに応じて5種類のモデル(nano/small/medium/large/extra large)から選択できる。
- CLAHE画像強化: 低照度環境での検出精度向上のため、コントラスト強化処理を自動適用する。
- 学習ログ可視化: 訓練済みモデルの学習過程をグラフで表示する。
- 検出結果保存: 処理結果をテキストファイルに保存し、後の分析に利用できる。
3. 基本的な使い方
- 起動とモデル選択:
プログラム起動後、使用するモデルサイズ(n/s/m/l/x)をキーボードで入力する。デフォルトはnano版である。
- 入力ソースの選択:
0(動画ファイル)、1(カメラ)、2(サンプル動画)のいずれかを入力し、Enterキーを押す。動画ファイルの場合はファイル選択ダイアログが表示される。
- 検出処理の実行:
選択した映像源から物体検出を開始し、検出結果が画面に表示される。日本語クラス名と信頼度が各物体に表示される。
- 終了方法:
映像表示画面でキーボードのqキーを押すとプログラムが終了し、結果がresult.txtに保存される。
4. 便利な機能
- 自動デバイス検出: GPU環境では自動的にCUDA加速を使用し、CPU環境では自動的にCPU処理に切り替わる。
- 統計情報表示: 検出されたクラス別の統計情報を画面とファイルに記録する。
- 日本語対応: 検出クラス名が日本語で表示され、結果の理解が容易である。
- 信頼度情報: 各検出結果に信頼度が表示され、検出精度の評価ができる。
OBB(Oriented Object Detection)とは
OBB(Oriented Bounding Box)は、従来の軸平行バウンディングボックスとは異なり、物体の向きに合わせて回転可能な長方形で物体を囲む技術である。通常の物体検出では水平・垂直な長方形しか使用できないが、OBBでは任意の角度で回転した長方形を使用することで、斜めや回転した物体をより正確に検出・位置特定できる。
従来手法との主な違い:
- 通常の物体検出: 軸に平行な長方形(axis-aligned rectangle)のみ
- OBB: 物体の向きに合わせて回転可能な長方形、より正確な位置特定
- 適用分野: 航空写真、衛星画像、回転物体が多い産業現場で特に有効
使用する学習済みモデル
YOLO11-OBB事前学習済みモデル:
- 学習データセット: DOTAv1(15クラス回転物体検出)
- 検出可能物体: 飛行機、船舶、貯蔵タンク、野球場、テニスコート、バスケットボールコート、陸上競技場、港湾、橋梁、車両など15種類
- 出力形式: 回転バウンディングボックス + クラス確率 + 信頼度 + 回転角度
- 入力解像度: 640×640ピクセル(デフォルト)
- モデルサイズ: Nano版(軽量)からExtra Large版(高精度)まで5種類
- 技術特徴: C3k2ブロック、C2PSA空間アテンション、SPPF多スケール処理
DOTAv1データセットの15クラス
- 飛行機 (plane)
- 船舶 (ship)
- 貯蔵タンク (storage-tank)
- 野球場 (baseball-diamond)
- テニスコート (tennis-court)
- バスケットボールコート (basketball-court)
- 陸上競技場 (ground-track-field)
- 港湾 (harbor)
- 橋梁 (bridge)
- 大型車両 (large-vehicle)
- 小型車両 (small-vehicle)
- ヘリコプター (helicopter)
- ラウンドアバウト (roundabout)
- サッカー場 (soccer-ball-field)
- 水泳プール (swimming-pool)
事前準備
ここでは、最低限の事前準備について説明する。機械学習や深層学習を行う場合は、NVIDIA CUDA、Visual Studio、Cursorなどを追加でインストールすると便利である。これらについては別ページ https://www.kkaneko.jp/cc/dev/aiassist.htmlで詳しく解説しているので、必要に応じて参照してください。Python 3.12 のインストール
インストール済みの場合は実行不要。
管理者権限でコマンドプロンプトを起動(手順:Windowsキーまたはスタートメニュー > cmd と入力 > 右クリック > 「管理者として実行」)し、以下を実行する。管理者権限は、wingetの--scope machineオプションでシステム全体にソフトウェアをインストールするために必要である。
REM Python をシステム領域にインストール
winget install --scope machine --id Python.Python.3.12 -e --silent --accept-source-agreements --accept-package-agreements
REM Python のパス設定
set "PYTHON_PATH=C:\Program Files\Python312"
set "PYTHON_SCRIPTS_PATH=C:\Program Files\Python312\Scripts"
echo "%PATH%" | find /i "%PYTHON_PATH%" >nul
if errorlevel 1 setx PATH "%PATH%;%PYTHON_PATH%" /M >nul
echo "%PATH%" | find /i "%PYTHON_SCRIPTS_PATH%" >nul
if errorlevel 1 setx PATH "%PATH%;%PYTHON_SCRIPTS_PATH%" /M >nul【関連する外部ページ】
Python の公式ページ: https://www.python.org/
AI エディタ Windsurf のインストール
Pythonプログラムの編集・実行には、AI エディタの利用を推奨する。ここでは,Windsurfのインストールを説明する。
管理者権限でコマンドプロンプトを起動(手順:Windowsキーまたはスタートメニュー > cmd と入力 > 右クリック > 「管理者として実行」)し、以下を実行して、Windsurfをシステム全体にインストールする。管理者権限は、wingetの--scope machineオプションでシステム全体にソフトウェアをインストールするために必要となる。
winget install --scope machine --id Codeium.Windsurf -e --silent --accept-source-agreements --accept-package-agreements【関連する外部ページ】
Windsurf の公式ページ: https://windsurf.com/
必要なパッケージのインストール
管理者権限でコマンドプロンプトを起動し、以下のコマンドを実行する:
pip install -U torch torchvision torchaudio --index-url https://download.pytorch.org/whl/cu126
pip install ultralytics opencv-python numpy pillow matplotlib pandas
YOLO11-OBB回転物体検出プログラム
概要
このプログラムは、YOLO11-OBBによる任意角度物体検出システムである。Oriented Bounding Box(OBB)を用いて、従来の軸平行境界ボックスでは困難な回転した物体の検出を実現する。航空・衛星画像におけるDOTAv1データセット15クラスの物体を検出・表示する[1][4]。
主要技術
YOLO11-OBB
最新のYOLO11アーキテクチャにOriented Bounding Box機能を統合した物体検出モデルである。C3k2ブロック、SPPFモジュール、C2PSAコンポーネントを導入し、特徴抽出能力を向上させている[1][2]。
CLAHE (Contrast Limited Adaptive Histogram Equalization)
画像を小領域に分割し、各領域でヒストグラム均等化を実行する適応的コントラスト強化技術である。コントラスト制限により、ノイズ増幅を抑制しながら局所的なコントラストを改善する[3]。
技術的特徴
- Oriented Bounding Box検出
物体の向きに合わせて回転可能な境界ボックスにより、航空・衛星画像における任意角度の物体検出を実現する。4つの角点座標で物体を表現し、背景領域の誤検出を削減する[2]。
- NMSフリー設計
YOLO11-OBBは重複除去処理を内部で実行するため、後処理でのNon-Maximum Suppressionが不要である。信頼度による閾値フィルタリングのみで検出結果を得る[1]。
- 信頼度降順ソート
検出結果を信頼度の高い順に自動ソートし、重要な検出を優先表示する。上位3件の詳細情報を表示することで、検出精度の評価が容易である。
- 学習ログ自動可視化
学習済みモデルの訓練ログを自動検索し、Box Loss、Class Loss、OBB Loss、mAP等のメトリクスをグラフ化する。matplotlibによる4分割レイアウトでトレーニング曲線を表示する。
実装の特色
- 3つの入力ソース選択(動画ファイル、カメラ、サンプル動画)
- 対話的なモデルサイズ選択(nano/small/medium/large/extra large)
- CUDA/CPU自動検出によるGPU加速対応
- YUV色空間でのCLAHE前処理による画像品質向上
- 日本語フォント対応とクラス名の日本語表示
- 処理結果のテキストファイル保存機能
参考文献
[1] Khanam, R., & Hussain, M. (2024). YOLOv11: An Overview of the Key Architectural Enhancements. arXiv preprint arXiv:2410.17725. https://arxiv.org/abs/2410.17725
[2] Ultralytics. (2024). Oriented Bounding Boxes Object Detection - YOLO11 OBB. https://docs.ultralytics.com/tasks/obb/
[3] Zuiderveld, K. (1994). Contrast Limited Adaptive Histogram Equalization. In Graphics Gems IV (pp. 474-485). AP Professional.
[4] Xia, G. S., Bai, X., Ding, J., Zhu, Z., Belongie, S., Luo, J., ... & Zhang, L. (2018). DOTA: A large-scale dataset for object detection in aerial images. In Proceedings of the IEEE conference on computer vision and pattern recognition (pp. 3974-3983).
ソースコード
"""
プログラム名: YOLO11-OBB物体検出プログラム
特徴技術名: YOLO11-OBB
出典:
  - 論文: Khanam, R., & Hussain, M. (2024). YOLOv11: An Overview of the Key Architectural Enhancements. arXiv preprint arXiv:2410.17725.
  - DOTA論文: Xia, G. S., et al. (2018). DOTA: A Large-scale Dataset for Object Detection in Aerial Images. CVPR 2018.
  - GitHub: https://github.com/ultralytics/ultralytics
  - 公式ドキュメント: https://docs.ultralytics.com/tasks/obb/
特徴機能: Oriented Bounding Box (OBB) による任意角度物体検出機能。従来の軸平行境界ボックスと異なり、物体の向きに合わせて回転可能な境界ボックスによる検出。航空・衛星画像において物体が様々な角度で現れる場合に有効で、背景領域の誤検出を削減
学習済みモデル:
  - yolo11n-obb.pt(DOTAv1データセット15クラス対応、Nano版、最軽量、自動ダウンロード)
  - yolo11s-obb.pt(DOTAv1データセット15クラス対応、Small版、軽量、自動ダウンロード)
  - yolo11m-obb.pt(DOTAv1データセット15クラス対応、Medium版、バランス型、自動ダウンロード)
  - yolo11l-obb.pt(DOTAv1データセット15クラス対応、Large版、精度重視、自動ダウンロード)
  - yolo11x-obb.pt(DOTAv1データセット15クラス対応、Extra Large版、最高精度、自動ダウンロード)
特徴技術および学習済モデルの利用制限: **AGPL-3.0ライセンス(オープンソース)。商用利用の場合はEnterprise License要取得(Ultralytics公式サイト参照)**
方式設計:
  関連利用技術:
    - PyTorch: 深層学習フレームワーク、CUDA対応によるGPU加速
    - OpenCV: 画像処理、カメラ制御、描画処理、動画入出力管理
    - CLAHE (Contrast Limited Adaptive Histogram Equalization): 低照度環境での画像品質向上
    - Matplotlib: 学習曲線の可視化
  入力と出力: 入力: 動画(ユーザは「0:動画ファイル,1:カメラ,2:サンプル動画」のメニューで選択。0:動画ファイルの場合はtkinterでファイル選択。1の場合はOpenCVでカメラが開く。2の場合はhttps://raw.githubusercontent.com/opencv/opencv/master/samples/data/vtest.aviを使用)、出力: OpenCV画面でリアルタイム表示(検出したオブジェクトをOBBで表示)、各フレームごとにprint()による処理結果表示、プログラム終了時にresult.txtファイルに保存、学習ログが存在する場合は自動的に学習曲線を画像ファイルとして保存
  処理手順: 1.学習ログの自動検索と可視化、2.フレーム取得、3.CLAHE前処理、4.YOLO11-OBB推論実行、5.DOTAv1 15クラスの検出、6.信頼度閾値による選別、7.Oriented Bounding Box描画
  前処理、後処理: 前処理:CLAHE適用による画像コントラスト強化、YOLO11-OBB内部で自動実行(640x640リサイズ、正規化)。後処理:YOLO11-OBBのNMSフリー設計により、重複除去処理が不要。信頼度による閾値フィルタリングのみ実施
  追加処理: CUDA/CPU自動検出機能により、GPU搭載環境では自動的に加速。検出結果の信頼度降順ソートにより重要な検出を優先表示。学習ログの自動検出と可視化
  調整を必要とする設定値: CONF_THRESH(オブジェクト検出信頼度閾値、デフォルト0.5)- 値を上げると誤検出が減少するが検出漏れが増加
将来方策: CONF_THRESHの動的調整機能。フレーム毎の検出数を監視し、検出数が閾値を超えた場合は信頼度を上げ、検出数が少ない場合は下げる適応的制御の実装
その他の重要事項: Windows環境専用設計、CUDA対応GPU推奨(自動検出・CPUフォールバック機能付き)、初回実行時は学習済みモデルの自動ダウンロード。DOTAv1 15クラス全て検出可能:plane, ship, storage-tank, baseball-diamond, tennis-court, basketball-court, ground-track-field, harbor, bridge, large-vehicle, small-vehicle, helicopter, roundabout, soccer-ball-field, swimming-pool
前準備:
  - pip install -U torch torchvision torchaudio --index-url https://download.pytorch.org/whl/cu126
  - pip install ultralytics opencv-python numpy pillow matplotlib pandas
"""

import cv2
import tkinter as tk
from tkinter import filedialog
import os
import torch
import numpy as np
from ultralytics import YOLO
import warnings
import time
import urllib.request
from PIL import Image, ImageDraw, ImageFont
import matplotlib
matplotlib.use('Agg')  # GUIバックエンドを使用しない
import matplotlib.pyplot as plt
import pandas as pd
from pathlib import Path
import glob
from datetime import datetime
import sys
import io

warnings.filterwarnings('ignore')

# Windows文字エンコーディング設定
sys.stdout = io.TextIOWrapper(sys.stdout.buffer, encoding='utf-8', line_buffering=True)

# GPU/CPU自動選択
device = torch.device('cuda' if torch.cuda.is_available() else 'cpu')

# モデル情報の構造化
MODEL_INFO = {
    'n': {'name': 'Nano', 'params': '2.7M', 'mAP': '78.4%', 'desc': '最軽量'},
    's': {'name': 'Small', 'params': '9.7M', 'mAP': '79.5%', 'desc': '軽量'},
    'm': {'name': 'Medium', 'params': '20.9M', 'mAP': '80.9%', 'desc': 'バランス型'},
    'l': {'name': 'Large', 'params': '26.2M', 'mAP': '81.0%', 'desc': '精度重視'},
    'x': {'name': 'Extra Large', 'params': '58.8M', 'mAP': '81.3%', 'desc': '最高精度'}
}

# 日本語クラス名マッピング
CLASS_NAMES_JP = {
    'plane': '飛行機', 'ship': '船舶', 'storage-tank': '貯蔵タンク',
    'baseball-diamond': '野球場', 'tennis-court': 'テニスコート', 'basketball-court': 'バスケットコート',
    'ground-track-field': '陸上競技場', 'harbor': '港湾', 'bridge': '橋梁',
    'large-vehicle': '大型車両', 'small-vehicle': '小型車両', 'helicopter': 'ヘリコプター',
    'roundabout': 'ロータリー', 'soccer-ball-field': 'サッカー場', 'swimming-pool': 'プール'
}

# 調整可能な設定値
CONF_THRESH = 0.5  # オブジェクト検出信頼度閾値(0.0-1.0)
IMG_SIZE = 640  # YOLO入力画像サイズ
CLAHE_CLIP_LIMIT = 3.0  # CLAHE制限値
CLAHE_TILE_SIZE = (8, 8)  # CLAHEタイルサイズ
WINDOW_NAME = "YOLO11-OBB Detection"  # OpenCVウィンドウ名

# 表示設定
OBJECT_TEXT_Y = 90  # 検出数表示Y座標
OBJECT_COLOR = (0, 255, 0)  # 検出数表示色(BGR)

# CLAHEオブジェクトをグローバルスコープで一度だけ定義
clahe = cv2.createCLAHE(clipLimit=CLAHE_CLIP_LIMIT, tileGridSize=CLAHE_TILE_SIZE)

# クラスごとの色生成(HSVからBGRに変換)
def generate_colors(num_classes):
    colors = []
    for i in range(num_classes):
        hue = int(180.0 * i / num_classes)
        hsv = np.uint8([[[hue, 255, 255]]])
        bgr = cv2.cvtColor(hsv, cv2.COLOR_HSV2BGR)[0][0]
        colors.append((int(bgr[0]), int(bgr[1]), int(bgr[2])))
    return colors

CLASS_COLORS = generate_colors(len(CLASS_NAMES_JP))

# BGR→RGB色変換のヘルパー関数
def bgr_to_rgb(color_bgr):
    """BGRカラーをRGBカラーに変換"""
    return (color_bgr[2], color_bgr[1], color_bgr[0])

# 日本語フォント設定
FONT_PATH = 'C:/Windows/Fonts/meiryo.ttc'
FONT_SIZE = 30
FONT = ImageFont.truetype(FONT_PATH, FONT_SIZE)

# matplotlib日本語フォント設定
plt.rcParams['font.sans-serif'] = ['MS Gothic']
plt.rcParams['axes.unicode_minus'] = False

# グローバル変数
frame_count = 0
results_log = []
class_counts = {}
model = None


def display_program_header():
    print('=' * 60)
    print('=== YOLO11-OBBオブジェクト検出プログラム ===')
    print('=' * 60)
    print('概要: リアルタイムでオブジェクトを検出し、Oriented Bounding Boxで表示します')
    print('機能: YOLO11-OBBによるオブジェクト検出(DOTAv1データセット15クラス)')
    print('技術: CLAHE (コントラスト強化) + Oriented Bounding Box')
    print('操作: qキーで終了')
    print('出力: 各フレームごとの処理結果表示、終了時にresult.txt保存')
    print()


def visualize_training_curves():
    """学習ログの自動検索と可視化"""
    # 学習ログファイルの検索パターン(精度向上のため再帰検索を使用)
    search_patterns = [
        '**/runs/obb/train*/results.csv',
        '**/runs/detect/train*/results.csv',
        '**/runs/train*/results.csv',
        'runs/**/results.csv',
        '**/results.csv'
    ]

    results_file = None
    all_files = []

    # 各パターンで検索
    for pattern in search_patterns:
        files = glob.glob(pattern, recursive=True)
        all_files.extend(files)

    # 重複を除去して最新のファイルを選択
    if all_files:
        unique_files = list(set(all_files))
        results_file = max(unique_files, key=os.path.getmtime)

    if not results_file:
        print("学習ログファイルが見つかりませんでした")
        return False

    print(f"学習ログを検出: {results_file}")

    try:
        # CSVファイル読み込み
        df = pd.read_csv(results_file)
        df.columns = df.columns.str.strip()

        # 利用可能なカラムを確認(OBB特有のメトリクスも含む)
        available_metrics = []
        metric_mapping = {
            'train/box_loss': 'Box Loss (Train)',
            'train/cls_loss': 'Class Loss (Train)',
            'train/obb_loss': 'OBB Loss (Train)',
            'val/box_loss': 'Box Loss (Val)',
            'val/cls_loss': 'Class Loss (Val)',
            'val/obb_loss': 'OBB Loss (Val)',
            'metrics/mAP50': 'mAP@0.5',
            'metrics/mAP50-95': 'mAP@0.5:0.95'
        }

        for col in df.columns:
            if col in metric_mapping:
                available_metrics.append(col)

        if not available_metrics:
            print("可視化可能なメトリクスが見つかりませんでした")
            return False

        # グラフ作成
        num_plots = min(len(available_metrics), 4)
        fig, axes = plt.subplots(2, 2, figsize=(12, 10))
        axes = axes.flatten()

        for i, metric in enumerate(available_metrics[:4]):
            axes[i].plot(df.index + 1, df[metric], linewidth=2)
            axes[i].set_title(metric_mapping.get(metric, metric))
            axes[i].set_xlabel('エポック')
            axes[i].set_ylabel('値')
            axes[i].grid(True, alpha=0.3)

        # 未使用のサブプロットを非表示
        for i in range(num_plots, 4):
            axes[i].set_visible(False)

        plt.suptitle('YOLO11-OBB 学習曲線', fontsize=16)
        plt.tight_layout()

        # グラフを保存(表示はしない)
        output_path = 'training_curves.png'
        plt.savefig(output_path, dpi=100)
        plt.close()  # メモリ解放
        print(f"学習曲線を保存: {output_path}")

        # 最終エポックの統計情報
        print("\n=== 最終エポックの統計 ===")
        last_epoch = df.iloc[-1]

        for metric in available_metrics:
            value = last_epoch[metric]
            print(f"{metric_mapping.get(metric, metric)}: {value:.4f}")

        return True

    except Exception as e:
        print(f"学習ログの可視化中にエラー: {e}")
        return False


def draw_texts_with_pillow(bgr_frame, texts):
    """テキスト描画, texts: list of dict with keys {text, org, color, font_type}"""
    img_pil = Image.fromarray(cv2.cvtColor(bgr_frame, cv2.COLOR_BGR2RGB))
    draw = ImageDraw.Draw(img_pil)

    for item in texts:
        text = item['text']
        x, y = item['org']
        color = item['color']  # RGB
        draw.text((x, y), text, font=FONT, fill=color)

    return cv2.cvtColor(np.array(img_pil), cv2.COLOR_RGB2BGR)


def add_text(frame, text, y, color):
    """フレームに日本語テキストを追加する関数"""
    img_pil = Image.fromarray(cv2.cvtColor(frame, cv2.COLOR_BGR2RGB))
    draw = ImageDraw.Draw(img_pil)
    draw.text((10, y), text, font=FONT, fill=(color[2], color[1], color[0]))
    return cv2.cvtColor(np.array(img_pil), cv2.COLOR_RGB2BGR)


# ===== OBB検出タスク固有の処理 =====
def draw_detection_results(frame, objects):
    """OBB検出の描画処理"""
    global frame_count

    if objects:
        frame_out = add_text(frame, f'検出数: {len(objects)}', OBJECT_TEXT_Y, OBJECT_COLOR)

        # 構造化されたテキスト描画を実行
        texts_to_draw = []
        for i, obj in enumerate(objects[:3]):  # 上位3件を表示
            class_name = obj['class_name']
            jp_name = CLASS_NAMES_JP.get(class_name, class_name)
            conf = obj['detection_conf']

            # OBBの最初の座標ペアを使用してテキスト位置を決定
            obb = obj['obb']
            text_x = int(obb[0][0])  # 最初の点のx座標
            text_y = int(obb[0][1]) - 30  # 最初の点のy座標から30ピクセル上

            texts_to_draw.append({
                'text': f"{jp_name}: {conf:.2f}",
                'org': (text_x, text_y),
                'color': bgr_to_rgb(CLASS_COLORS[obj['class_id'] % len(CLASS_COLORS)]),
                'font_type': 'main'
            })

        frame_out = draw_texts_with_pillow(frame_out, texts_to_draw)
    else:
        frame_out = frame

    # 統計情報を描画
    info_text = f"Objects: {len(objects)} | Frame: {frame_count} | Classes: {len(set(obj['class_name'] for obj in objects)) if objects else 0}"
    cv2.putText(frame_out, info_text, (10, 30),
                cv2.FONT_HERSHEY_SIMPLEX, 0.7, (255, 255, 255), 2)

    return frame_out


def format_detection_output(objects):
    """OBB検出の出力フォーマット"""
    if len(objects) == 0:
        return '検出なし'
    else:
        # クラス別検出数をカウント
        class_counts_frame = {}
        for obj in objects:
            class_name = obj['class_name']
            class_counts_frame[class_name] = class_counts_frame.get(class_name, 0) + 1

        result = f'{len(objects)}個検出'
        # 信頼度順に上位3件の詳細を表示
        for i, obj in enumerate(objects[:3]):
            result += f' | Top{i+1}: {obj["class_name"]}({obj["detection_conf"]:.2f})'

        return result


def detect_objects(frame):
    """共通の検出処理(CLAHE、推論、検出を実行)"""
    global model

    # AIモデルの入力用にCLAHEを適用(YUV色空間で輝度チャンネルのみ処理)
    yuv_frame = cv2.cvtColor(frame, cv2.COLOR_BGR2YUV)
    yuv_frame[:, :, 0] = clahe.apply(yuv_frame[:, :, 0])
    enh_frame = cv2.cvtColor(yuv_frame, cv2.COLOR_YUV2BGR)

    # オブジェクト検出実行(デバイス指定)
    preds = model(enh_frame, conf=CONF_THRESH, device=device,
                  imgsz=IMG_SIZE, verbose=False)

    # 検出結果処理(ソート用のコピーを作成)
    objects = []
    for pred in preds:
        if hasattr(pred, 'obb') and pred.obb is not None and len(pred.obb.cls) > 0:
            # データをコピーしてからソート
            xyxyxyxy = pred.obb.xyxyxyxy.cpu().numpy().copy()
            confs = pred.obb.conf.cpu().numpy().copy()
            classes = pred.obb.cls.cpu().numpy().copy()

            # 信頼度でソート(降順)
            sorted_indices = np.argsort(confs)[::-1]
            xyxyxyxy = xyxyxyxy[sorted_indices]
            confs = confs[sorted_indices]
            classes = classes[sorted_indices]

            # 各オブジェクトの処理
            for i, (obb, conf, cls) in enumerate(zip(xyxyxyxy, confs, classes)):
                class_id = int(cls)
                object_data = {
                    'obb': obb,
                    'detection_conf': conf,
                    'class_id': class_id,
                    'class_name': list(CLASS_NAMES_JP.keys())[class_id]
                }
                objects.append(object_data)

    return objects


def process_video_frame(frame):
    """動画用ラッパー"""
    # 共通の検出処理
    objects = detect_objects(frame)

    # クラスごとの検出数を更新
    global class_counts
    for obj in objects:
        name = obj['class_name']
        if name not in class_counts:
            class_counts[name] = 0
        class_counts[name] += 1

    # 標準の描画を使用(OBB表示)
    if objects:
        preds = model(frame, conf=CONF_THRESH, device=device,
                      imgsz=IMG_SIZE, verbose=False)
        frame_out = preds[0].plot()
    else:
        frame_out = frame

    # OBB検出固有の描画処理
    frame_out = draw_detection_results(frame_out, objects)

    # OBB検出固有の出力フォーマット
    result = format_detection_output(objects)

    return frame_out, result


def video_frame_processing(frame):
    """フレーム処理メイン関数"""
    global frame_count
    current_time = time.time()
    frame_count += 1

    processed_frame, result = process_video_frame(frame)
    return processed_frame, result, current_time


# プログラム概要表示
display_program_header()

# 学習ログの自動可視化
print('学習ログを検索中...')
visualize_training_curves()
print()

# システム初期化
print('システム初期化中...')
start_time = time.time()

print(f'デバイス: {str(device)}')

if device.type == 'cuda':
    print(f'GPU検出: {torch.cuda.get_device_name(0)}')
    print(f'CUDA バージョン: {torch.version.cuda}')

# モデル選択(対話的実装)
print("\n=== YOLO11-OBBモデル選択 ===")
print('使用するYOLO11-OBBモデルを選択してください:')
for key, info in MODEL_INFO.items():
    print(f'{key}: {info["name"]} ({info["params"]} params, mAP {info["mAP"]}) - {info["desc"]}')
print()

model_choice = ''
while model_choice not in MODEL_INFO.keys():
    model_choice = input("選択 (n/s/m/l/x) [デフォルト: n]: ").strip().lower()
    if model_choice == '':
        model_choice = 'n'
        break
    if model_choice not in MODEL_INFO.keys():
        print("無効な選択です。もう一度入力してください。")

# YOLO11-OBBモデル初期化
model_name = f'yolo11{model_choice}-obb.pt'
try:
    print(f'YOLO11{model_choice}-OBBモデルを初期化中...')
    model = YOLO(model_name)
    model.to(device)
    model.eval()
    print(f'YOLO11{model_choice}-OBBモデルの初期化が完了しました')
    print(f'モデルサイズ: {model_choice} ({MODEL_INFO[model_choice]["name"]}={MODEL_INFO[model_choice]["desc"]})')
    print(f"\n検出可能なクラス数: {len(CLASS_NAMES_JP)}")
    print(f"クラス一覧: {', '.join(CLASS_NAMES_JP.keys())}")
    print(f"モデル情報: {MODEL_INFO[model_choice]['name']} ({MODEL_INFO[model_choice]['params']} params, mAP {MODEL_INFO[model_choice]['mAP']})")
except Exception as e:
    print(f'YOLO11{model_choice}-OBBモデルの初期化に失敗しました')
    print(f'エラー: {e}')
    exit()

print('初期化完了')
print()

# 入力選択
print("\n=== YOLO11-OBBリアルタイム物体検出(DOTAv1 15クラス) ===")
print('0: 動画ファイル')
print('1: カメラ')
print('2: サンプル動画')

choice = input('選択: ')

if choice == '0':
    root = tk.Tk()
    root.withdraw()
    path = filedialog.askopenfilename()
    if not path:
        exit()
    cap = cv2.VideoCapture(path)
elif choice == '1':
    cap = cv2.VideoCapture(0, cv2.CAP_DSHOW)
    if not cap.isOpened():
        cap = cv2.VideoCapture(0)
    cap.set(cv2.CAP_PROP_BUFFERSIZE, 1)
else:
    # サンプル動画ダウンロード・処理
    SAMPLE_URL = 'https://raw.githubusercontent.com/opencv/opencv/master/samples/data/vtest.avi'
    SAMPLE_FILE = 'vtest.avi'
    urllib.request.urlretrieve(SAMPLE_URL, SAMPLE_FILE)
    cap = cv2.VideoCapture(SAMPLE_FILE)

if not cap.isOpened():
    print('動画ファイル・カメラを開けませんでした')
    exit()

# メイン処理
print('\n=== 動画処理開始 ===')
print('操作方法:')
print('  q キー: プログラム終了')
try:
    while True:
        ret, frame = cap.read()
        if not ret:
            break

        MAIN_FUNC_DESC = "YOLO11-OBB Object Detection"
        processed_frame, result, current_time = video_frame_processing(frame)
        cv2.imshow(WINDOW_NAME, processed_frame)
        if choice == '1':  # カメラの場合
            print(datetime.fromtimestamp(current_time).strftime("%Y-%m-%d %H:%M:%S.%f")[:-3], result)
        else:  # 動画ファイルの場合
            print(frame_count, result)
        results_log.append(result)
        if cv2.waitKey(1) & 0xFF == ord('q'):
            break
finally:
    print('\n=== プログラム終了 ===')
    cap.release()
    cv2.destroyAllWindows()
    if results_log:
        with open('result.txt', 'w', encoding='utf-8') as f:
            f.write('=== YOLO11-OBB物体検出結果 ===\n')
            f.write(f'処理フレーム数: {frame_count}\n')
            f.write(f'使用モデル: {model_name}\n')
            f.write(f'モデル情報: {MODEL_INFO[model_choice]["name"]} ({MODEL_INFO[model_choice]["params"]} params, mAP {MODEL_INFO[model_choice]["mAP"]})\n')
            f.write(f'使用デバイス: {str(device).upper()}\n')
            if device.type == 'cuda':
                f.write(f'GPU: {torch.cuda.get_device_name(0)}\n')
            f.write(f'画像処理: CLAHE適用(YUV色空間)\n')
            f.write(f'信頼度閾値: {CONF_THRESH}(固定値)\n')
            f.write(f'\n検出されたクラス一覧:\n')
            for class_name, count in sorted(class_counts.items()):
                jp_name = CLASS_NAMES_JP.get(class_name, class_name)
                f.write(f'  {jp_name} ({class_name}): {count}回\n')
            f.write('\n')
            f.write('\n'.join(results_log))
        print(f'\n処理結果をresult.txtに保存しました')
        print(f'検出されたクラス数: {len(class_counts)}')
実験・探求のアイデア
YOLO11-OBBモデル選択実験
異なるYOLO11-OBBモデルを比較できる:
yolo11n-obb.pt:Nano版(最高効率、エッジデバイス最適)yolo11s-obb.pt:Small版(バランス型、実用性重視)yolo11m-obb.pt:Medium版(汎用用途、精度向上)yolo11l-obb.pt:Large版(高精度重視、計算コスト増)yolo11x-obb.pt:Extra Large版(最高性能、最大計算要求)
回転物体検出精度の検証実験
C2PSAの並列空間アテンション効果を定量的に評価:
- 回転角度による検出精度:物体を様々な角度に回転させた場合の検出精度測定
- 複数回転物体検出:密集環境での回転物体分離能力の評価
- 部分遮蔽対応:遮蔽された回転物体の検出復元性能
- 複雑背景処理:背景が複雑な環境での回転物体検出精度
体験・実験・探求のアイデア
アーキテクチャ改良効果の測定: C3k2とC2PSAの技術革新により、従来困難であった回転物体シーンでの性能向上を定量的に測定
リアルタイム応用実験:
- 航空写真解析:飛行機、滑走路、建物の回転検出
- 海事監視:様々な角度の船舶自動検出
- 農業監視:ドローンからの農機具・作物列の回転検出
- 都市計画:衛星画像からの道路・建物の向き検出
多スケール回転検出能力の実験: SPPFによる異なるサイズの回転物体同時検出性能を評価
回転角度精度実験: 様々な回転角度での検出精度とバウンディングボックスの正確性を測定