Real-ESRGANによる超解像(ソースコードと実行結果)
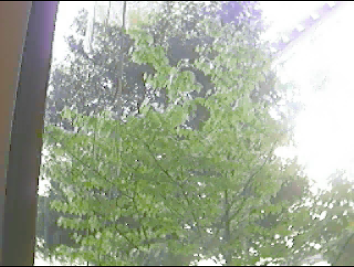
画質改善前
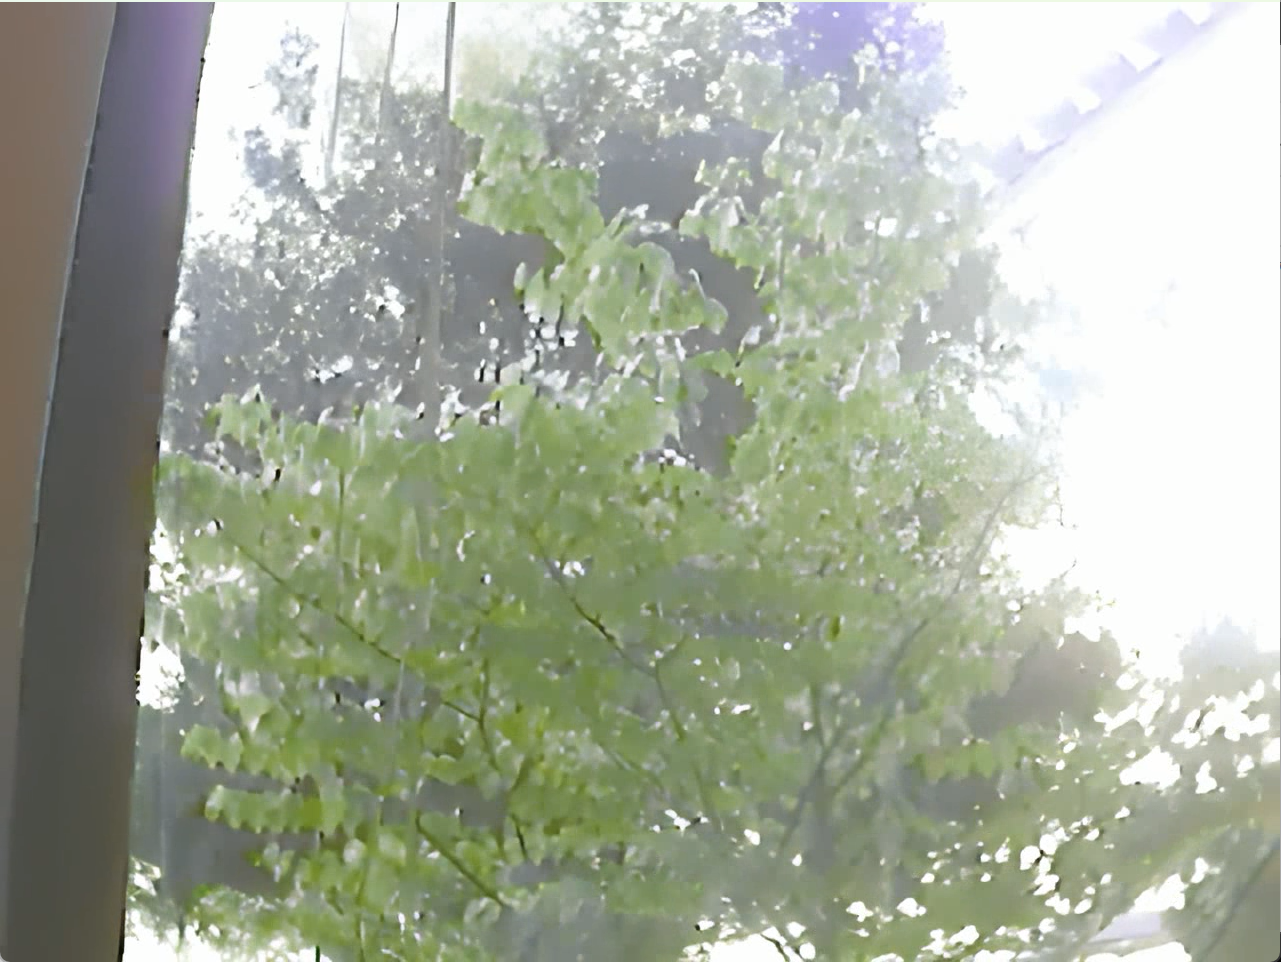
画質改善後
Python開発環境,ライブラリ類
ここでは、最低限の事前準備について説明する。機械学習や深層学習を行う場合は、NVIDIA CUDA、Visual Studio、Cursorなどを追加でインストールすると便利である。これらについては別ページ https://www.kkaneko.jp/cc/dev/aiassist.htmlで詳しく解説しているので、必要に応じて参照してください。
Python 3.12 のインストール
インストール済みの場合は実行不要。
管理者権限でコマンドプロンプトを起動(手順:Windowsキーまたはスタートメニュー > cmd と入力 > 右クリック > 「管理者として実行」)し、以下を実行する。管理者権限は、wingetの--scope machineオプションでシステム全体にソフトウェアをインストールするために必要である。
REM Python をシステム領域にインストール
winget install --scope machine --id Python.Python.3.12 -e --silent --accept-source-agreements --accept-package-agreements
REM Python のパス設定
set "PYTHON_PATH=C:\Program Files\Python312"
set "PYTHON_SCRIPTS_PATH=C:\Program Files\Python312\Scripts"
echo "%PATH%" | find /i "%PYTHON_PATH%" >nul
if errorlevel 1 setx PATH "%PATH%;%PYTHON_PATH%" /M >nul
echo "%PATH%" | find /i "%PYTHON_SCRIPTS_PATH%" >nul
if errorlevel 1 setx PATH "%PATH%;%PYTHON_SCRIPTS_PATH%" /M >nul【関連する外部ページ】
Python の公式ページ: https://www.python.org/
AI エディタ Windsurf のインストール
Pythonプログラムの編集・実行には、AI エディタの利用を推奨する。ここでは,Windsurfのインストールを説明する。
管理者権限でコマンドプロンプトを起動(手順:Windowsキーまたはスタートメニュー > cmd と入力 > 右クリック > 「管理者として実行」)し、以下を実行して、Windsurfをシステム全体にインストールする。管理者権限は、wingetの--scope machineオプションでシステム全体にソフトウェアをインストールするために必要となる。
winget install --scope machine --id Codeium.Windsurf -e --silent --accept-source-agreements --accept-package-agreements【関連する外部ページ】
Windsurf の公式ページ: https://windsurf.com/
Windows での FFmpeg インストール手順(手動インストール)
公式ビルド版を使用
-
ダウンロード
- https://www.gyan.dev/ffmpeg/builds/ にアクセス
- 「release builds」セクションの「full」版をダウンロード
- ファイル名例:
ffmpeg-release-full.7z - essentials版ではなくfull版を選択(ffprobeも含まれる)
- ファイル名例:
-
解凍
- ダウンロードした7zファイルを右クリック
- 7-Zip等で解凍(Windows標準では7z非対応のため、7-Zipが必要)
- 7-Zipダウンロード: https://www.7-zip.org/
- 解凍先を
C:\ffmpegにする(推奨)- フォルダ構造:
C:\ffmpeg\bin\ffmpeg.exeとなるように配置
- フォルダ構造:
-
環境変数PATHの設定
- Windowsキー + R → 「sysdm.cpl」と入力してEnter
- 「詳細設定」タブ → 「環境変数」ボタンをクリック
- 「システム環境変数」の「Path」を選択 → 「編集」
- 「新規」をクリック →
C:\ffmpeg\binを追加 - 「OK」を3回クリックして設定を保存
-
動作確認
- コマンドプロンプトを新規で開く(既存のものは閉じる)
- 以下のコマンドを実行:
ffmpeg -version ffprobe -version - バージョン情報が表示されれば成功
必要なライブラリをシステム領域にインストール
コマンドプロンプトを管理者として実行(手順:Windowsキーまたはスタートメニュー > cmd と入力 > 右クリック > 「管理者として実行」)し、以下を実行する
pip install -U torch torchvision torchaudio --index-url https://download.pytorch.org/whl/cu126
pip install basicsr opencv-python pillow numpy requests scikit-image
Real-ESRGAN超解像プログラム
このプログラムは、Real-ESRGAN技術を用いて動画の各フレームに対して超解像度化処理を実行する。動画入力、カメラ入力、サンプル動画に対応し、リアルタイム表示と品質評価指標(PSNR・SSIM)の計算を行う。処理結果は連番PNG形式で保存され、FFmpegを用いて音声付きMP4動画として出力される。
主要技術
Real-ESRGAN (Real-World Enhanced Super-Resolution Generative Adversarial Network)
Real-ESRGANは、超解像度技術である[1]。高次劣化モデリングプロセス(High-order degradation modeling)により、ノイズ、ぼけ、JPEG圧縮アーティファクト等の複雑な劣化を考慮した超解像度化を実現する[1][2]。
Residual-in-Residual Dense Block (RRDB)
RRDBは、ESRGANで導入されたニューラルネットワーク構造である[3]。多階層残差ネットワークと密結合を組み合わせ、Batch Normalizationを除去した構造を持つ。この構造により、より深く複雑なネットワークでの効果的な特徴抽出が可能となる[3][4]。
高次劣化モデリング
実世界の画像劣化は、カメラのブレ、センサーノイズ、JPEG圧縮、画像編集、インターネット送信等の複雑な組み合わせである[2]。Real-ESRGANでは、リンギングとオーバーシュートアーティファクトに対処するためのsincフィルタを導入している[1][2]。
技術的特徴
RRDBNetアーキテクチャ
プログラムで実装されているRRDBNetは、Residual Dense Block(RDB)を多階層化したRRDBを基本単位とする。各RDBは密結合畳み込み層で構成され、LeakyReLU活性化関数を使用する。グローバルスキップ接続により勾配消失問題を軽減し、深いネットワークでの安定した学習を実現する[4]。
マルチモデル対応
3種類の学習済みモデルを提供している:RealESRGAN_x2plus(12チャンネル入力、汎用実写画像向け)、RealESRGAN_x4plus(3チャンネル入力、標準品質)、RealESRGAN_x4plus_anime_6B(6ブロック構造、アニメ画像特化)。
実装の特色
リアルタイム品質評価
処理された各フレームに対してPSNR(Peak Signal-to-Noise Ratio)とSSIM(Structural Similarity Index Measure)を計算し、Lanczos4補間との比較による品質評価を実行する。
マルチメディア統合処理
FFmpegとの連携により、処理済みフレームと元動画の音声を結合してMP4形式で出力する。フレームレート自動検出機能により、元動画の時間軸特性を保持した動画生成を実現する。
参考文献
[1] Wang, X., Xie, L., Dong, C., & Shan, Y. (2021). Real-ESRGAN: Training Real-World Blind Super-Resolution with Pure Synthetic Data. In Proceedings of the IEEE/CVF International Conference on Computer Vision (pp. 1905-1914). https://arxiv.org/abs/2107.10833
[2] Wang, X., Xie, L., Dong, C., & Shan, Y. (2021). Real-ESRGAN: Training Real-World Blind Super-Resolution with Pure Synthetic Data. IEEE Conference Publication. https://ieeexplore.ieee.org/document/9607421
[3] Wang, X., Yu, K., Wu, S., Gu, J., Liu, Y., Dong, C., Qiao, Y., & Loy, C. C. (2018). ESRGAN: Enhanced Super-Resolution Generative Adversarial Networks. In The European Conference on Computer Vision Workshops (ECCVW). https://arxiv.org/abs/1809.00219
[4] Zhang, Y., Tian, Y., Kong, Y., Zhong, B., & Fu, Y. (2018). Residual Dense Network for Image Super-Resolution. In Proceedings of the IEEE Conference on Computer Vision and Pattern Recognition (CVPR). https://arxiv.org/abs/1802.08797
ソースコード
# プログラム名: Real-ESRGAN超解像プログラム
# 特徴技術名: Real-ESRGAN (Real-World Enhanced Super-Resolution Generative Adversarial Network)
# 出典: Wang, X., Xie, L., Dong, C., & Shan, Y. (2021). Real-ESRGAN: Training Real-World Blind Super-Resolution with Pure Synthetic Data. In Proceedings of the IEEE/CVF International Conference on Computer Vision (pp. 1905-1914).
# 特徴機能: 実世界劣化に対応した超解像度化。High-order degradation modelingにより、ノイズ、ぼけ、JPEG圧縮アーティファクト等の複雑な劣化を考慮した超解像度化を実現
# 学習済みモデル: RealESRGAN_x2plus (汎用実写画像向け), RealESRGAN_x4plus(汎用4倍超解像度、23 RRDB構造、実写画像向け)、RealESRGAN_x4plus_anime_6B(アニメ特化、6 RRDB構造、アニメ画像向け)
# 方式設計:
# - 関連利用技術:
# * BasicSR(画像復元ツールボックス)- Real-ESRGANの基盤フレームワーク、RRDBNetアーキテクチャ提供
# * OpenCV(コンピュータビジョンライブラリ)- 動画読み込み、フレーム処理、動画出力
# * PIL(画像処理ライブラリ)- RGB/BGR色空間変換とNumPy配列との相互変換、日本語テキスト描画
# * FFmpeg(マルチメディア処理ツール)- 動画音声の抽出・結合
# * scikit-image(画像品質評価)- PSNR・SSIM品質指標計算
# - 入力と出力: 入力: 動画(0:動画ファイル、1:カメラ、2:サンプル動画)、出力: OpenCV画面でリアルタイム表示、処理結果をresult.txtファイルに保存
# - 処理手順:
# 1. モデル選択(3種類のReal-ESRGANモデルから選択)
# 2. 選択されたモデルのダウンロードと初期化
# 3. 入力ソース選択(動画ファイル/カメラ/サンプル動画)
# 4. 動画をフレーム単位で読み込み
# 5. 各フレームをReal-ESRGANで超解像度化
# 6. 品質評価指標(PSNR・SSIM)を計算
# 7. 処理済みフレームをOpenCV画面にリアルタイム表示
# 8. 動画入力時は処理済みフレームを連番PNG形式で保存
# 9. ffmpegでPNGと音声をmuxしてMP4出力
# 10. 結果をresult.txtファイルに保存
# その他の重要事項: FFmpegが必要(音声保持機能用)。Windows環境での動作を前提
# 前準備: pip install -U torch torchvision torchaudio --index-url https://download.pytorch.org/whl/cu126
# pip install basicsr opencv-python pillow numpy requests scikit-image
import torch
import torch.nn as nn
import torch.nn.functional as F
import cv2
import numpy as np
import os
import requests
import subprocess
from PIL import Image, ImageDraw, ImageFont
from pathlib import Path
from skimage.metrics import structural_similarity as ssim
from skimage.metrics import peak_signal_noise_ratio as psnr
import warnings
import tkinter as tk
from tkinter import filedialog
import urllib.request
import time
from datetime import datetime
warnings.filterwarnings('ignore')
# GPU/CPU自動選択
device = torch.device('cuda' if torch.cuda.is_available() else 'cpu')
print(f'デバイス: {str(device)}')
# GPU使用時の最適化
if device.type == 'cuda':
torch.backends.cudnn.benchmark = True
# RRDBNet実装(Real-ESRGANの実際の構造に対応)
class ResidualDenseBlock(nn.Module):
def __init__(self, num_feat=64, num_grow_ch=32):
super(ResidualDenseBlock, self).__init__()
self.conv1 = nn.Conv2d(num_feat, num_grow_ch, 3, 1, 1)
self.conv2 = nn.Conv2d(num_feat + num_grow_ch, num_grow_ch, 3, 1, 1)
self.conv3 = nn.Conv2d(num_feat + 2 * num_grow_ch, num_grow_ch, 3, 1, 1)
self.conv4 = nn.Conv2d(num_feat + 3 * num_grow_ch, num_grow_ch, 3, 1, 1)
self.conv5 = nn.Conv2d(num_feat + 4 * num_grow_ch, num_feat, 3, 1, 1)
self.lrelu = nn.LeakyReLU(negative_slope=0.2, inplace=True)
def forward(self, x):
x1 = self.lrelu(self.conv1(x))
x2 = self.lrelu(self.conv2(torch.cat((x, x1), 1)))
x3 = self.lrelu(self.conv3(torch.cat((x, x1, x2), 1)))
x4 = self.lrelu(self.conv4(torch.cat((x, x1, x2, x3), 1)))
x5 = self.conv5(torch.cat((x, x1, x2, x3, x4), 1))
return x5 * 0.2 + x
class RRDB(nn.Module):
def __init__(self, num_feat, num_grow_ch=32):
super(RRDB, self).__init__()
self.rdb1 = ResidualDenseBlock(num_feat, num_grow_ch)
self.rdb2 = ResidualDenseBlock(num_feat, num_grow_ch)
self.rdb3 = ResidualDenseBlock(num_feat, num_grow_ch)
def forward(self, x):
out = self.rdb1(x)
out = self.rdb2(out)
out = self.rdb3(out)
return out * 0.2 + x
class RRDBNet(nn.Module):
def __init__(self, num_in_ch=3, num_out_ch=3, num_feat=64, num_block=23, num_grow_ch=32, scale=4):
super(RRDBNet, self).__init__()
self.scale = scale
self.conv_first = nn.Conv2d(num_in_ch, num_feat, 3, 1, 1)
self.body = nn.Sequential(*[RRDB(num_feat, num_grow_ch) for _ in range(num_block)])
self.conv_body = nn.Conv2d(num_feat, num_feat, 3, 1, 1)
self.conv_up1 = nn.Conv2d(num_feat, num_feat, 3, 1, 1)
self.conv_up2 = nn.Conv2d(num_feat, num_feat, 3, 1, 1)
self.conv_hr = nn.Conv2d(num_feat, num_feat, 3, 1, 1)
self.conv_last = nn.Conv2d(num_feat, num_out_ch, 3, 1, 1)
self.lrelu = nn.LeakyReLU(negative_slope=0.2, inplace=True)
def forward(self, x):
feat = self.conv_first(x)
body_feat = self.conv_body(self.body(feat))
feat = feat + body_feat
feat = self.lrelu(self.conv_up1(F.interpolate(feat, scale_factor=2, mode='nearest')))
feat = self.lrelu(self.conv_up2(F.interpolate(feat, scale_factor=2, mode='nearest')))
out = self.conv_last(self.lrelu(self.conv_hr(feat)))
return out
# モデルダウンロード機能
def download_file_from_url(url, model_dir, progress=True, file_name=None):
os.makedirs(model_dir, exist_ok=True)
if file_name is None:
file_name = url.split('/')[-1]
file_path = os.path.join(model_dir, file_name)
if os.path.exists(file_path):
return file_path
print(f'ダウンロード中: {url}')
response = requests.get(url, stream=True)
response.raise_for_status()
total_size = int(response.headers.get('content-length', 0))
downloaded = 0
with open(file_path, 'wb') as f:
for chunk in response.iter_content(chunk_size=8192):
if chunk:
f.write(chunk)
downloaded += len(chunk)
if progress and total_size > 0:
percent = (downloaded / total_size) * 100
print(f'\rダウンロード進捗: {percent:.1f}%', end='', flush=True)
if progress:
print('\nダウンロード完了')
return file_path
# 定数定義
WEIGHTS_DIR = 'weights'
RESULT_FILE = 'result.txt'
OUTPUT_VIDEO_FILE = 'enhanced_output.mp4'
SAMPLE_FILE = 'vtest.avi'
FONT_PATH = 'C:/Windows/Fonts/meiryo.ttc'
FONT_SIZE = 20
FONT_COLOR = (0, 255, 0)
TEXT_POSITION = (10, 30)
# モデル情報定義(RealESRGAN_x2plusは12チャンネル入力)
MODEL_INFO = {
'RealESRGAN_x2plus': {
'name': 'RealESRGAN x2plus(実際は4倍)',
'description': '汎用実写画像向け、高品質',
'scale': 4,
'input_channels': 12,
'blocks': 23,
'features': 64,
'url': 'https://github.com/xinntao/Real-ESRGAN/releases/download/v0.2.1/RealESRGAN_x2plus.pth',
'file_size': '約67MB'
},
'RealESRGAN_x4plus': {
'name': 'RealESRGAN x4plus',
'description': '汎用実写画像向け、標準品質',
'scale': 4,
'input_channels': 3,
'blocks': 23,
'features': 64,
'url': 'https://github.com/xinntao/Real-ESRGAN/releases/download/v0.1.0/RealESRGAN_x4plus.pth',
'file_size': '約67MB'
},
'RealESRGAN_x4plus_anime_6B': {
'name': 'RealESRGAN x4plus Anime 6B',
'description': 'アニメ画像特化、軽量モデル',
'scale': 4,
'input_channels': 3,
'blocks': 6,
'features': 64,
'url': 'https://github.com/xinntao/Real-ESRGAN/releases/download/v0.2.2.4/RealESRGAN_x4plus_anime_6B.pth',
'file_size': '約17MB'
}
}
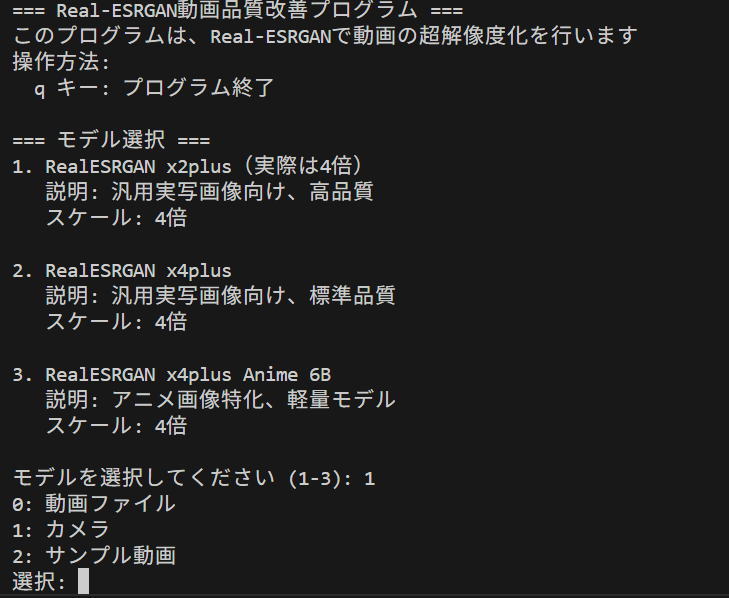
print('=== Real-ESRGAN動画品質改善プログラム ===')
print('このプログラムは、Real-ESRGANで動画の超解像度化を行います')
print('操作方法:')
print(' q キー: プログラム終了')
print('')
# フォントチェック
if not os.path.exists(FONT_PATH):
print('エラー: Meiryoフォントが見つかりません')
exit()
# FFmpeg/ffprobe利用可能性チェック
FFMPEG_AVAILABLE = False
try:
subprocess.run(['ffmpeg', '-version'], capture_output=True, check=True)
FFMPEG_AVAILABLE = True
except Exception:
pass
FFPROBE_AVAILABLE = False
try:
subprocess.run(['ffprobe', '-version'], capture_output=True, check=True)
FFPROBE_AVAILABLE = True
except Exception:
pass
# システム環境に応じた設定
if torch.cuda.is_available():
gpu_memory = torch.cuda.get_device_properties(0).total_memory / 1024**3
if gpu_memory >= 8:
TILE_SIZE = 512
USE_HALF = True
elif gpu_memory >= 4:
TILE_SIZE = 256
USE_HALF = True
else:
TILE_SIZE = 128
USE_HALF = False
else:
TILE_SIZE = 64
USE_HALF = False
# モデル選択
print('=== モデル選択 ===')
models = list(MODEL_INFO.keys())
for i, model_key in enumerate(models, 1):
info = MODEL_INFO[model_key]
print(f'{i}. {info["name"]}')
print(f' 説明: {info["description"]}')
print(f' スケール: {info["scale"]}倍')
print()
while True:
try:
choice = input(f'モデルを選択してください (1-{len(models)}): ')
choice_idx = int(choice) - 1
if 0 <= choice_idx < len(models):
MODEL_NAME = models[choice_idx]
break
else:
print(f'1から{len(models)}の間で選択してください')
except ValueError:
print('数値を入力してください')
model_info = MODEL_INFO[MODEL_NAME]
SCALE_FACTOR = model_info['scale']
# デバイス切り替え用ヘルパー関数(将来の拡張性を考慮)
def switch_to_cpu_on_oom(model, device):
"""GPUメモリ不足時にCPUに切り替える共通処理"""
print('GPU メモリ不足、CPUに切り替えます...')
torch.cuda.empty_cache()
model = model.cpu()
device = torch.device('cpu')
return model, device
# Real-ESRGANエンハンサークラス
class RealESRGANer:
def __init__(self, scale, model_path, model, tile=0, tile_pad=10, pre_pad=0, half=True, device=None, input_channels=3):
self.scale = scale
self.tile_size = tile
self.tile_pad = tile_pad
self.pre_pad = pre_pad
self.half = half
self.input_channels = input_channels
self.device = torch.device('cuda' if torch.cuda.is_available() else 'cpu') if device is None else device
loadnet = torch.load(model_path, map_location=torch.device('cpu'))
keyname = 'params_ema' if 'params_ema' in loadnet else 'params'
model.load_state_dict(loadnet[keyname], strict=True)
self.model = model.to(self.device)
self.model.eval()
if self.half and self.device.type == 'cuda':
self.model = self.model.half()
def enhance(self, img, outscale=None):
if outscale is None:
outscale = self.scale
img = img.astype(np.float32)
if np.max(img) > 256:
max_range = 65535
img = img / max_range
else:
max_range = 255
img = img / max_range
if len(img.shape) == 2:
img = np.expand_dims(img, axis=2)
if img.shape[2] == 4:
img = img[:, :, :3]
h, w = img.shape[0:2]
# 12チャンネルモデルの場合、入力を12チャンネルに拡張
if self.input_channels == 12:
img_12ch = np.concatenate([img, img, img, img], axis=2)
img = torch.from_numpy(np.transpose(img_12ch, (2, 0, 1))).float()
else:
img = torch.from_numpy(np.transpose(img, (2, 0, 1))).float()
img = img.unsqueeze(0).to(self.device)
if self.half and self.device.type == 'cuda':
img = img.half()
try:
with torch.no_grad():
output = self.model(img)
except RuntimeError as e:
if 'out of memory' in str(e).lower():
self.model, self.device = switch_to_cpu_on_oom(self.model, self.device)
img = img.cpu()
with torch.no_grad():
output = self.model(img)
else:
raise e
output = output.data.squeeze().float().cpu().clamp_(0, 1).numpy()
output = np.transpose(output, (1, 2, 0))
if outscale != self.scale:
output = cv2.resize(output, (int(w * outscale), int(h * outscale)), interpolation=cv2.INTER_LANCZOS4)
output = (output * max_range).round().astype(np.uint8)
return output, None
# モデルダウンロード
weights_dir = Path(WEIGHTS_DIR)
weights_dir.mkdir(exist_ok=True)
model_path = weights_dir / f'{MODEL_NAME}.pth'
if not model_path.exists():
print(f'モデル {model_info["name"]} をダウンロード中...')
download_file_from_url(model_info['url'], model_dir=str(weights_dir), progress=True, file_name=f'{MODEL_NAME}.pth')
# モデル初期化
model = RRDBNet(
num_in_ch=model_info['input_channels'],
num_out_ch=3,
num_feat=model_info['features'],
num_block=model_info['blocks'],
num_grow_ch=32,
scale=model_info['scale']
)
upsampler = RealESRGANer(
scale=SCALE_FACTOR,
model_path=str(model_path),
model=model,
tile=TILE_SIZE,
tile_pad=10,
pre_pad=0,
half=USE_HALF,
device=device,
input_channels=model_info['input_channels']
)
# フォント設定
font = ImageFont.truetype(FONT_PATH, FONT_SIZE)
# 品質評価の蓄積
frame_count = 0
results_log = []
def video_frame_processing(frame):
global frame_count
current_time = time.time()
frame_count += 1
# 推論実行
frame_rgb = cv2.cvtColor(frame, cv2.COLOR_BGR2RGB)
enhanced_frame, _ = upsampler.enhance(np.array(frame_rgb), outscale=None)
enhanced_frame_bgr = cv2.cvtColor(enhanced_frame, cv2.COLOR_RGB2BGR)
# 元の低解像度画像と超解像度化後の画像のサイズを合わせて比較
original_resized = cv2.resize(frame, (enhanced_frame_bgr.shape[1], enhanced_frame_bgr.shape[0]), interpolation=cv2.INTER_LANCZOS4)
# PSNR/SSIM計算
psnr_val = psnr(original_resized, enhanced_frame_bgr, data_range=255)
ssim_val = ssim(original_resized, enhanced_frame_bgr, channel_axis=2, data_range=255)
# 日本語テキスト描画
info_text = f'フレーム: {frame_count} | PSNR (vs Lanczos4): {psnr_val:.2f}dB | SSIM (vs Lanczos4): {ssim_val:.4f}'
img_pil = Image.fromarray(cv2.cvtColor(enhanced_frame_bgr, cv2.COLOR_BGR2RGB))
draw = ImageDraw.Draw(img_pil)
draw.text(TEXT_POSITION, info_text, font=font, fill=FONT_COLOR)
processed_frame = cv2.cvtColor(np.array(img_pil), cv2.COLOR_RGB2BGR)
result = f'解像度: {frame.shape[1]}x{frame.shape[0]} → {enhanced_frame_bgr.shape[1]}x{enhanced_frame_bgr.shape[0]}, PSNR (vs Lanczos4): {psnr_val:.2f}dB, SSIM (vs Lanczos4): {ssim_val:.4f}'
return processed_frame, result, current_time
print("0: 動画ファイル")
print("1: カメラ")
print("2: サンプル動画")
choice = input("選択: ")
if choice == '0':
root = tk.Tk()
root.withdraw()
path = filedialog.askopenfilename()
if not path:
exit()
cap = cv2.VideoCapture(path)
elif choice == '1':
cap = cv2.VideoCapture(0, cv2.CAP_DSHOW)
if not cap.isOpened():
cap = cv2.VideoCapture(0)
cap.set(cv2.CAP_PROP_BUFFERSIZE, 1)
else:
# サンプル動画ダウンロード・処理
SAMPLE_URL = 'https://raw.githubusercontent.com/opencv/opencv/master/samples/data/vtest.avi'
SAMPLE_FILE = 'vtest.avi'
urllib.request.urlretrieve(SAMPLE_URL, SAMPLE_FILE)
cap = cv2.VideoCapture(SAMPLE_FILE)
if not cap.isOpened():
print('動画ファイル・カメラを開けませんでした')
exit()
# 連番画像保存ディレクトリ(動画入力時のみ)
frames_dir = None
if choice != '1':
if not (FFMPEG_AVAILABLE and FFPROBE_AVAILABLE):
print('警告: ffmpeg/ffprobeが見つかりません。動画出力機能は利用できません')
else:
timestamp = datetime.now().strftime('%Y%m%d_%H%M%S')
frames_dir = Path(f'frames_{timestamp}')
frames_dir.mkdir(parents=True, exist_ok=True)
# メイン処理
print('\n=== 動画処理開始 ===')
print('操作方法:')
print(' q キー: プログラム終了')
try:
while True:
ret, frame = cap.read()
if not ret:
break
MAIN_FUNC_DESC = "Real-ESRGAN超解像度化"
processed_frame, result, current_time = video_frame_processing(frame)
cv2.imshow(MAIN_FUNC_DESC, processed_frame)
if choice == '1': # カメラの場合
print(datetime.fromtimestamp(current_time).strftime("%Y-%m-%d %H:%M:%S.%f")[:-3], result)
else: # 動画ファイルの場合
print(frame_count, result)
results_log.append(result)
# 動画入力の場合は連番PNGで保存
if choice != '1' and frames_dir is not None:
save_path = frames_dir / f'{frame_count:06d}.png'
cv2.imwrite(str(save_path), processed_frame)
if cv2.waitKey(1) & 0xFF == ord('q'):
break
finally:
print('\n=== プログラム終了 ===')
cap.release()
cv2.destroyAllWindows()
# 動画mux(動画入力時のみ)
if choice != '1' and frames_dir is not None and FFMPEG_AVAILABLE and FFPROBE_AVAILABLE:
original_path = path if choice == '0' else SAMPLE_FILE
# ffprobe_get_framerate処理をインライン化
cmd = [
'ffprobe', '-v', 'error',
'-select_streams', 'v:0',
'-show_entries', 'stream=r_frame_rate,avg_frame_rate',
'-of', 'default=nw=1:nk=1',
original_path
]
rate = None
try:
res = subprocess.run(cmd, capture_output=True, text=True, timeout=30)
if res.returncode == 0:
lines = [ln.strip() for ln in res.stdout.splitlines() if ln.strip()]
rate = lines[0] if lines else None
if rate in (None, '0/0', 'N/A', '0', ''):
rate = lines[1] if len(lines) > 1 else None
if rate in (None, '0/0', 'N/A', '0', ''):
rate = None
except Exception:
pass
if rate:
cmd = [
'ffmpeg',
'-y',
'-framerate', rate,
'-i', str(frames_dir / '%06d.png'),
'-i', original_path,
'-map', '0:v',
'-map', '1:a?',
'-shortest',
'-c:v', 'libx264',
'-pix_fmt', 'yuv420p',
'-c:a', 'aac',
OUTPUT_VIDEO_FILE
]
result = subprocess.run(cmd, capture_output=True)
if result.returncode == 0 and os.path.exists(OUTPUT_VIDEO_FILE):
print(f'動画を{OUTPUT_VIDEO_FILE}に保存しました')
# サンプル動画の削除
if choice == '2' and os.path.exists(SAMPLE_FILE):
os.remove(SAMPLE_FILE)
if results_log:
with open('result.txt', 'w', encoding='utf-8') as f:
f.write('=== 結果 ===\n')
f.write(f'処理フレーム数: {frame_count}\n')
f.write(f'使用デバイス: {str(device).upper()}\n')
if device.type == 'cuda':
f.write(f'GPU: {torch.cuda.get_device_name(0)}\n')
f.write('\n')
f.write('\n'.join(results_log))
print(f'\n処理結果をresult.txtに保存しました')