LLaVA-NeXTによる商業施設向けAI案内(ソースコードと実行結果)
プログラム利用ガイド
1. このプログラムの利用シーン
商業施設内の動画映像から、看板、標識、案内表示、商品情報を自動的に読み取り、日本語で解説する。駅、空港、ショッピングモールなどの施設で撮影された映像を解析し、利用者向けの案内情報を抽出する用途に適している。
2. 主な機能
- 動画フレームからのテキスト情報抽出:看板、標識、案内図に書かれた文字を認識する。
- 施設タイプの自動判別:映像内容から施設の種類を自動的に判定する。
- 施設別の情報抽出:駅ではプラットフォーム情報、空港ではゲート情報、ショッピングモールでは店舗情報を重点的に抽出する。
- 多言語対応:英語表記を日本語に翻訳して説明する。
- リアルタイム表示:処理結果を画面上にリアルタイムで表示する。
- 結果の保存:すべての解析結果をテキストファイル(result.txt)に保存する。
3. 基本的な使い方
- プログラム起動
プログラムを実行すると、入力ソースの選択メニューが表示される。
- 入力ソースの選択
キーボードで 0(動画ファイル)、1(カメラ)、2(サンプル動画)のいずれかを入力し、Enterキーを押す。0を選択した場合、ファイル選択ダイアログが表示される。
- 処理の実行
動画の処理が開始され、OpenCVウィンドウに映像と解析結果が表示される。コンソールには各フレームの処理結果が出力される。
- 終了
映像表示ウィンドウを選択した状態で、qキーを押す。処理結果がresult.txtファイルに自動保存される。
4. 便利な機能
- 自動施設判定:初回フレームの解析結果から施設タイプを自動判定し、以降のフレームでは該当施設に特化した情報を抽出する。
- GPU自動利用:CUDA対応GPUが利用可能な場合、自動的にGPUを使用して処理を高速化する。
- 処理状況の確認:コンソール出力で各フレームの処理状況をリアルタイムに確認できる。
- 結果の一括保存:プログラム終了時に全フレームの解析結果がresult.txtに一括保存される。
Python開発環境、ライブラリ類
ここでは、最低限の事前準備について説明する。機械学習や深層学習を行う場合は、NVIDIA CUDA、Visual Studio、Cursorなどを追加でインストールすると便利である。これらについては別ページ https://www.kkaneko.jp/cc/dev/aiassist.htmlで解説している。
Python 3.12 のインストール
インストール済みの場合は実行不要。
管理者権限でコマンドプロンプトを起動(手順:Windowsキーまたはスタートメニュー > cmd と入力 > 右クリック > 「管理者として実行」)し、以下を実行する。管理者権限は、wingetの--scope machineオプションでシステム全体にソフトウェアをインストールするために必要である。
REM Python をシステム領域にインストール
winget install --scope machine --id Python.Python.3.12 -e --silent --accept-source-agreements --accept-package-agreements
REM Python のパス設定
set "PYTHON_PATH=C:\Program Files\Python312"
set "PYTHON_SCRIPTS_PATH=C:\Program Files\Python312\Scripts"
echo "%PATH%" | find /i "%PYTHON_PATH%" >nul
if errorlevel 1 setx PATH "%PATH%;%PYTHON_PATH%" /M >nul
echo "%PATH%" | find /i "%PYTHON_SCRIPTS_PATH%" >nul
if errorlevel 1 setx PATH "%PATH%;%PYTHON_SCRIPTS_PATH%" /M >nul【関連する外部ページ】
Python の公式ページ: https://www.python.org/
AI エディタ Windsurf のインストール
Pythonプログラムの編集・実行には、AI エディタの利用を推奨する。ここでは、Windsurfのインストールを説明する。
管理者権限でコマンドプロンプトを起動(手順:Windowsキーまたはスタートメニュー > cmd と入力 > 右クリック > 「管理者として実行」)し、以下を実行して、Windsurfをシステム全体にインストールする。管理者権限は、wingetの--scope machineオプションでシステム全体にソフトウェアをインストールするために必要となる。
winget install --scope machine --id Codeium.Windsurf -e --silent --accept-source-agreements --accept-package-agreements【関連する外部ページ】
Windsurf の公式ページ: https://windsurf.com/
CUDA 12.6のインストール
AIプログラムのGPU実行に必要なCUDAとPyTorchをインストールする。GPUを搭載している場合は、これらをインストールすることでGPUを使用できる。
管理者権限でコマンドプロンプトを起動(手順:Windowsキーまたはスタートメニュー > cmd と入力 > 右クリック > 「管理者として実行」)し、以下を実行する。管理者権限は、wingetの--scope machineオプションでシステム全体にソフトウェアをインストールするために必要である。
REM CUDA、Visual Studio再配布可能パッケージをシステム領域にインストール
winget install --scope machine --accept-package-agreements --accept-source-agreements -e Nvidia.CUDA Microsoft.VCRedist.2015+.x64
REM CUDA のパス設定
set "CUDA_PATH=C:\Program Files\NVIDIA GPU Computing Toolkit\CUDA\v12.6"
if exist "%CUDA_PATH%" setx CUDA_PATH "%CUDA_PATH%" /M >nul
if exist "%CUDA_PATH%" setx CUDNN_PATH "%CUDA_PATH%" /M >nul
必要なライブラリをシステム領域にインストール
コマンドプロンプトを管理者として実行(手順:Windowsキーまたはスタートメニュー > cmd と入力 > 右クリック > 「管理者として実行」)し、以下を実行する。
pip install -U torch torchvision torchaudio --index-url https://download.pytorch.org/whl/cu126
pip install hf_xet
pip install transformers pillow requests opencv-python
LLaVA-NeXTによる商業施設向けAI案内プログラム
概要
このプログラムは、LLaVA-NeXT(v1.6)を使用した商業施設向けAI案内システムである。動画のフレームから看板、標識、商品、ロゴを認識し、案内情報を提供する。動画ファイル、カメラ、サンプル動画の3つの入力ソースに対応し、処理結果をリアルタイムで画面表示すると同時にテキストファイルに保存する。
主要技術
LLaVA-NeXT(v1.6)
LLaVA-NeXTは、事前学習された視覚エンコーダと大規模言語モデルを組み合わせたマルチモーダルモデルである[1]。LLaVA-1.5と比較して、入力画像解像度を4倍に増加させ、672×672、336×1344、1344×336の3つのアスペクト比をサポートする[1]。視覚的推論とOCR(光学文字認識)の能力を向上させた視覚指示チューニングデータの混合により訓練されている[1]。
llava-v1.6-mistral-7b-hf
このモデルは、Mistral-7BをベースとしたLLaVA-NeXTの実装である[2]。Mistral-7Bは73億パラメータを持つ言語モデルで、Grouped-query Attention(GQA)による推論とSliding Window Attention(SWA)による長いシーケンス処理を特徴とする[3]。Apache 2.0ライセンスで提供され、商用利用が可能である[3]。
技術的特徴
- 動的高解像度画像処理
AnyRes機構により、画像を動的にタイル分割して処理する。従来の336×336ピクセルから最大1344×336ピクセルまでの高解像度画像を扱える[1]。
- 施設タイプ自動検出
初回フレーム解析時に画像内容から施設の種類(駅、空港、ショッピングモール、一般)を自動判定する。検出されたキーワード(「プラットフォーム」「ゲート」「店舗」など)に基づいて分類を行う。
- 施設タイプ別プロンプト切り替え
検出された施設タイプに応じて、専用の解析プロンプトを適用する。駅では「プラットフォーム番号、路線名、時刻表」、空港では「ゲート番号、フライト情報、保安検査場」、ショッピングモールでは「店舗名、フロアガイド、セール情報」といった施設固有の情報抽出を行う。
- 多言語対応
英語で記載された看板や表示を検出した場合、その内容を日本語に翻訳して説明する。プロンプトに多言語翻訳指示を含めることで実現している。
- GPU/CPU選択
CUDA対応GPUが利用可能な場合はGPUを使用し、利用できない場合はCPUで動作する。GPU使用時はtorch.backends.cudnn.benchmarkを有効化し、推論を最適化する。
実装の特色
- 3つの入力ソース選択(動画ファイル、カメラ、サンプル動画)
- 処理結果のリアルタイム画面表示(OpenCVウィンドウに最大3行のテキストを重畳表示)
- 日本語フォント(meiryo.ttc)による結果表示
- 処理結果のファイル保存(result.txtに全フレームの解析結果を保存)
- 推論パラメータの設定(temperature=0.2、top_p=0.9、repetition_penalty=1.2)
- 重複行の削除(同一内容の繰り返しを防止)
参考文献
[1] Liu, H., Li, C., Li, Y., Li, B., Zhang, Y., Shen, S., & Lee, Y. J. (2024). LLaVA-NeXT: Improved reasoning, OCR, and world knowledge. https://llava-vl.github.io/blog/2024-01-30-llava-next/
[2] Hugging Face. (n.d.). llava-hf/llava-v1.6-mistral-7b-hf. https://huggingface.co/llava-hf/llava-v1.6-mistral-7b-hf
[3] Mistral AI. (2023). Announcing Mistral 7B. https://mistral.ai/news/announcing-mistral-7b
ソースコード
"""
- プログラム名: LLaVA-NeXTによる商業施設向けAI案内プログラム
- 特徴技術名: LLaVA-NeXT(v1.6)
- 出典: Liu, H., Li, C., Li, Y., Li, B., Zhang, Y., Shen, S., & Lee, Y. J. (2024). LLaVA-NeXT: Improved reasoning, OCR, and world knowledge. Retrieved from https://llava-vl.github.io/blog/2024-01-30-llava-next/
- 特徴機能: 動的高解像度画像処理による視覚認識とOCR能力(従来の4倍の解像度で画像解析し、光学文字認識と視覚的推論を統合)
- 学習済みモデル: llava-hf/llava-v1.6-mistral-7b-hf(Mistral-7Bをベースとしたマルチモーダル言語モデル、商用利用可能、多言語対応)、URL: https://huggingface.co/llava-hf/llava-v1.6-mistral-7b-hf
- 方式設計
- 関連利用技術:
- OpenCV(リアルタイム画像・動画処理)
- Transformers(深層学習モデル処理)
- PIL(画像操作・テキスト描画)
- tkinter(ファイル選択GUI)
- 入力と出力:
- 入力: 動画(ユーザは「0:動画ファイル,1:カメラ,2:サンプル動画」のメニューで選択.0:動画ファイルの場合はtkinterでファイル選択.1の場合はOpenCVでカメラが開く.2の場合はhttps://raw.githubusercontent.com/opencv/opencv/master/samples/data/vtest.aviを使用)
- 出力: 処理結果をOpenCV画面でリアルタイム表示.OpenCV画面内に処理結果をテキストで表示.各フレームごとにprint()で処理結果を表示.プログラム終了時にprint()で表示した処理結果をresult.txtファイルに保存し,「result.txtに保存」したことをprint()で表示.プログラム開始時にプログラムの概要とユーザが行う必要がある操作をprint()で表示.
- 処理手順: フレーム取得→PIL変換→LLaVA-NeXTによる多言語案内情報解析→結果表示→result.txt保存
- 前処理、後処理: 前処理:BGR→RGB変換とPIL形式変換、後処理:日本語フォント適用とテキスト重畳表示
- 追加処理: 動的高解像度画像処理(AnyRes)による認識精度向上、商業施設特化の案内情報抽出プロンプト適用
- 調整を必要とする設定値: ANALYSIS_QUESTION(解析質問内容、商業施設の特性に応じた案内情報取得のためのプロンプト文字列)
- 将来方策: 商業施設の種類(駅、空港、ショッピングモール等)に応じた専用プロンプトテンプレートの動的切り替え機能
- その他の重要事項: CUDA対応GPU推奨、日本語フォント(meiryo.ttc)必須、transformers>=4.39.0必須
- 前準備:
pip install torch torchvision torchaudio --index-url https://download.pytorch.org/whl/cu126
pip install transformers pillow opencv-python
"""
import cv2
import tkinter as tk
from tkinter import filedialog
import urllib.request
import torch
from transformers import LlavaNextProcessor, LlavaNextForConditionalGeneration
from PIL import Image, ImageDraw, ImageFont
import numpy as np
import time
from datetime import datetime
# 設定定数
MAX_NEW_TOKENS_MAIN = 300
TEMPERATURE = 0.2
TOP_P = 0.9
# 施設タイプごとのプロンプトテンプレート
FACILITY_PROMPTS = {
'station': '駅構内の画像です。以下の項目を日本語で箇条書きで分析してください:\n・プラットフォーム番号、路線名、行き先\n・出口案内、階段、エスカレーター、エレベーターの位置\n・時刻表、運行情報、遅延情報\n・売店、トイレ、コインロッカーなどの施設\n・その他の案内表示や注意事項',
'airport': '空港内の画像です。以下の項目を日本語で箇条書きで分析してください:\n・ゲート番号、搭乗口、チェックインカウンター\n・出発・到着情報、フライト情報\n・保安検査場、出入国審査、税関の位置\n・レストラン、免税店、ラウンジなどの施設\n・その他の案内表示や注意事項',
'mall': 'ショッピングモール内の画像です。以下の項目を日本語で箇条書きで分析してください:\n・店舗名、ブランド名、営業時間\n・フロアガイド、エレベーター、エスカレーターの位置\n・レストラン、フードコート、トイレの位置\n・セール情報、イベント情報\n・その他の案内表示や注意事項',
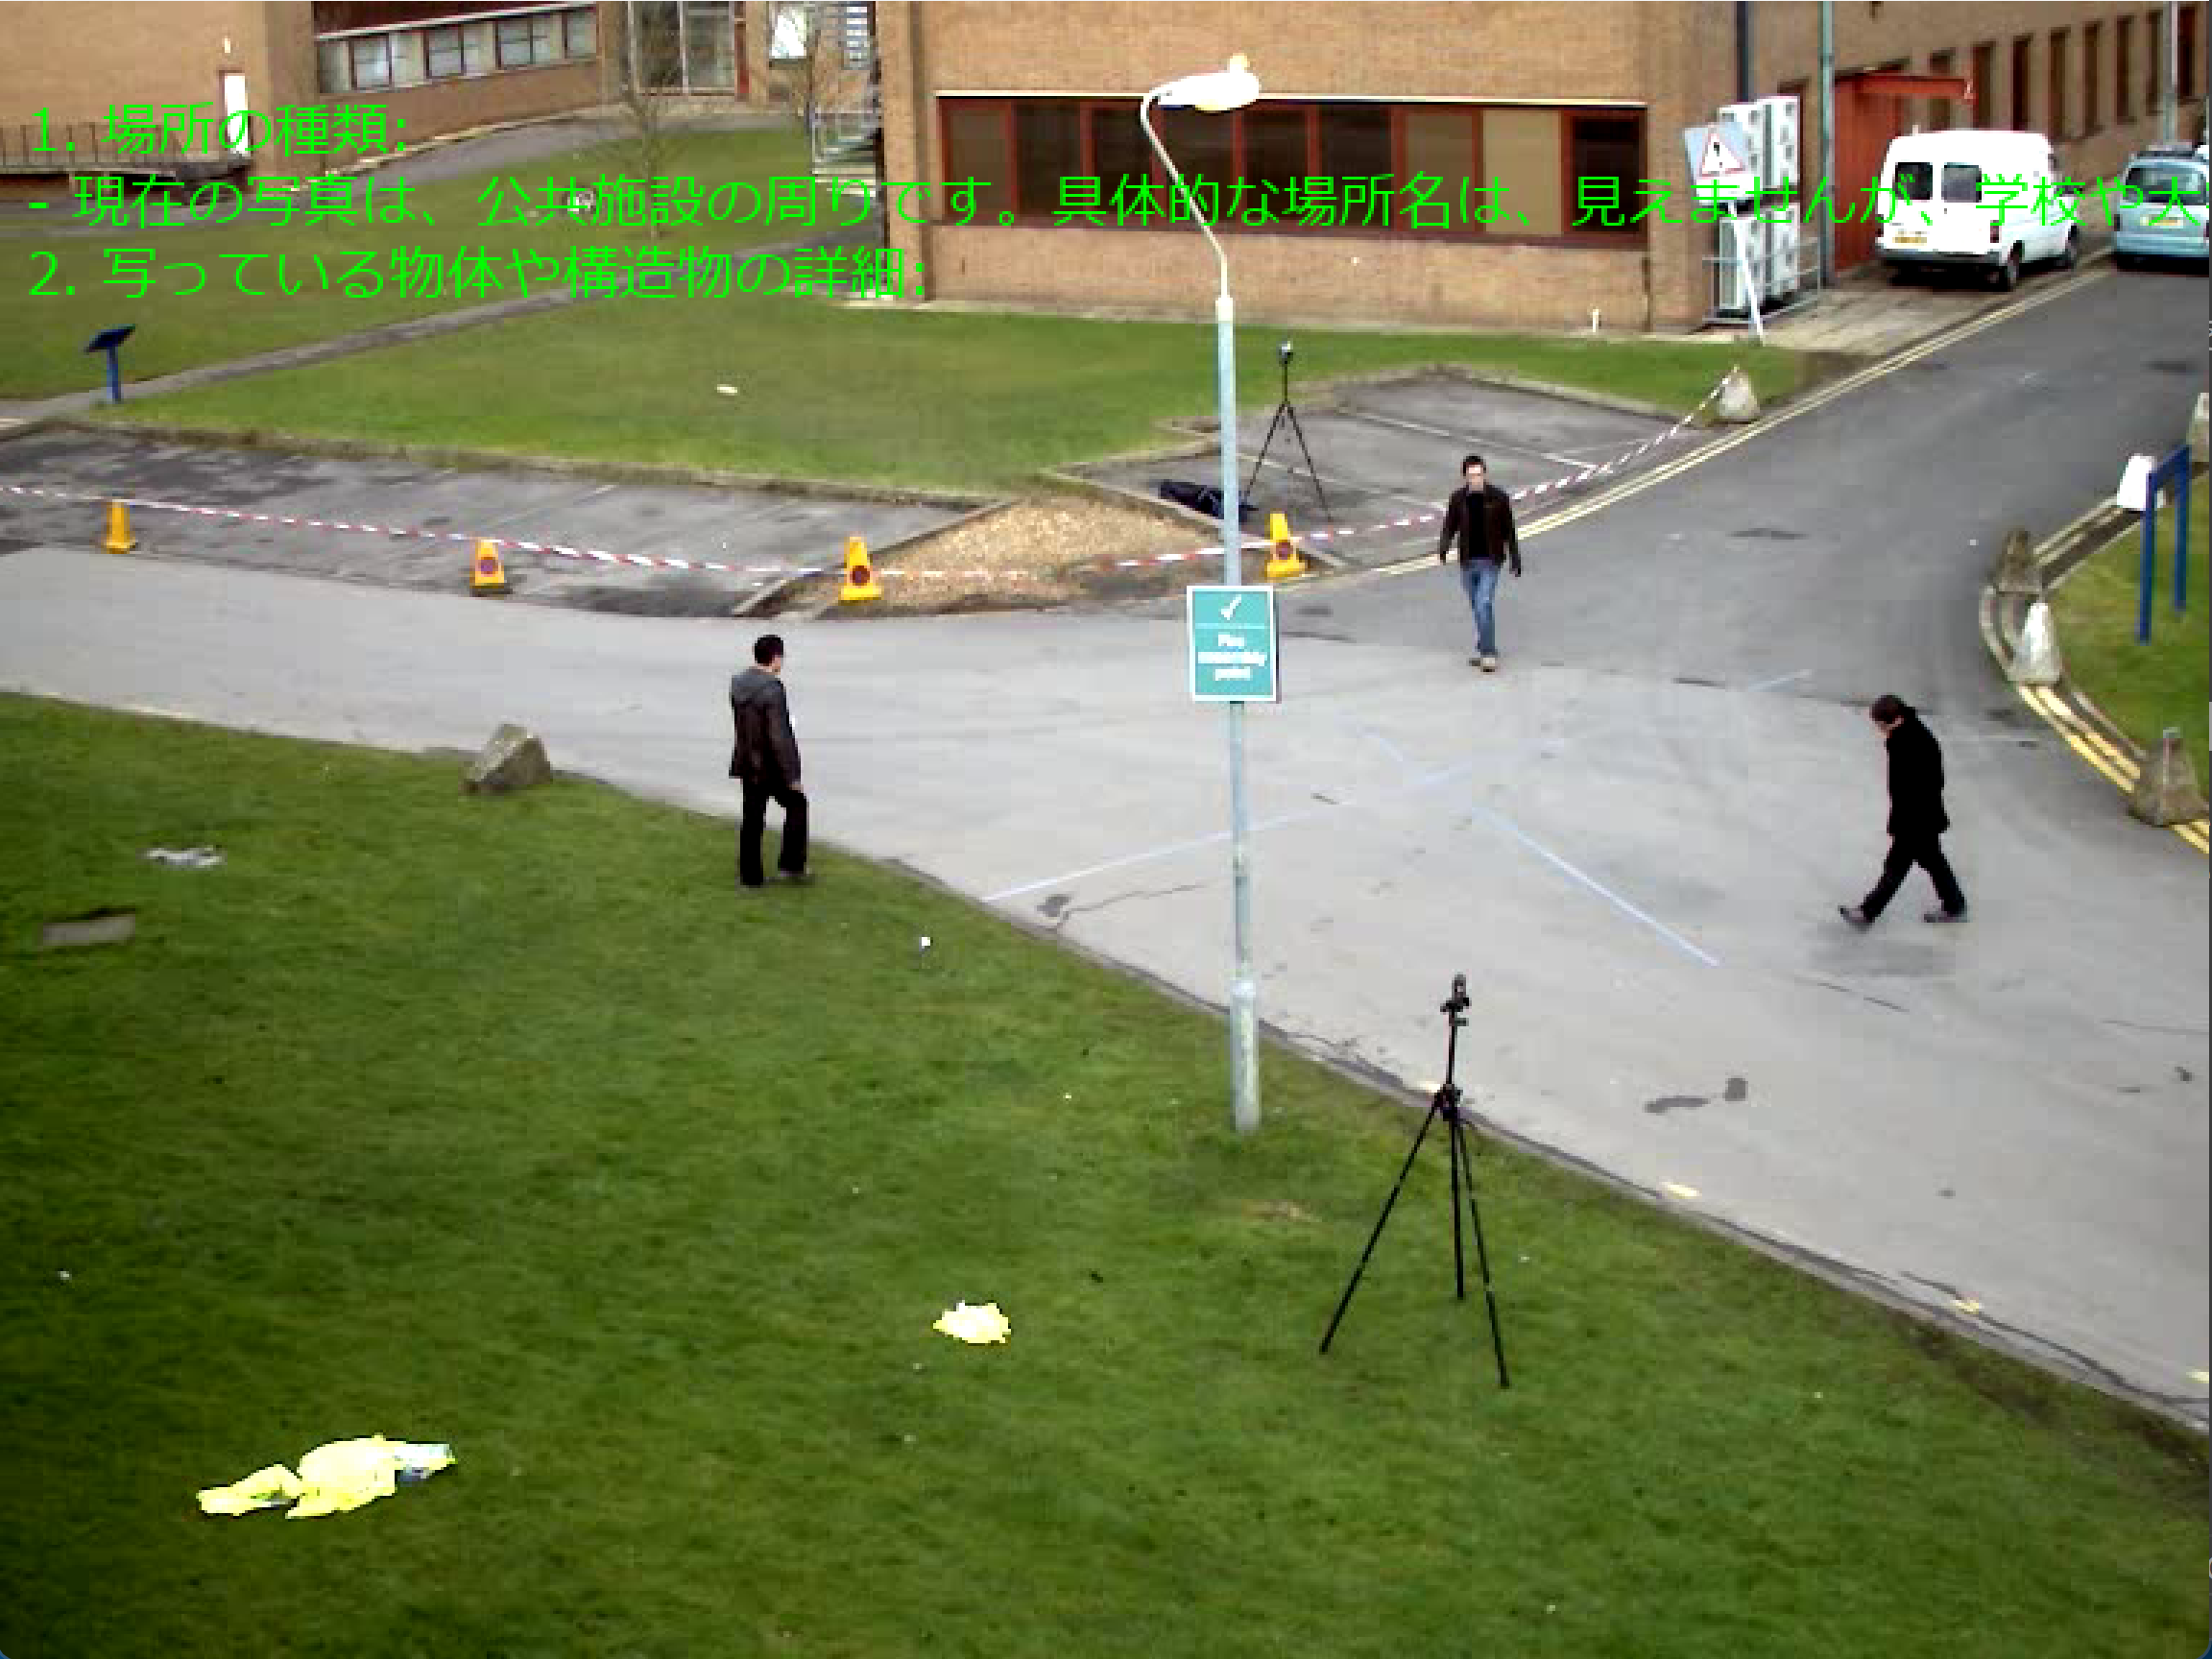
'general': 'この画像について以下の項目を日本語で箇条書きで詳しく分析してください:\n・場所の種類(屋内/屋外、建物の種類、具体的な場所名)\n・写っている物体や構造物の詳細\n・看板、案内図、標識、標示などに書かれている文字情報\n・時間帯、天候、季節などの状況\n・その他の特徴的で有用な情報\n※必ず日本語で回答してください。'
}
# 多言語プロンプト
MULTILINGUAL_PROMPT = '\n\n検出された英語の看板や表示がある場合は、その内容を日本語に翻訳して説明してください。'
print('\n=== LLaVA-NeXT商業施設向けAI案内システム ===')
print('このシステムは動画から看板、標識、商品、アイコン、ロゴを認識し、案内情報を提供します')
print('操作方法:')
print(' q キー: プログラム終了')
print('注意事項:')
print(' - GPU推奨(CPUでも動作可能ですが処理が遅くなります)')
print(' - 初回実行時はモデルのダウンロードに時間がかかります')
def load_model():
"""LLaVA-NeXTモデルとプロセッサをロード(GPUメモリ不足時はCPUにフォールバック)"""
try:
print('\nモデルをロード中...')
model_id = 'llava-hf/llava-v1.6-mistral-7b-hf'
# まずGPUでの読み込みを試みる
if torch.cuda.is_available():
try:
print('GPUでのモデルロードを試みています...')
model_kwargs = {
'torch_dtype': torch.float16,
'device_map': 'auto',
'low_cpu_mem_usage': True
}
model = LlavaNextForConditionalGeneration.from_pretrained(model_id, **model_kwargs)
device = torch.device('cuda')
model.eval()
print(f'GPUでのモデルロード成功(デバイス: {device})')
except (RuntimeError, torch.cuda.OutOfMemoryError) as e:
print(f'\nGPUメモリ不足のため、CPUモードに切り替えます')
print(f'エラー詳細: {str(e)[:100]}...')
torch.cuda.empty_cache() # GPUメモリをクリア
# CPUで再ロード
model_kwargs = {
'torch_dtype': torch.float32,
'device_map': None,
'low_cpu_mem_usage': True
}
model = LlavaNextForConditionalGeneration.from_pretrained(model_id, **model_kwargs)
device = torch.device('cpu')
model.to(device)
model.eval()
print(f'CPUでのモデルロード成功(デバイス: {device})')
else:
# GPUが利用不可の場合は最初からCPU
print('GPUが利用できません。CPUモードで起動します')
model_kwargs = {
'torch_dtype': torch.float32,
'device_map': None,
'low_cpu_mem_usage': True
}
model = LlavaNextForConditionalGeneration.from_pretrained(model_id, **model_kwargs)
device = torch.device('cpu')
model.to(device)
model.eval()
print(f'CPUでのモデルロード完了(デバイス: {device})')
processor = LlavaNextProcessor.from_pretrained(model_id)
print('モデルのロード完了')
return model, processor, device
except Exception as e:
print(f'モデルのロードに失敗しました: {e}')
print('transformers ライブラリをインストールしてください:')
print('pip install transformers')
exit()
def detect_facility_type(text):
"""画像解析結果から施設タイプを推定"""
text_lower = text.lower()
# 駅の特徴的なキーワード
if any(keyword in text for keyword in ['プラットフォーム', '路線', '時刻表', '改札', '乗り場', 'platform', 'railway', 'train']):
return 'station'
# 空港の特徴的なキーワード
elif any(keyword in text for keyword in ['ゲート', '搭乗', 'フライト', '出発', '到着', 'gate', 'flight', 'departure', 'arrival']):
return 'airport'
# ショッピングモールの特徴的なキーワード
elif any(keyword in text for keyword in ['店舗', 'ショップ', 'フロア', 'セール', 'レストラン', 'shop', 'store', 'floor', 'sale']):
return 'mall'
return 'general'
def analyze_image(model, processor, image, facility_type='general'):
"""画像を解析して案内情報を抽出"""
try:
# 施設タイプに応じたプロンプトを選択
base_prompt = FACILITY_PROMPTS.get(facility_type, FACILITY_PROMPTS['general'])
prompt = base_prompt + MULTILINGUAL_PROMPT
conversation = [
{
'role': 'user',
'content': [
{'type': 'image'},
{'type': 'text', 'text': prompt},
],
},
]
prompt = processor.apply_chat_template(conversation, add_generation_prompt=True)
inputs = processor(images=image, text=prompt, return_tensors='pt')
if torch.cuda.is_available():
inputs = {k: v.to('cuda') for k, v in inputs.items()}
with torch.inference_mode():
output = model.generate(
**inputs,
max_new_tokens=MAX_NEW_TOKENS_MAIN,
do_sample=True,
temperature=TEMPERATURE,
top_p=TOP_P,
pad_token_id=processor.tokenizer.eos_token_id,
eos_token_id=processor.tokenizer.eos_token_id,
repetition_penalty=1.2
)
response = processor.decode(output[0], skip_special_tokens=True)
# LLaVA-NeXTの応答形式に対応
if '[/INST]' in response:
response = response.split('[/INST]')[-1].strip()
elif 'ASSISTANT:' in response:
response = response.split('ASSISTANT:')[-1].strip()
# 結果が空または短い場合のフォールバック
if len(response.strip()) < 10:
return "画像の解析に失敗しました。"
# 重複行の削除
lines = response.split('\n')
seen = set()
cleaned = []
for line in lines:
if line.strip() and line.strip() not in seen:
cleaned.append(line)
seen.add(line.strip())
return '\n'.join(cleaned)
except Exception as e:
return f'画像解析エラー: {e}'
# モデルをロード(deviceも返り値に含める)
model, processor, device = load_model()
print(f'デバイス: {str(device)}')
# GPU使用時の最適化
if device.type == 'cuda':
torch.backends.cudnn.benchmark = True
# グローバル変数
frame_count = 0
results_log = []
current_facility_type = 'general'
facility_type_detected = False
def video_frame_processing(frame):
"""動画フレームを処理"""
global frame_count, current_facility_type, facility_type_detected
current_time = time.time()
frame_count += 1
# BGR→RGB変換とPIL形式変換
image_rgb = cv2.cvtColor(frame, cv2.COLOR_BGR2RGB)
pil_image = Image.fromarray(image_rgb)
# 初回のみ施設タイプを自動検出
if not facility_type_detected and frame_count == 1:
initial_response = analyze_image(model, processor, pil_image, 'general')
detected_type = detect_facility_type(initial_response)
if detected_type != 'general':
current_facility_type = detected_type
facility_type_detected = True
print(f'施設タイプを検出: {detected_type}')
# 画像解析
result = analyze_image(model, processor, pil_image, current_facility_type)
# 結果を画面に表示
processed_frame = frame.copy()
FONT_PATH = 'C:/Windows/Fonts/meiryo.ttc'
FONT_SIZE = 20
try:
font = ImageFont.truetype(FONT_PATH, FONT_SIZE)
except:
font = ImageFont.load_default()
img_pil = Image.fromarray(cv2.cvtColor(processed_frame, cv2.COLOR_BGR2RGB))
draw = ImageDraw.Draw(img_pil)
# 解析結果の最初の3行を表示
lines = result.split('\n')[:3]
for i, line in enumerate(lines):
if len(line) > 40:
line = line[:40] + '...'
draw.text((10, 30 + i * 25), line, font=font, fill=(0, 255, 0))
processed_frame = cv2.cvtColor(np.array(img_pil), cv2.COLOR_RGB2BGR)
# 結果を簡潔に整形
result_summary = result.replace('\n', ' ')[:100] + '...' if len(result) > 100 else result.replace('\n', ' ')
return processed_frame, result_summary, current_time
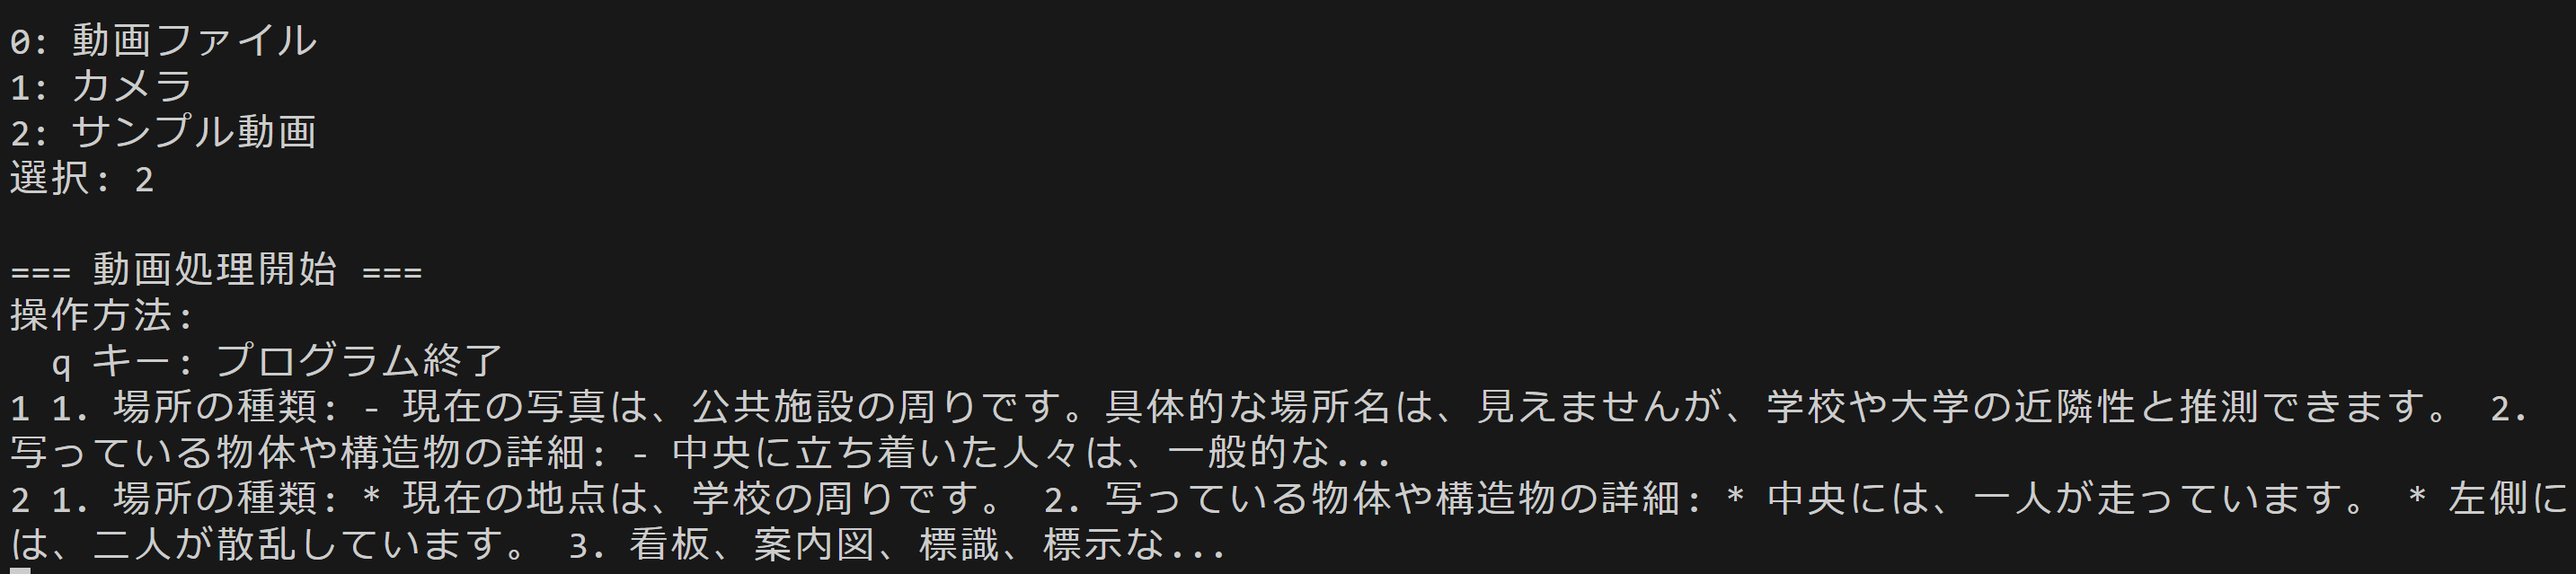
print("\n0: 動画ファイル")
print("1: カメラ")
print("2: サンプル動画")
choice = input("選択: ")
if choice == '0':
root = tk.Tk()
root.withdraw()
path = filedialog.askopenfilename()
if not path:
exit()
cap = cv2.VideoCapture(path)
elif choice == '1':
cap = cv2.VideoCapture(0, cv2.CAP_DSHOW)
if not cap.isOpened():
cap = cv2.VideoCapture(0)
cap.set(cv2.CAP_PROP_BUFFERSIZE, 1)
else:
# サンプル動画ダウンロード・処理
SAMPLE_URL = 'https://raw.githubusercontent.com/opencv/opencv/master/samples/data/vtest.avi'
SAMPLE_FILE = 'vtest.avi'
urllib.request.urlretrieve(SAMPLE_URL, SAMPLE_FILE)
cap = cv2.VideoCapture(SAMPLE_FILE)
if not cap.isOpened():
print('動画ファイル・カメラを開けませんでした')
exit()
# メイン処理
print('\n=== 動画処理開始 ===')
print('操作方法:')
print(' q キー: プログラム終了')
try:
while True:
ret, frame = cap.read()
if not ret:
break
MAIN_FUNC_DESC = "商業施設AI案内"
processed_frame, result, current_time = video_frame_processing(frame)
cv2.imshow(MAIN_FUNC_DESC, processed_frame)
if choice == '1': # カメラの場合
print(datetime.fromtimestamp(current_time).strftime("%Y-%m-%d %H:%M:%S.%f")[:-3], result)
else: # 動画ファイルの場合
print(frame_count, result)
results_log.append(result)
if cv2.waitKey(1) & 0xFF == ord('q'):
break
finally:
print('\n=== プログラム終了 ===')
cap.release()
cv2.destroyAllWindows()
if results_log:
with open('result.txt', 'w', encoding='utf-8') as f:
f.write('=== 結果 ===\n')
f.write(f'処理フレーム数: {frame_count}\n')
f.write(f'使用デバイス: {str(device).upper()}\n')
if device.type == 'cuda':
f.write(f'GPU: {torch.cuda.get_device_name(0)}\n')
f.write('\n')
f.write('\n'.join(results_log))
print(f'\n処理結果をresult.txtに保存しました')
実験・研究スキルの基礎:Windowsで学ぶ画像解析実験
1. 実験・研究のスキル構成要素
実験や研究を行うには、以下の5つの構成要素を理解する必要がある。
1.1 実験用データ
このプログラムでは動画ファイルまたはカメラ映像が実験用データである。商業施設(駅、空港、ショッピングモール等)で撮影された映像を使用することで、看板や案内表示の認識精度を評価できる。
1.2 実験計画
何を明らかにするために実験を行うのかを定める。
計画例:
- 生成トークン数がテキスト抽出の完全性に与える影響を確認する
- 温度パラメータ(temperature)が応答の多様性に与える影響を確認する
- 施設タイプ別プロンプトが情報抽出精度に与える影響を確認する
- 異なる解像度の画像における文字認識精度を比較する
- 英語表記の看板に対する日本語翻訳の精度を評価する
- 多言語プロンプトの有無が翻訳品質に与える影響を確認する
1.3 プログラム
実験を実施するためのツールである。このプログラムはLLaVA-NeXT(v1.6)モデルとTransformersライブラリを使用している。
- プログラムの機能を理解して活用することが基本である
- 基本となるプログラムを出発点として、将来、様々な機能を自分で追加することができる
1.4 プログラムの機能
このプログラムは複数のパラメータで画像解析を制御する。
入力パラメータ:
- max_new_tokens:生成する最大トークン数(50~500)
- temperature:応答の多様性を制御する温度パラメータ(0.0~2.0)
- top_p:累積確率によるサンプリング閾値(0.0~1.0)
- facility_prompts:施設タイプ別の解析プロンプト(駅、空港、モール、一般)
- multilingual_prompt:多言語翻訳指示の有無
出力情報:
- OpenCVウィンドウへの映像表示と解析結果のテキスト重畳表示
- コンソールへのフレームごとの解析結果出力
- result.txtファイルへの全解析結果の保存
- 検出された施設タイプの表示
処理の流れ:
- フレーム取得→PIL変換→LLaVA-NeXTによる解析→結果表示→ファイル保存
- 初回フレームで施設タイプを自動検出し、以降は専用プロンプトを適用
1.5 検証(結果の確認と考察)
プログラムの実行結果を観察し、パラメータの影響を考察する。
基本認識:
- パラメータを変えると結果が変わる。その変化を観察することが実験である
- 「良い結果」「悪い結果」は目的によって異なる
観察のポイント:
- 抽出されたテキスト情報は完全か、途中で切れていないか
- 看板や標識の文字は正しく認識されているか
- 施設タイプの自動判定は正確か
- 英語表記の日本語翻訳は適切か
- 重要な情報(路線名、ゲート番号、店舗名など)が抽出されているか
- 同じ内容が繰り返し出力されていないか
- 処理速度は実用的か(GPU使用時とCPU使用時の比較)
2. 間違いの原因と対処方法
2.1 プログラムのミス(人為的エラー)
プログラムがエラーで停止する
- 原因:transformersライブラリのバージョンが古い(4.39.0未満)、日本語フォントが見つからない
- 対処方法:pip install transformers --upgradeを実行する。フォントパスを環境に合わせて修正する
モデルのロードに失敗する
- 原因:初回実行時に約13GBのモデルをダウンロードする必要がある、ネットワーク接続が不安定
- 対処方法:これは正常な動作である。ダウンロードが完了するまで待つ。十分なディスク容量を確保する
GPU使用時にメモリ不足エラーが発生する
- 原因:GPUメモリが不足している(7Bモデルは約14GBのGPUメモリを必要とする)
- 対処方法:他のプログラムを終了してメモリを解放する
日本語が文字化けする
- 原因:日本語フォント(meiryo.ttc)が見つからない、またはパスが間違っている
- 対処方法:FONT_PATH変数を環境に存在するフォントパスに変更する
2.2 期待と異なる結果が出る場合
看板の文字が正しく認識されない
- 原因:画像解像度が低い、文字が小さすぎる、または複雑な背景により文字が不明瞭
- 対処方法:高解像度の映像を使用する。LLaVA-NeXTは最大1344×336ピクセルまで対応している
施設タイプの自動判定が間違っている
- 原因:初回フレームに特徴的なキーワードが含まれていない
- 対処方法:これは正常な動作である。detect_facility_type関数のキーワードリストを確認し、必要に応じて追加する
生成されたテキストが途中で切れている
- 原因:max_new_tokensの値が小さすぎる
- 対処方法:max_new_tokensを300から500程度に増やす。ただし、処理時間も増加する
同じ内容が繰り返し出力される
- 原因:repetition_penaltyの値が低すぎる、またはtemperatureが高すぎる
- 対処方法:repetition_penaltyを1.2から1.5に増やす、またはtemperatureを0.2から0.1に下げる
英語の翻訳が出力されない
- 原因:multilingual_promptが適用されていない、または画像内に英語表記がない
- 対処方法:プロンプトにmultilingual_promptが含まれているか確認する。英語表記が明確に写っている画像を使用する
処理が遅い
- 原因:CPUモードで動作している、またはGPUメモリが不足してスワップが発生している
- 対処方法:CUDA対応GPUが利用可能か確認する。デバイス表示で「cuda」と表示されていればGPUを使用している
3. 実験レポートのサンプル
生成トークン数が情報抽出の完全性に与える影響
実験目的:
駅構内の案内表示を含む画像から、路線名、行き先、時刻表情報を完全に抽出するための適切な生成トークン数を見つける。
実験計画:
temperature=xxx、top_p=xxxに固定し、max_new_tokensを変化させて情報抽出の完全性を評価する。施設タイプは「station」に設定する。
実験方法:
プログラムを実行し、max_new_tokensの値を変更しながら以下の基準で評価する:
- 情報完全性:要求した全項目(路線名、行き先、時刻表等)が出力されているか
- テキスト切断:文章が途中で切れていないか
- 処理時間:xxxフレームあたりの処理時間(目安)
実験結果:
| max_new_tokens | 路線名 | 行き先 | 時刻表 | 施設情報 | テキスト切断 | 処理時間 |
|---|---|---|---|---|---|---|
| xxx | xxx | xxx | xxx | xxx | xxx | xxx |
| xxx | xxx | xxx | xxx | xxx | xxx | xxx |
| xxx | xxx | xxx | xxx | xxx | xxx | xxx |
| xxx | xxx | xxx | xxx | xxx | xxx | xxx |
| xxx | xxx | xxx | xxx | xxx | xxx | xxx |
考察:
- (例文)max_new_tokens=xxxでは基本的な情報(路線名、行き先)は抽出できたが、時刻表や施設情報の途中で出力が切れた。(例文)短い応答で済む用途には適している
- (例文)max_new_tokens=xxxでは時刻表の一部が抽出できたが、不完全であった。(例文)情報量の多い画像には不十分である
- (例文)max_new_tokens=xxxでは要求した主要項目がすべて出力され、テキスト切断も発生しなかった。(例文)処理時間も許容範囲内である
- (例文)max_new_tokens=xxx(デフォルト値)ではすべての項目が完全に出力され、追加の注意事項も含まれていた。(例文)情報の完全性と処理時間のバランスが取れている
- (例文)max_new_tokens=xxxでは出力内容はxxxと同等であったが、処理時間が増加した。(例文)余剰トークンを生成しているため非効率である
結論:
(例文)本実験の駅構内画像においては、max_new_tokens=xxxがバランスの取れた設定であった。(例文)簡易的な情報抽出にはxxxでも十分であるが、詳細な案内情報を確実に抽出する場合はxxxを推奨する。(例文)xxx以上に増やしても情報量は増えず、処理時間のみが増加するため、実用的ではない。(例文)施設の種類や画像の情報密度に応じて、xxx~xxxの範囲で調整することが望ましい。
温度パラメータが応答の安定性に与える影響
実験目的:
同じ画像を繰り返し解析したときの応答の一貫性を評価し、商業施設案内システムに適した温度パラメータを見つける。
実験計画:
同一画像に対して各温度設定でxxx回解析を実行し、結果のばらつきを評価する。max_new_tokens=xxx、top_p=xxxに固定する。
実験方法:
空港ゲート案内の画像を使用し、temperatureを変化させながら以下を記録する:
- 応答の一貫性:xxx回の実行で同じ情報が抽出されるか
- 情報の正確性:ゲート番号、フライト情報が正確か
- 表現の多様性:同じ内容を異なる表現で説明しているか
実験結果:
| temperature | 一貫性(xxx段階) | 正確性(xxx段階) | 多様性(xxx段階) | 総合評価 |
|---|---|---|---|---|
| xxx | xxx | xxx | xxx | xxx |
| xxx | xxx | xxx | xxx | xxx |
| xxx | xxx | xxx | xxx | xxx |
| xxx | xxx | xxx | xxx | xxx |
| xxx | xxx | xxx | xxx | xxx |
考察:
- (例文)temperature=xxxではxxx回の実行で同一の応答が得られ、ゲート番号やフライト情報も正確に抽出された。(例文)案内システムとして信頼性がある
- (例文)temperature=xxx(デフォルト値)では一貫性を保ちながら、わずかな表現のバリエーションが見られた。(例文)実用性と柔軟性のバランスが取れている
- (例文)temperature=xxxでは同じ画像でも異なる情報が抽出される場合があり、一貫性が低下した
- (例文)temperature=xxxでは応答のばらつきが大きく、時には誤った情報や関連性の低い情報が含まれた
- (例文)temperature=xxxでは応答が不安定で、実用的でない結果が多く含まれた
結論:
(例文)商業施設案内システムでは応答の一貫性と正確性が重要であるため、temperature=xxx~xxxの範囲が適している。(例文)デフォルト値のxxxは、安定性を保ちながら自然な表現を生成できるため推奨される。(例文)創造的なタスクではより高い温度が有用であるが、案内情報の抽出では低い温度設定が望ましいことが確認できた。