SAM2による画像セグメンテーション
事前準備
基本環境の構築
Python, Windsurfをインストールしていない場合の手順(インストール済みの場合は実行不要)。
- 管理者権限でコマンドプロンプトを起動する(手順:Windowsキーまたはスタートメニュー > cmd と入力 > 右クリック > 「管理者として実行」)。
- 以下のコマンドをそれぞれ実行する(winget コマンドは1つずつ実行)。
REM Python をシステム領域にインストール
winget install --scope machine --id Python.Python.3.12 -e --silent
REM Windsurf をシステム領域にインストール
winget install --scope machine --id Codeium.Windsurf -e --silent
REM Python のパス設定
set "PYTHON_PATH=C:\Program Files\Python312"
set "PYTHON_SCRIPTS_PATH=C:\Program Files\Python312\Scripts"
echo "%PATH%" | find /i "%PYTHON_PATH%" >nul
if errorlevel 1 setx PATH "%PATH%;%PYTHON_PATH%" /M >nul
echo "%PATH%" | find /i "%PYTHON_SCRIPTS_PATH%" >nul
if errorlevel 1 setx PATH "%PATH%;%PYTHON_SCRIPTS_PATH%" /M >nul
REM Windsurf のパス設定
set "WINDSURF_PATH=C:\Program Files\Windsurf"
if exist "%WINDSURF_PATH%" (
    echo "%PATH%" | find /i "%WINDSURF_PATH%" >nul
    if errorlevel 1 setx PATH "%PATH%;%WINDSURF_PATH%" /M >nul
)
必要なパッケージのインストール
コマンドプロンプトを管理者として実行(手順:Windowsキーまたはスタートメニュー > cmd と入力 > 右クリック > 「管理者として実行」)し、以下を実行する。
pip install -U torch torchvision torchaudio --index-url https://download.pytorch.org/whl/cu126
pip install sam2 opencv-python numpy requests pillow tqdm
SAM2画像セグメンテーションプログラム
ソースコード
# SAM2.1画像セグメンテーションプログラム
# 技術名: SAM2.1 (Segment Anything Model 2.1)
# 出典: Ravi, N., Gabeur, V., Hu, Y.-T., Hu, R., Ryali, C., Ma, T., Khedr, H., Rädle, R., Rolland, C., Pan, J., Alwala, K. V., Carion, N., Wu, C.-Y., Girshick, R., Dollár, P., & Feichtenhofer, C. (2024). SAM 2: Segment Anything in Images and Videos. arXiv:2408.00714
# 機能: プロンプタブル・セグメンテーション - 点プロンプトを用いて画像内の任意のオブジェクトをセグメント化し、グリッドベースの網羅的検出を実現
# 学習済みモデル: SAM2.1 Hiera - Segment Anything Model 2.1、複数バリエーション対応
# 方式設計:
#   - 関連利用技術: PyTorch(深層学習フレームワーク、GPU加速推論)、OpenCV(画像処理、カメラアクセス)、NumPy(数値計算)、Requests(モデルダウンロード)、Pillow(日本語表示)、tqdm(進捗表示)
#   - 入力と出力: 入力: 動画(ユーザは「0:動画ファイル,1:カメラ,2:サンプル動画」のメニューで選択)、出力: OpenCV画面でセグメンテーション結果表示、各フレームごとに検出オブジェクト数を表示、終了時にresult.txtファイルに保存
#   - 処理手順: 1)入力フレームの前処理(1024x1024へのリサイズとパディング)、2)グリッドベース点プロンプト生成(元画像解像度基準で20pixel間隔生成)、3)SAM2ImagePredictorによる各点でのセグメンテーション実行、4)全マスクの論理和統合と連結成分分析、5)面積閾値フィルタリングと色分け表示
#   - 前処理、後処理: 前処理)1024x1024へのリサイズとパディング、テンソル正規化、後処理)連結成分による物体分離、最近傍補間で元画像解像度へ拡大し二値化、元画像サイズに応じた面積フィルタリング
#   - 追加処理: グリッドベースのプロンプト生成により全画像を網羅的にセグメンテーション、SAM2.1の統一アーキテクチャによる処理
#   - 調整を必要とする設定値: グリッドポイント間隔(現在20pixel)- セグメンテーションの細かさを制御、最小面積比率(現在0.0001)- 小さなノイズ除去レベルを制御
# 将来方策: グリッドポイント間隔の動的調整機能 - フレーム内のオブジェクト密度を分析し、密度が高い領域では間隔を狭く、低い領域では広く設定する適応的グリッド生成
# その他の重要事項: Windows環境でのDirectShowバックエンド使用、バッファクリアによる最新フレーム取得、Apache 2.0ライセンスでオープンソース公開、SA-Vデータセット使用
# 前準備: pip install -U torch torchvision torchaudio --index-url https://download.pytorch.org/whl/cu126
# git clone https://github.com/facebookresearch/sam2.git && cd sam2 && pip install -e .
# pip install opencv-python numpy requests pillow tqdm

import cv2
import numpy as np
import torch
import requests
import tkinter as tk
from tkinter import filedialog
import urllib.request
import time
from pathlib import Path
from sam2.build_sam import build_sam2
from sam2.sam2_image_predictor import SAM2ImagePredictor
from PIL import Image, ImageDraw, ImageFont
from tqdm import tqdm
from datetime import datetime

# GPU/CPU自動選択
device = torch.device('cuda' if torch.cuda.is_available() else 'cpu')
print(f'デバイス: {str(device)}')
# GPU使用時の最適化
if device.type == 'cuda':
    torch.backends.cudnn.benchmark = True

# SAM2.1モデル設定
SAM21_MODELS = {
    '0': {
        'name': 'SAM2.1 Hiera-Tiny',
        'checkpoint': 'sam2.1_hiera_tiny.pt',
        'config': 'configs/sam2.1/sam2.1_hiera_t.yaml',
        'url': 'https://dl.fbaipublicfiles.com/segment_anything_2/092824/sam2.1_hiera_tiny.pt',
        'size': '38.9M'
    },
    '1': {
        'name': 'SAM2.1 Hiera-Small',
        'checkpoint': 'sam2.1_hiera_small.pt',
        'config': 'configs/sam2.1/sam2.1_hiera_s.yaml',
        'url': 'https://dl.fbaipublicfiles.com/segment_anything_2/092824/sam2.1_hiera_small.pt',
        'size': '46M'
    },
    '2': {
        'name': 'SAM2.1 Hiera-Base-Plus',
        'checkpoint': 'sam2.1_hiera_base_plus.pt',
        'config': 'configs/sam2.1/sam2.1_hiera_b+.yaml',
        'url': 'https://dl.fbaipublicfiles.com/segment_anything_2/092824/sam2.1_hiera_base_plus.pt',
        'size': '80.8M'
    },
    '3': {
        'name': 'SAM2.1 Hiera-Large',
        'checkpoint': 'sam2.1_hiera_large.pt',
        'config': 'configs/sam2.1/sam2.1_hiera_l.yaml',
        'url': 'https://dl.fbaipublicfiles.com/segment_anything_2/092824/sam2.1_hiera_large.pt',
        'size': '224.4M'
    }
}

CHUNK_SIZE = 8192
SEED = 42
# セグメンテーション設定
INPUT_SIZE = 1024
GRID_SPACING = 20  # グリッドポイント間隔(調整可能)
MIN_AREA_RATIO = 0.0001  # 最小面積比率(元画像サイズの0.01%)
# ファイル出力設定
FILE_ENCODING = 'utf-8'
# フォント設定
FONT_PATH = 'C:/Windows/Fonts/meiryo.ttc'
FONT_SIZE = 20

def download_model_with_progress(url, filepath):
    """tqdmを使用してモデルをダウンロード"""
    response = requests.get(url, stream=True)
    response.raise_for_status()

    total_size = int(response.headers.get('content-length', 0))

    with open(filepath, 'wb') as file, tqdm(
        desc=f"ダウンロード中: {filepath.name}",
        total=total_size,
        unit='B',
        unit_scale=True,
        unit_divisor=1024,
    ) as pbar:
        for chunk in response.iter_content(chunk_size=CHUNK_SIZE):
            if chunk:
                file.write(chunk)
                pbar.update(len(chunk))

frame_count = 0
results_log = []

def video_frame_processing(frame):
    global frame_count
    current_time = time.time()
    frame_count += 1

    rgb = cv2.cvtColor(frame, cv2.COLOR_BGR2RGB)
    obj_count = 0

    with torch.no_grad():
        h, w = rgb.shape[:2]
        scale = INPUT_SIZE / max(h, w)
        new_h, new_w = int(h * scale), int(w * scale)

        resized = cv2.resize(rgb, (new_w, new_h))
        padded = np.zeros((INPUT_SIZE, INPUT_SIZE, 3), dtype=np.uint8)
        padded[:new_h, :new_w] = resized

        predictor.set_image(padded)

        # 元画像解像度基準でグリッドポイント生成
        orig_xs = list(range(0, w, GRID_SPACING))
        orig_ys = list(range(0, h, GRID_SPACING))

        # リサイズ後の座標に変換
        scaled_xs = [int(x * scale) for x in orig_xs if int(x * scale) < new_w]
        scaled_ys = [int(y * scale) for y in orig_ys if int(y * scale) < new_h]
        points = [[x, y] for y in scaled_ys for x in scaled_xs]

        all_masks = np.zeros((INPUT_SIZE, INPUT_SIZE), dtype=bool)
        for point in points:
            masks, _, _ = predictor.predict(
                point_coords=np.array([point]),
                point_labels=np.array([1]),
                multimask_output=False
            )
            if len(masks) > 0:
                all_masks |= masks[0].astype(bool)

    mask_img = np.zeros((h, w, 3), dtype=np.uint8)
    result_frame = frame.copy()

    if all_masks.any():
        # パディングを除いた実領域に限定
        combined_mask = all_masks[:new_h, :new_w]
        # 元画像解像度へ最近傍補間で拡大後,明示的に二値化
        resized_masks = cv2.resize(
            combined_mask.astype(np.uint8),
            (w, h),
            interpolation=cv2.INTER_NEAREST
        )
        bin_mask = (resized_masks > 0).astype(np.uint8)

        # 元画像サイズに応じた最小面積閾値を計算
        min_area_threshold = int(w * h * MIN_AREA_RATIO)

        # 連結成分解析(元画像ピクセル数基準)
        num_labels, labels = cv2.connectedComponents(bin_mask)

        for i in range(1, num_labels):
            mask = (labels == i)
            if mask.sum() > min_area_threshold:
                obj_count += 1
                color = np.random.randint(0, 255, 3).tolist()
                mask_img[mask] = color

                # 輪郭線描画
                contours, _ = cv2.findContours(mask.astype(np.uint8), cv2.RETR_EXTERNAL, cv2.CHAIN_APPROX_SIMPLE)
                cv2.drawContours(result_frame, contours, -1, color, 2)

    # 合成画像の作成
    result_frame = cv2.addWeighted(result_frame, 0.6, mask_img, 0.4, 0)

    # 検出数の表示(日本語表示)
    img_pil = Image.fromarray(cv2.cvtColor(result_frame, cv2.COLOR_BGR2RGB))
    draw = ImageDraw.Draw(img_pil)
    text = f"検出オブジェクト数: {obj_count}個"
    draw.text((10, 10), text, font=font, fill=(0, 255, 0))
    result_frame = cv2.cvtColor(np.array(img_pil), cv2.COLOR_RGB2BGR)

    result = f"検出オブジェクト数: {obj_count}個"
    return result_frame, result, current_time

# 乱数シード設定(再現性)
np.random.seed(SEED)
torch.manual_seed(SEED)

# weightsフォルダの作成
weights_dir = Path('weights')
weights_dir.mkdir(exist_ok=True)

# モデル選択メニュー表示
print('=== SAM2.1モデル選択 ===')
for key, model in SAM21_MODELS.items():
    print(f"{key}: {model['name']} - モデルサイズ: {model['size']}")

model_choice = input('モデルを選択してください: ')
if model_choice not in SAM21_MODELS:
    print('無効な選択です')
    exit()

selected_model = SAM21_MODELS[model_choice]
checkpoint_name = selected_model['checkpoint']
config_name = selected_model['config']
model_url = selected_model['url']

print(f'選択されたモデル: {selected_model["name"]}')

# SAM2.1モデルダウンロード
model_path = weights_dir / checkpoint_name
if not model_path.exists():
    print(f'ダウンロード開始: {checkpoint_name}')
    try:
        download_model_with_progress(model_url, model_path)
        print(f'ダウンロード完了: {model_path}')
    except Exception as e:
        print(f'モデルのダウンロードに失敗しました: {model_url}')
        print(f'エラー: {e}')
        exit()
else:
    print(f'既存ファイルを使用: {checkpoint_name}')

# SAM2.1モデル初期化
sam2_model = build_sam2(config_name, str(model_path), device=device)
predictor = SAM2ImagePredictor(sam2_model)

# フォント初期化
try:
    font = ImageFont.truetype(FONT_PATH, FONT_SIZE)
except:
    font = ImageFont.load_default()
    print('日本語フォントの読み込みに失敗しました。デフォルトフォントを使用します。')

# プログラム説明表示(ガイダンス)
print('=== SAM2.1画像セグメンテーションプログラム ===')
print('概要: SAM2.1を使用して動画内のオブジェクトをセグメント化します')
print('操作: 画像ウィンドウをアクティブにして q キーで終了します')
print('注意: 初回はモデルをダウンロードする場合があります(数十MB〜数百MB)')
print('注意: GPUが利用できない場合はCPUで実行します(処理速度は環境に依存)')
print('出力: セグメンテーション結果をOpenCV画面に表示、検出数を各フレームごとに表示し、result.txtに保存します')
print('=====================================')

print("0: 動画ファイル")
print("1: カメラ")
print("2: サンプル動画")

choice = input("選択: ")

if choice == '0':
    root = tk.Tk()
    root.withdraw()
    path = filedialog.askopenfilename()
    if not path:
        exit()
    cap = cv2.VideoCapture(path)
elif choice == '1':
    cap = cv2.VideoCapture(0, cv2.CAP_DSHOW)
    if not cap.isOpened():
        cap = cv2.VideoCapture(0)
    cap.set(cv2.CAP_PROP_BUFFERSIZE, 1)
else:
    # サンプル動画ダウンロード・処理
    SAMPLE_URL = 'https://raw.githubusercontent.com/opencv/opencv/master/samples/data/vtest.avi'
    SAMPLE_FILE = 'vtest.avi'
    urllib.request.urlretrieve(SAMPLE_URL, SAMPLE_FILE)
    cap = cv2.VideoCapture(SAMPLE_FILE)

if not cap.isOpened():
    print('動画ファイル・カメラを開けませんでした')
    exit()

# メイン処理
print('\n=== 動画処理開始 ===')
print('操作方法:')
print('  q キー: プログラム終了')
try:
    while True:
        ret, frame = cap.read()
        if not ret:
            break

        MAIN_FUNC_DESC = "SAM2.1セグメンテーション結果"
        processed_frame, result, current_time = video_frame_processing(frame)
        cv2.imshow(MAIN_FUNC_DESC, processed_frame)
        if choice == '1':  # カメラの場合
            print(datetime.fromtimestamp(current_time).strftime("%Y-%m-%d %H:%M:%S.%f")[:-3], result)
        else:  # 動画ファイルの場合
            print(frame_count, result)
        results_log.append(result)
        if cv2.waitKey(1) & 0xFF == ord('q'):
            break
finally:
    print('\n=== プログラム終了 ===')
    cap.release()
    cv2.destroyAllWindows()
    if results_log:
        with open('result.txt', 'w', encoding='utf-8') as f:
            f.write('=== 結果 ===\n')
            f.write(f'処理フレーム数: {frame_count}\n')
            f.write(f'使用デバイス: {str(device).upper()}\n')
            if device.type == 'cuda':
                f.write(f'GPU: {torch.cuda.get_device_name(0)}\n')
            f.write('\n')
            f.write('\n'.join(results_log))
        print(f'\n処理結果をresult.txtに保存しました')
実行と結果
- 上記のプログラムを実行する
- プログラム実行時には、SAM2モデルがダウンロードされる。
- セグメンテーションが開始される。
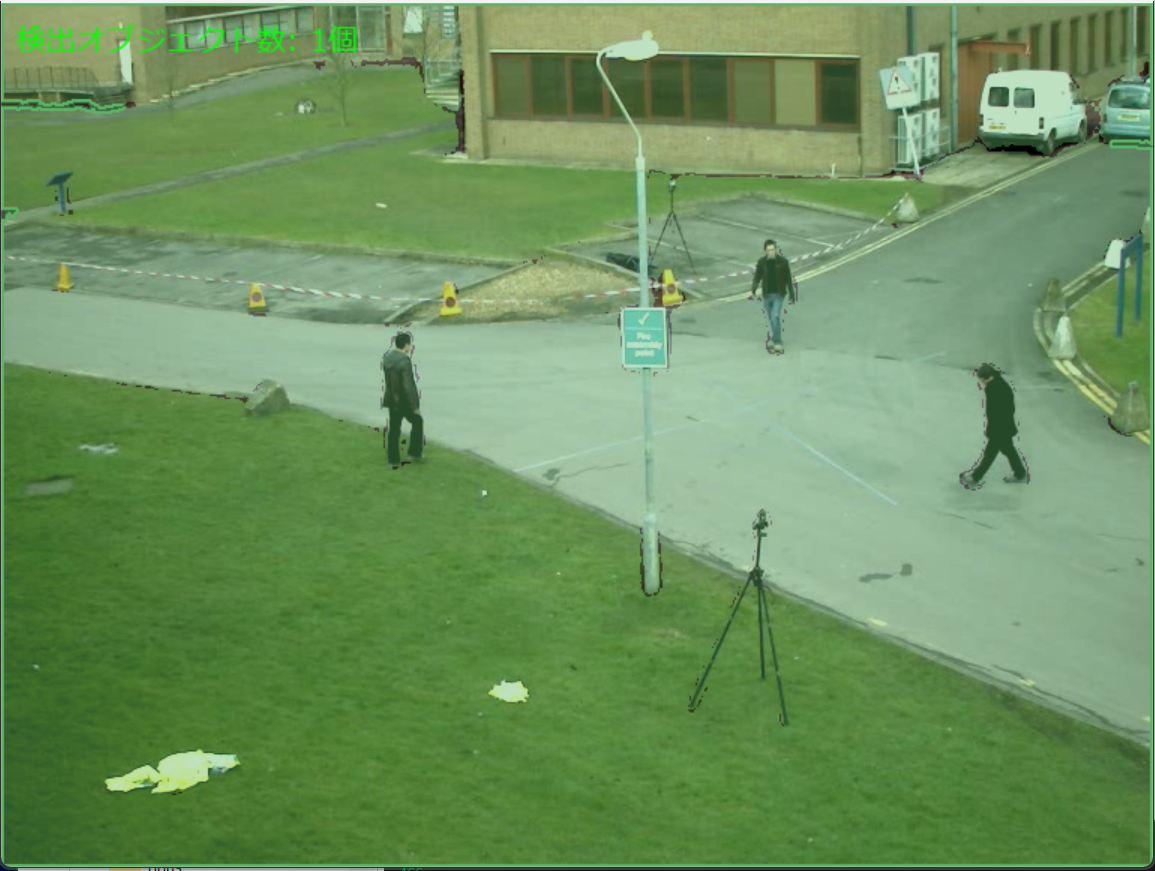
- 検出された物体が色分けされ、輪郭線が描かれ,元画像に重ねて表示される。
- 'q'キーで処理が終了する。
実験・探求
パラメータ調整実験
グリッドベースのポイントプロンプトの密度を変更することで、セグメンテーションの精度と処理速度のバランスを調整できる。プログラム内のrange(100, 900, 20)の値を変更し、密なグリッド(range(100, 900, 10))や粗いグリッド(range(100, 900, 50))を試すことができる。
最小面積フィルタの閾値(現在は1000)を変更することで、検出される物体の大きさを制御できる。小さな物体も検出したい場合は値を小さくし、大きな物体のみを検出したい場合は値を大きくする。
段階的検証実験
基礎実験として単一物体をWebカメラの前に配置し、検出性能を確認する。透明な物体、反射する物体、複雑な形状の物体、単色の物体など、特徴の異なる物体での検出結果を比較する。
応用実験として複数の物体を同時に配置し、重なり合った物体や類似した色の物体がどのように区別されるかを観察する。限界確認実験として照明条件を変更し、明るい環境と暗い環境での性能差を確認する。背景の複雑さによる影響も比較する。