DeepSeek-OCR によるPDF・画像OCR(ソースコードと説明と利用ガイド)
【概要】DeepSeek-OCRは、PDFや画像から文字情報を抽出するOCRツールである。Context Optical Compression技術により7〜20倍のトークン削減を実現し、5段階の解像度モードで処理速度と精度のバランスを選択できる。本記事では、プログラムの利用方法、技術的背景、ソースコード、実験ガイドを解説する。
【目次】
プログラム利用ガイド
1. このプログラムの利用シーン
PDFドキュメントやスキャン画像から文字情報を抽出し、テキストに変換するためのツールである。論文、レポート、スキャン文書、画像内の文字列など、幅広い文書タイプに対応する。
2. 主な機能
- 複数ファイルの一括処理: PDF、PNG、JPG、BMP、TIFFの各形式に対応し、複数ファイルを同時に選択して処理できる。
- 5段階の解像度設定: Tiny(最速)からGundam(最高精度)までの5つのモードから、処理速度と精度のバランスを選択できる。
- Free OCRモード: 座標情報を必要としない純粋なテキスト抽出を行う。斜めに配置された文字にも対応する。
- PDF自動分割処理: PDFファイルを自動的にページ単位で分割し、各ページを個別にOCR処理する。
- 処理結果の即時表示: 各ファイルの処理結果をコンソールに表示し、処理状況を確認できる。
3. 基本的な使い方
事前準備
以下のパッケージを事前にインストールする必要がある。
- transformers、tokenizers、einops、PyMuPDF
- Flash Attention 2(環境に応じたプリビルドwhlファイル)
- NVIDIA GPU環境(CUDA 11.8以上)
実行手順
- プログラムを起動する。モデルのロードには数秒から数十秒を要する。
- モード選択画面で1〜5の数字を入力し、Enterキーを押す。初回利用時はBase(3)を推奨する。
- ファイル選択ダイアログが表示されるため、処理したいPDFまたは画像ファイルを選択する。複数ファイルの選択も可能である。
- 処理が自動的に開始され、各ファイルのOCR結果がコンソールに表示される。
- 全ファイルの処理完了後、処理統計情報が表示される。
4. 便利な機能
- 解像度モードの選択: 単純な文書にはTinyまたはSmallモード、表やグラフを含む複雑な文書にはBaseまたはLargeモード、学術論文や数式を含む文書にはGundamモードを使用する。
- 複数ファイルの一括処理: 同じモードで複数の文書を連続処理することで、作業効率を向上させる。
- PDFの自動ページ分割: 複数ページのPDFファイルを選択すると、各ページが自動的に分割されて処理される。
- 処理結果の確認: コンソールに表示される結果をコピーすることで、すぐに他のアプリケーションで利用できる。
DeepSeek-OCR の公式プロンプト
-
ドキュメント用
"<image>\n<|grounding|>Convert the document to markdown."
座標付き、Markdown形式で出力
-
一般画像用
"<image>\n<|grounding|>OCR this image."
座標付き、一般OCR
-
レイアウトなしテキストのみ(現在使用中)
"<image>\nFree OCR."
座標なし、純粋なテキスト抽出
-
図表解析
"<image>\nParse the figure."
図表の内容を解析
-
画像の詳細説明
"<image>\nDescribe this image in detail."
OCRではなく画像キャプション生成
-
特定テキストの位置検索
"<image>\nLocate <|ref|>xxxx</ref|> in the image."
指定したテキストの座標を返す
Python開発環境、ライブラリ類
ここでは、最低限の事前準備について説明する。機械学習や深層学習を行う場合は、NVIDIA CUDA、Visual Studio、Cursorなどを追加でインストールすると便利である。これらについては別ページ https://www.kkaneko.jp/cc/dev/aiassist.html で詳しく解説している。
Python 3.12 のインストール
インストール済みの場合は実行不要である。
管理者権限でコマンドプロンプトを起動し(Windowsキーまたはスタートメニューからcmdと入力、右クリックして「管理者として実行」)、以下を実行する。管理者権限は、wingetの--scope machineオプションでシステム全体にソフトウェアをインストールするために必要である。
REM Python をシステム領域にインストール
winget install --scope machine --id Python.Python.3.12 -e --silent --accept-source-agreements --accept-package-agreements
REM Python のパス設定
set "PYTHON_PATH=C:\Program Files\Python312"
set "PYTHON_SCRIPTS_PATH=C:\Program Files\Python312\Scripts"
echo "%PATH%" | find /i "%PYTHON_PATH%" >nul
if errorlevel 1 setx PATH "%PATH%;%PYTHON_PATH%" /M >nul
echo "%PATH%" | find /i "%PYTHON_SCRIPTS_PATH%" >nul
if errorlevel 1 setx PATH "%PATH%;%PYTHON_SCRIPTS_PATH%" /M >nul【関連する外部ページ】
Python の公式ページ: https://www.python.org/
AI エディタ Windsurf のインストール
Pythonプログラムの編集・実行には、AI エディタの利用を推奨する。ここでは、Windsurfのインストールを説明する。
管理者権限でコマンドプロンプトを起動し(Windowsキーまたはスタートメニューからcmdと入力、右クリックして「管理者として実行」)、以下を実行して、Windsurfをシステム全体にインストールする。管理者権限は、wingetの--scope machineオプションでシステム全体にソフトウェアをインストールするために必要となる。
winget install --scope machine --id Codeium.Windsurf -e --silent --accept-source-agreements --accept-package-agreements【関連する外部ページ】
Windsurf の公式ページ: https://windsurf.com/
必要なライブラリをシステム領域にインストール
コマンドプロンプトを管理者として実行し(Windowsキーまたはスタートメニューからcmdと入力、右クリックして「管理者として実行」)、以下を実行する。
pip install transformers==4.46.3 tokenizers==0.20.3 einops addict easydict gitpython PyMuPDFflash-attnはプリビルドwhlをダウンロードしてインストールする(環境に合わせて選択)。参考ページ: https://github.com/mjun0812/flash-attention-prebuild-wheels/releases
pip install https://github.com/mjun0812/flash-attention-prebuild-wheels/releases/download/v0.4.15/flash_attn-2.8.3+cu126torch2.9-cp312-cp312-win_amd64.whlプログラムコード
1. 概要
このプログラムは、PDFファイルおよび画像ファイルから文字情報を抽出するOCRアプリケーションである。DeepSeek-OCRモデル、Free OCR プロンプトを使用する。複数ファイルの処理に対応し、GUIでファイルを選択できる。
2. 主要技術
Context Optical Compression
DeepSeek-OCRが採用する視覚圧縮技術である[1]。テキストを画像として扱い、ビジョンエンコーダで少数のビジョントークンに圧縮することで、従来のテキストトークン表現と比較して7〜20倍のトークン削減を実現する。Fox benchmarkでは、10倍圧縮時に97%の精度を維持することが報告されている[1]。
DeepEncoder + MoEデコーダ構造
DeepEncoderは約380Mパラメータを持つ視覚エンコーダで、SAM(Segment Anything Model)[2]とCLIP(Contrastive Language-Image Pre-training)[3]の2つのコンポーネントを組み合わせている。SAMはウィンドウアテンションで局所的な知覚を行い、CLIPは密なアテンションで大域的な理解を行う[1]。両者の間には16倍の畳み込み圧縮層があり、ビジョントークン数を削減する。デコーダはDeepSeek3B-MoEモデルで、約570Mの活性パラメータを持つ[1]。
3. 技術的特徴
- 動的解像度モード
5つの解像度モード(Tiny: 512×512/64トークン、Small: 640×640/100トークン、Base: 1024×1024/256トークン、Large: 1280×1280/400トークン、Gundam: 動的タイリング)があり、処理対象に応じて選択できる[1]。
- Free OCRモード
座標情報を出力せず、純粋なテキスト抽出に特化したモードである。斜めに配置された文字や複雑なレイアウトに対応する。
- Flash Attention 2統合
アテンション計算の実装にFlash Attention 2を採用し、メモリ効率と計算速度を向上させる。
- GPU専用アーキテクチャ
CUDA環境でのみ動作し、bfloat16精度での推論を行う。RTX 3070以上のGPUを推奨する。
4. 実装の特色
PDFと画像の両形式に対応し、以下の機能を実装する。
- PDFの各ページを150dpi相当で画像化してOCR処理を実行
- 複数ファイルの一括選択と逐次処理
- Tkinterベースのファイル選択ダイアログ
- 警告メッセージの抑制による出力の整理
- 処理結果のコンソール表示と統計情報の出力
5. 参考文献
[1] DeepSeek-AI. (2025). DeepSeek-OCR: Contexts Optical Compression. GitHub. https://github.com/deepseek-ai/DeepSeek-OCR
[2] Kirillov, A., et al. (2023). Segment Anything. arXiv:2304.02643. https://arxiv.org/abs/2304.02643
[3] Radford, A., et al. (2021). Learning Transferable Visual Models From Natural Language Supervision. arXiv:2103.00020. https://github.com/openai/CLIP
ソースコード
"""
DeepSeek-OCR による画像・PDF OCRアプリケーション
画像ファイルまたはPDFを選択してOCR処理を実行します
事前インストールが必要なパッケージ (Windows):
pip install transformers==4.46.3 tokenizers==0.20.3 einops addict easydict gitpython PyMuPDF
pip install https://github.com/mjun0812/flash-attention-prebuild-wheels/releases/download/v0.4.15/flash_attn-2.8.3+cu126torch2.9-cp312-cp312-win_amd64.whl
flash-attnはプリビルドwhlをダウンロードしてインストール(環境に合わせて選択):
https://github.com/mjun0812/flash-attention-prebuild-wheels/releases
"""
import warnings
warnings.filterwarnings('ignore')
import os
os.environ['TF_CPP_MIN_LOG_LEVEL'] = '3'
os.environ['TF_ENABLE_ONEDNN_OPTS'] = '0'
os.environ['TRANSFORMERS_VERBOSITY'] = 'error'
import sys
import logging
logging.getLogger('transformers').setLevel(logging.CRITICAL)
logging.getLogger('transformers.generation').setLevel(logging.CRITICAL)
logging.getLogger('transformers.modeling_utils').setLevel(logging.CRITICAL)
import tkinter as tk
from tkinter import filedialog
from transformers import AutoModel, AutoTokenizer
import torch
from pathlib import Path
import fitz
import tempfile
import shutil
from io import StringIO
SUPPORTED_IMAGE_FORMATS = ['.png', '.jpg', '.jpeg', '.bmp', '.tiff']
PDF_ZOOM_FACTOR = 150 / 72
MODE_CONFIGS = {
"1": {"base_size": 512, "image_size": 512, "crop_mode": False, "name": "Tiny", "tokens": "64"},
"2": {"base_size": 640, "image_size": 640, "crop_mode": False, "name": "Small", "tokens": "100"},
"3": {"base_size": 1024, "image_size": 1024, "crop_mode": False, "name": "Base", "tokens": "256"},
"4": {"base_size": 1280, "image_size": 1280, "crop_mode": False, "name": "Large", "tokens": "400"},
"5": {"base_size": 1024, "image_size": 640, "crop_mode": True, "name": "Gundam", "tokens": "n×100+256 (動的)"}
}
class TeeOutput:
"""標準出力を複数のストリームに分配"""
def __init__(self, *streams):
self.streams = streams
def write(self, data):
for stream in self.streams:
stream.write(data)
def flush(self):
for stream in self.streams:
stream.flush()
class SuppressOutput:
"""出力を抑制"""
def write(self, data):
pass
def flush(self):
pass
def print_separator():
print("=" * 60)
def run_ocr_inference(image_path, config, model, tokenizer, prompt):
old_stdout = sys.stdout
old_stderr = sys.stderr
captured_out = StringIO()
sys.stdout = TeeOutput(old_stdout, captured_out)
sys.stderr = SuppressOutput()
temp_output_dir = tempfile.mkdtemp()
try:
model.infer(
tokenizer,
prompt=prompt,
image_file=image_path,
output_path=temp_output_dir,
base_size=config['base_size'],
image_size=config['image_size'],
crop_mode=config['crop_mode'],
save_results=True,
test_compress=False
)
finally:
sys.stdout = old_stdout
sys.stderr = old_stderr
output = captured_out.getvalue()
filtered_lines = []
for line in output.split('\n'):
if line.startswith('BASE:') or line.startswith('PATCHES:') or line.startswith('====='):
continue
if line.strip():
filtered_lines.append(line)
result_path = os.path.join(temp_output_dir, "result.md")
result_text = None
if os.path.exists(result_path):
with open(result_path, 'r', encoding='utf-8') as f:
result_text = f.read()
shutil.rmtree(temp_output_dir, ignore_errors=True)
return result_text if result_text else '\n'.join(filtered_lines)
def execute_ocr(image_path, filename_base, config, model, tokenizer, original_path):
print(f" 処理中(Free OCRモード - 高精度)...")
prompt_text = "<image>\nFree OCR."
result_text = run_ocr_inference(image_path, config, model, tokenizer, prompt_text)
return {
'filename': filename_base,
'text': result_text,
'original': original_path
}
def process_file(file_path, config, model, tokenizer):
file_ext = Path(file_path).suffix.lower()
if file_ext in SUPPORTED_IMAGE_FORMATS:
result_dict = execute_ocr(
file_path,
Path(file_path).name,
config,
model,
tokenizer,
file_path
)
return [result_dict]
elif file_ext == '.pdf':
doc = fitz.open(file_path)
total_pages = len(doc)
print(f" ページ数: {total_pages}")
results = []
for page_num in range(total_pages):
page = doc[page_num]
mat = fitz.Matrix(PDF_ZOOM_FACTOR, PDF_ZOOM_FACTOR)
pix = page.get_pixmap(matrix=mat)
tmp_path = None
try:
with tempfile.NamedTemporaryFile(suffix='.png', delete=False) as tmp_file:
tmp_path = tmp_file.name
pix.save(tmp_path)
filename_base = f"{Path(file_path).stem}_page{page_num + 1}.png"
result_dict = execute_ocr(
tmp_path,
filename_base,
config,
model,
tokenizer,
file_path
)
result_dict['filename'] = f"{Path(file_path).name} Page {page_num + 1}/{total_pages}"
results.append(result_dict)
finally:
if tmp_path and os.path.exists(tmp_path):
os.unlink(tmp_path)
doc.close()
return results
else:
print(f"未対応形式: {file_path}")
return []
def select_files_dialog():
root = tk.Tk()
root.withdraw()
root.update()
user_files = filedialog.askopenfilenames(
title="ファイルを選択してください(複数選択可)",
filetypes=[
("対応ファイル", "*.pdf *.png *.jpg *.jpeg *.bmp *.tiff"),
("すべてのファイル", "*.*")
]
)
root.destroy()
return user_files
print_separator()
print("DeepSeek-OCR: 画像・PDFからMarkdown変換")
print("\n【モデル選択】")
print("1. Tiny (512×512, 64トークン) - 最速")
print("2. Small (640×640, 100トークン) - 高速")
print("3. Base (1024×1024, 256トークン) - 推奨・バランス型")
print("4. Large (1280×1280, 400トークン) - 高精度")
print("5. Gundam (動的解像度) - 最高精度")
choice = input("\nモード選択 (1-5, デフォルト=3): ").strip() or "3"
config = MODE_CONFIGS.get(choice, MODE_CONFIGS["3"])
print(f"\n選択: {config['name']}モード")
print("\n【モデルについて】")
print("""DeepSeek-OCRは2つのコンポーネントで構成:
1. DeepEncoder: 画像を圧縮しビジョントークンに変換(SAM+CLIP構造)
2. DeepSeek3B-MoE: ビジョントークンからテキストを復元(570M活性パラメータ)
特徴: 7-20倍トークン削減、97%精度で10倍圧縮達成(Fox benchmark)""")
print("\nモデルロード中...")
if not torch.cuda.is_available():
print_separator()
print("【エラー】NVIDIA GPUが検出されませんでした")
print("DeepSeek-OCRはNVIDIA GPU専用モデルです")
print_separator()
raise RuntimeError("GPU required for DeepSeek-OCR")
print(f"デバイス: cuda")
tokenizer = AutoTokenizer.from_pretrained('deepseek-ai/DeepSeek-OCR', trust_remote_code=True)
model = AutoModel.from_pretrained(
'deepseek-ai/DeepSeek-OCR',
_attn_implementation='flash_attention_2',
trust_remote_code=True,
use_safetensors=True
).eval().cuda().to(torch.bfloat16)
print("ロード完了\n")
print()
print_separator()
print("【ファイル選択】")
print_separator()
print("複数の画像・PDFファイルをアップロード可能です")
print("対応形式: PDF, PNG, JPG, JPEG, BMP, TIFF")
print(f"\nOCR方式: Free OCRモード(高精度、座標なし、斜め文字対応)\n")
user_files = select_files_dialog()
if user_files:
all_results = []
for file_path in user_files:
print(f"\n処理中: {file_path}")
file_results = process_file(file_path, config, model, tokenizer)
all_results.extend(file_results)
print()
print_separator()
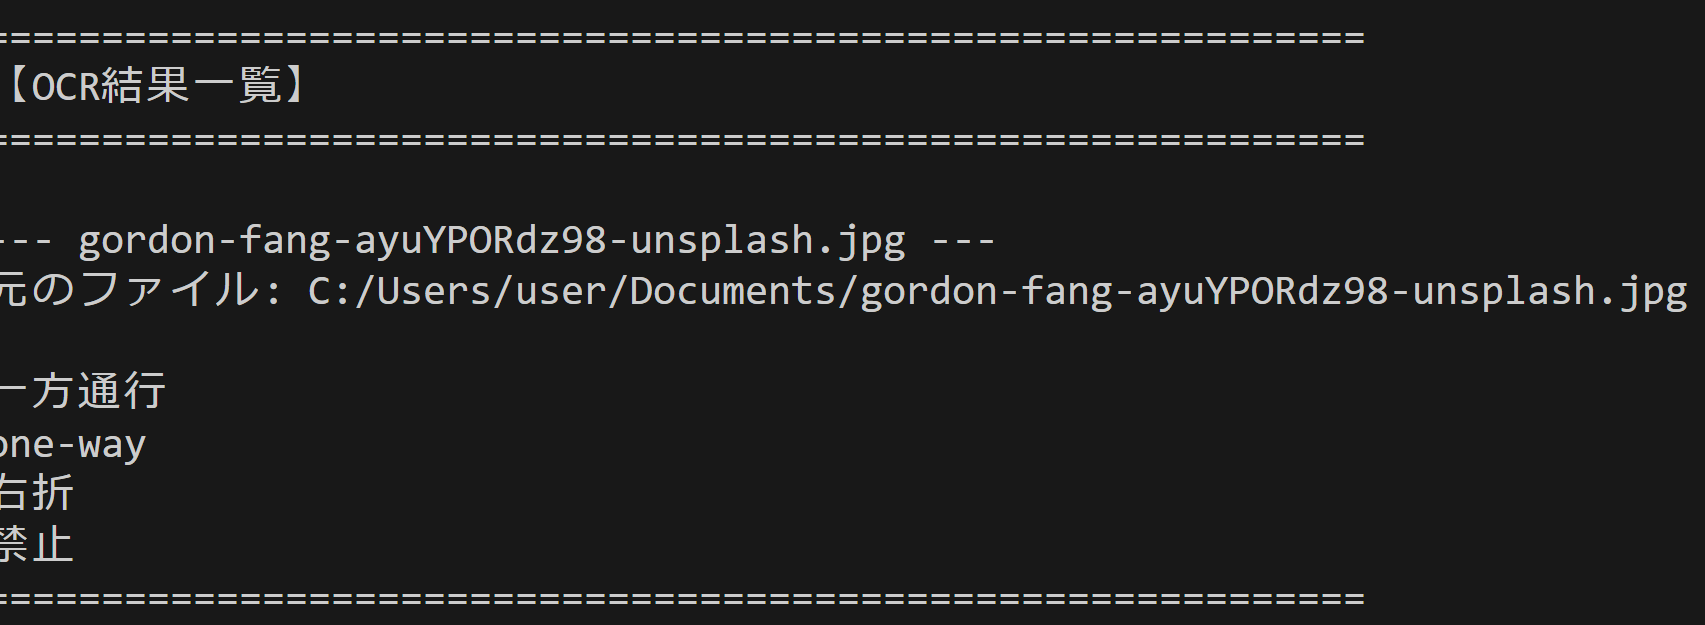
print("【OCR結果一覧】")
print_separator()
for result in all_results:
print(f"\n--- {result['filename']} ---")
print(f"元のファイル: {result['original']}")
print()
print(result['text'])
print_separator()
print("\n【検証データ】")
total_files = len(user_files)
total_pages = len(all_results)
print(f" 処理ファイル数: {total_files}")
print(f" 総ページ/画像数: {total_pages}")
print(f" モード: {config['name']} (base_size={config['base_size']}, image_size={config['image_size']}, crop_mode={config['crop_mode']})")
print(f" ビジョントークン数: {config['tokens']}")
else:
print("ファイル未選択")
print("\n処理完了")
実験・研究スキルの基礎:パソコンで学ぶOCR実験
1. 実験・研究のスキル構成要素
実験や研究を行うには、以下の5つの構成要素を理解する必要がある。
1.1 実験用データ
このプログラムではPDFファイルと画像ファイルが実験用データである。
1.2 実験計画
何を明らかにするために実験を行うのかを決める。
計画例:
- 解像度モードがOCR精度に与える影響を調べる
- 文書の種類(論文、レポート、新聞)によって適切なモードを探す
- 表やグラフを含む文書での各モードの認識精度を比較する
- 処理時間と精度のバランスを評価する
- 斜めに配置された文字や複雑なレイアウトに対する認識性能を調べる
1.3 プログラム
実験を実施するためのツールである。このプログラムはDeepSeek-OCRモデルとTkinterのファイル選択機能を使用する。
- プログラムの機能を理解して活用することが基本である
- 基本となるプログラムを出発点として、将来、様々な機能を自分で追加することができる
1.4 プログラムの機能
このプログラムは解像度モードでOCR処理を制御する。
入力パラメータ:
- 解像度モード: Tiny(512×512)、Small(640×640)、Base(1024×1024)、Large(1280×1280)、Gundam(動的タイリング)の5段階
- 入力ファイル: PDF、PNG、JPG、JPEG、BMP、TIFFの各形式
出力情報:
- 抽出されたテキスト
- 各ファイルの処理状況とページ番号
- 処理統計情報(ファイル数、ページ数、使用モード、トークン数)
処理の動作:
- ファイル選択後、自動的にOCR処理が開始される
- PDFは自動的にページ単位で分割され、各ページが順次処理される
1.5 検証(結果の確認と考察)
プログラムの実行結果を観察し、モードの影響を考察する。
基本認識:
- モードを変えると処理時間と精度が変わる。その変化を観察することが実験である
- 「良い結果」「悪い結果」は目的によって異なる
観察のポイント:
- 文字認識率はどの程度か(誤認識や欠落はあるか)
- 表やグラフの構造は正しく認識されているか
- 処理時間はどの程度か
- レイアウトの再現性はどうか
- 数式や特殊記号は正しく認識されているか
2. 間違いの原因と対処方法
2.1 プログラムのミス(人為的エラー)
プログラムがエラーで停止する
- 原因: 必要なライブラリがインストールされていない、またはGPUが利用できない
- 対処方法: エラーメッセージを確認し、pip installコマンドで不足パッケージをインストールする。GPU環境を確認する
モデルのダウンロードに時間がかかる
- 原因: 初回実行時にDeepSeek-OCRモデル(約6.67GB)をダウンロードしている
- 対処方法: これは正常な動作である。ダウンロードが完了するまで待つ
2.2 期待と異なる結果が出る場合
認識精度が低い
- 原因: 選択したモードが文書の複雑さに対して不適切、または画像の解像度が低い
- 対処方法: より上位のモード(BaseやLarge、Gundam)を試す。元画像の解像度を確認する
正しく認識されない
- 原因: TinyやSmallモードでは複雑な構造の認識が困難である
- 対処方法: BaseまたはLargeモード以上を使用する。それでも改善しない場合はGundamモードを試す
数式や特殊記号が正しく認識されない
- 原因: 複雑な数式にはより詳細な解析が必要である
- 対処方法: Gundamモードを使用する。それでも困難な場合は、Free OCRモードの限界として理解する
3. 実験レポートのサンプル
文書タイプ別の最適モード選択
実験目的:
異なるタイプの文書(レポート、論文、新聞)に対して、精度と処理時間のバランスが最も良いモードを探す。
実験計画:
3種類の文書を用意し、全5つのモードで処理を行い、認識精度と処理時間を記録する。
実験方法:
プログラムを実行し、各モードを選択しながら以下の基準で評価する。
- 文字認識率: 正しく認識された文字の割合(目視確認)
- レイアウト再現性: 段落や表の構造が保持されているか
- 処理時間: 1ページあたりの処理にかかった秒数
実験結果(レポート文書の例):
| モード | 解像度 | 文字認識率 | レイアウト再現性 | 処理時間(秒/ページ) | 総合評価 |
|---|---|---|---|---|---|
| Tiny | 512×512 | xxxx | xxxx | xxxx | xxxx |
| Small | 640×640 | xxxx | xxxx | xxxx | xxxx |
| Base | 1024×1024 | xxxx | xxxx | xxxx | xxxx |
| Large | 1280×1280 | xxxx | xxxx | xxxx | xxxx |
| Gundam | 動的 | xxxx | xxxx | xxxx | xxxx |
考察:
- (例文)Tinyモードは処理が速いが、文字認識率がxxxx%にとどまり、小さい文字や複雑なレイアウトでの誤認識が目立った
- (例文)Smallモードは処理時間と精度のバランスが良く、一般的なレポート文書には十分な性能を示した。デフォルト選択として妥当である
- (例文)BaseモードはSmallよりxxxx%の精度向上が見られたが、処理時間は約xxxx倍になった。精度を重視する場合に適している
- (例文)LargeとGundamモードはxxxx%近い認識率を達成したが、処理時間が大幅に増加した。わずかな精度向上のために処理時間を犠牲にする価値があるかは用途次第である
- (例文)解像度を上げるほど精度は向上するが、処理時間も比例的に増加するというトレードオフの関係が確認できた
結論:
(例文)本実験のレポート文書においては、Smallモードが最もバランスの取れた設定であった。処理速度を優先する場合はTiny、高い精度が必要な場合はBase、表や図を多く含む複雑な文書や学術論文にはGundamが適切である。文書の種類と目的に応じてモードを選択する必要性が確認できた。